1968 Plymouth GTX

I have been using the Lord Fusor 803 DTM which is a 1 part sealer.
What 2 part sealers are you using?
3M makes a 2 part. It is expensive and you need the special 2 part gun.
I've just been using 1 part. All of them that I looked at say it is paintable right away on the tech sheet.
I talked to Barry and he recommended waiting longer, especially if it is put on thick, like in gap areas.
I put it on and then moved on to other areas of the car, then came back 3-4 days later and painted over it with epoxy.
 
While waiting for my seam sealer, filler and sandpaper order to get here, I pulled out the console.
It has some cracks in it that I super glued together.

What I am trying to figure out now, is how to fill the voids and match the texture.
Cracks Glued.JPG


My thinking is to use JB Weld clear epoxy and a toothpick to fill the voids to level. Then just before it completely sets, try to match the texture by pressing a scrap piece of vinyl against it.

JB Weld Clear Epoxy.jpg


Any suggestions from those who have done this before?
 
While waiting for my seam sealer, filler and sandpaper order to get here, I pulled out the console.
It has some cracks in it that I super glued together.

What I am trying to figure out now, is how to fill the voids and match the texture.
View attachment 22402

My thinking is to use JB Weld clear epoxy and a toothpick to fill the voids to level. Then just before it completely sets, try to match the texture by pressing a scrap piece of vinyl against it.

View attachment 22403

Any suggestions from those who have done this before?
How important is "factory" to you? If not important and you just want it to look good, I have a few ideas, but they are not factory.
 
So what I would try is buy some 2 part silicone moulding material and make a mold of a good part of the texture. Clay dams would work to hold it in as it cures. I would then mix up some JB Weld or PC-7 (later won't flow but don't know how it will take the mold), fill the gap then press the silicon mold on the patch and maybe wrap tape around the console to hold it tight. The texture should get transferred to the epoxy.
 
While waiting for my seam sealer, filler and sandpaper order to get here, I pulled out the console.
It has some cracks in it that I super glued together.

What I am trying to figure out now, is how to fill the voids and match the texture.
View attachment 22402

My thinking is to use JB Weld clear epoxy and a toothpick to fill the voids to level. Then just before it completely sets, try to match the texture by pressing a scrap piece of vinyl against it.

View attachment 22403

Any suggestions from those who have done this before?
Is this padded or just textured?
 
How important is "factory" to you? If not important and you just want it to look good, I have a few ideas, but they are not factory.
I try to keep things very close to factory if possible.
The console top that came with the car is actually from a '69 so I purchased a decent used but correct top for it.
 
So what I would try is buy some 2 part silicone moulding material and make a mold of a good part of the texture. Clay dams would work to hold it in as it cures. I would then mix up some JB Weld or PC-7 (later won't flow but don't know how it will take the mold), fill the gap then press the silicon mold on the patch and maybe wrap tape around the console to hold it tight. The texture should get transferred to the epoxy.
We are thinking along the same lines but I have never used silicone moulding material before.
 
  • Like
Reactions: MJM
My suggestion if you use the epoxy would be........take a piece of wood and scratch it down to the same depth as the crack you're going to fix. Once you have the cracked filled on your repair piece, fill the crack in the wood. The wood is going to be your test piece to know when the epoxy is ready to use your texture material. Applying the texture too soon will cause the epoxy to pull causing cobweb hairs. Applying the texture too late, won't make the transfer. Timing IMHO is critical.
 
When I lived in the big city there was an outfit that came around and did stuff like that out of a truck. They had silicone molds, etc., it's kind of an art imo. I would farm that job out if I could. Might enquire with an upholstery shop.
 
When I lived in the big city there was an outfit that came around and did stuff like that out of a truck. They had silicone molds, etc., it's kind of an art imo. I would farm that job out if I could. Might enquire with an upholstery shop.
I live in a rural area so not much available when it comes to nearby shops.
 
I've molded some tail light lenses using the 2 part silicone molding kit from EBAY. I was amazed the cracking and checking from the 80 year old lenses showed up in the finished parts.
 
I've molded some tail light lenses using the 2 part silicone molding kit from EBAY. I was amazed the cracking and checking from the 80 year old lenses showed up in the finished parts.
that's why I asked if it was padded or just texture. From what I've seen you do, this is right in your wheelhouse.
 
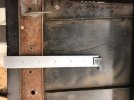
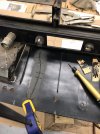
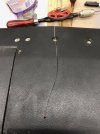
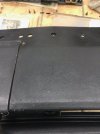
I repaired a cracked dash in the car I'm finishing up a while back. Used black ABS JB weld on it. Transfered the grain using aluminum foil which worked out pretty good. Used a piece of sponge to hold the foil against the exterior side of the dash. Finished it up with SEM's. Making a mold for would work well also. Here's some pics.

IMG_03561.jpg

IMG_03921.jpg

IMG_03831.jpg

IMG_04211.jpg
 
Back
Top