Dave C 5
Member
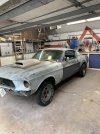
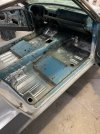
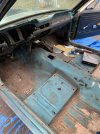
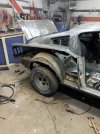
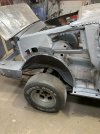
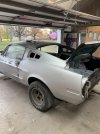
One of six according to Marti report( 1968 )- not a numbers matching engine though - been in a garage since 1989- 390 4 speed- I’ll try to keep you all posted on progress - I forget to take pictures though
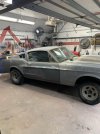
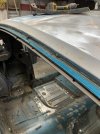
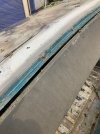
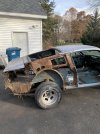
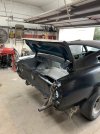
Back window tray - zero rust and factory paint
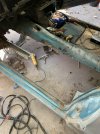
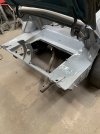
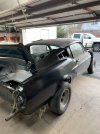
Rotisserie is SO nice! Was glad I got one for my project.The plan right now is to get the metal work done then put it on a rotisserie and have the under side and inside blasted- kinda backwards I know but cash flow right now dictates that . I will dress the underside welds then SPI epoxy on underside and inside. After that it will get Lizard Skin both inside and under the car …. Hopefully in the next few months
Here is a YouTube video if Fitzee demonstrating pretty much what Chris is talking about.If you have doubts about your welding ability obviously the full quarter is a better choice.
It is very do-able to take say a full replacement quarter and cut it down to what you need and weld it in as a partial. You would want to have the seam very close to the body line on the quarter in order to minimize warpage.
One way that works well with a MIG is to cut the replacement a little long so that it overlaps the old quarter. This assumes you have removed all of the old quarter but left it a little long in the seam area. Fit the partial to the car and the two panels will overlap in the planned seam area. Use some self tappers to hold the two together and then start in the center with a cut-off tool and a 1/32 wheel. Cut about 8-12 inches peeling the cut back, inside and out. Align the panels with a small flat screwdriver and tack with the MIG. You always want to have a gap of about the width of the cutoff wheel when doing this. If your gap shrinks, run the cutoff wheel through to get it back.
Continue working out from the center cutting and tacking taking care to align the panels with the screwdriver. Once you have it all cut and the initial tacks done, start tacking halfway between each previous tacks. Meaning if you have 2 tacks 12 inches apart you would put one in the middle of those. Skip around, take your time, don't force cool the tacks.
As you progress grind your tacks a little. Keep the seam clean. Continue tacking/spotting until you have the seam welded. You only tack/spot when doing this. Never more than that. That is the key. When you start to get close to each precious tack/spot, spot the next weld so it slightly overlaps the previous tack. This helps keep the pinholes to a minimum, although if this is your first time doing this you will get a few, Just grind you seam close hold a light to the backside and then spot/tack each pinhole until you do not see any light.
Done this way you will have very little distortion. It's darn near impossible to planish MIG welds due to the carbon in the shielding gas, so this method works very nicely. Key is to have the right gap, take your time, and skip around never doing more than spotting/tacking.
What makes this one of six? Great job by the way!One of six according to Marti report( 1968 )- not a numbers matching engine though - been in a garage since 1989- 390 4 speed- I’ll try to keep you all posted on progress - I forget to take pictures though