Lower quarter patch panel advice

robking

Promoted Users
Hey folks, thanks in advance for any advice you might have.

I have a lower quarter patch panel for my 68 dodge coronet, and have been debating the best shape to use to minimize warpage (MIG welding). Chris' "patch panel advice" sticky thread has been a great resource. My goal with this patch is try and make the cuts along body lines, avoid low crown areas, and replace as much as makes sense.

A quick introduction to the problem, the area inside the yellow circle was in bad shape, to the point that I started out assuming I would have to go with the green or red line for the cut. The area in question was caved in along the lower body line and below it, and was bumped out almost 1/2" above it due to something sliding across the trunk multiple times. However this afternoon I decided I would try and put some of my newly acquired metal bumping skills to work and just see what happened. I'm actually pretty happy with the results, its a little bumpy (+/- metal thickness) but I think with a little more work a very light skim of filler would be enough.

The options I think I have are to cut along:
  1. Orange line
    Pros: Avoid having to weld across the relatively flat section between the wheel well and the upper body line.
    Cons: Have to smooth out the area inside the yellow circle to a reasonable finish.
  2. Green line
    Pros: Don't have to deal with area in yellow (and a few other miscellaneous bumps and bruises), horizontal weld is below upper body line
    Cons: Welding across low crown area between wheel well and upper body line
  3. Red line
    Pros: Don't have to deal with area in yellow and don't have to deal with filling emblem holes and the indentations the emblems left
    Cons: Welding low crown area between wheel well and upper body line, horizontal weld is above upper body line (easier to see?)
The quarter does have a slight horizontal crown in that area between wheel well and upper body line so its not like cutting across the middle of a large flat panel. In my limited welding experience I've had reasonable luck controlling warpage by tacking hot, grinding and hammering each tack to keep the patch to body gap consistent and preserve the crown along the weld.

The patch panel itself is not much bigger than the red line, so that's about the extent of my options. It is cut square, so technically the green/red cuts from wheel well to upper body line could be vertical which involves cutting that accent body line at the wheel well at more of an angle.

Biggest question I guess is, should I be concerned about welding from the wheel well to the upper body line? Or would I be better off trying to keep as much original metal as possible.

One other thing to mention, I do have access to the back of the quarter, trunk pan and extensions are out at the moment.

Thanks again!


pass_quarter.jpg
 
Sounds like you have a basic grasp on welding sheetmetal. I'm far from an expert, but I've done enough of this to know my limitations. If the panel is in good shape, I would cut it at the orange line, you have a fairly sharp body line to help your shrinkage there. I wouldn't cut the whole panel just to keep from filling the trim holes. But be sure to radius that corner where it angles up beside the wheelwell. You don't want that to be a sharp corner, even with access to the back side. Hopefully one of the real experts will reply as well.
 
Sounds like you have a basic grasp on welding sheetmetal. I'm far from an expert, but I've done enough of this to know my limitations. If the panel is in good shape, I would cut it at the orange line, you have a fairly sharp body line to help your shrinkage there. I wouldn't cut the whole panel just to keep from filling the trim holes. But be sure to radius that corner where it angles up beside the wheelwell. You don't want that to be a sharp corner, even with access to the back side. Hopefully one of the real experts will reply as well.
I'm 99% sure you've done more than me, and in a way I guess that's my struggle. My skills with a MIG and my skills with a hammer/dolly are equally green.

I agree its not worth going up high to avoid filling the holes, to me the advantage is putting in a nice smooth piece of metal in the yellow area. It was really rough to start with, I think a tool box tray slid around in the trunk somewhere in the last 50 years (I had a single wall bed Datsun truck as a kid, ask me how I know this). When I cut the bottom of the quarter loose, a handful of sockets, lug nuts, and a sparkplug wire fell out in addition to a dust pan worth of rust. Not one of Mopar's better designs. :)

The area below the orange line has to go (eat up from the back) so I may cut that off about an inch below the line to make it easier to dolly that yellow area and play around some more. I did shrink it with the shrinking disc just a little yesterday, it took a hellauva knock from the inside multiple times.

Thanks for the advice, and thanks for the reminder on the radius, I have not done that in the past and regretted it.
 
Absent any rust issues interfering, Ideally you would place the seam just below (about an inch to allow room for dolly from the back side) that bottom crease (under the orange) as this slight crown gets your weld in a nice area for planishing from the outside, and a straight cut horizontally would eliminate any of the puckers normally seen on inside corners. The red and green cuts are going through a substantial crown in the middle of the panel, which is going to pull inward and may require additional planishing to keep things where they should be. The downside to anything that pulls inward is the the most effective planishing is from a hammer strike from the inside or to a lesser extent, pushing outward with the dolly while striking from the outside. Which means limited room available the closer you get to the wheel well.

Given the rust issues present, the area below the bottom crease is too low. The next best option IMO would be to go about an inch above the crease in the concave valley. Here any shrinkage is going to pull OUTWARD so it will be easier to planish with hammer swings from the outside. This means your hammer face will need to conform to the shape of the valley without the edges of the hammer touching. (In much the same fashion as selecting a dolly, as close to the shape of the panel as possible without the edges touching as that will cause coining) I think I’ve shown the fabrication of a body hammer using a leaf spring eye (I’ll try to find a link) and this hammer is ideal in working such areas. Jim Kueneman’s current project included welding on near full quarter panels and I convinced him to use a similar feature just below the top of the quarter, so if you look at his thread you can see the concept of welding through that area.

I think the area above the crease (slightly higher than you show) through the center of the inward radius will be easier to address planishing efforts. If you need to go up into the wheel well flare any higher, I would almost do that as a separate piece as it will give you better options for planishing while the bottom of the quarter is open. Once that is done (and planished) then finish up with the horizontal seam across for the entire bottom part.
 
Last edited:
I agree with MP&C. Keep it down close to the body line. If you’re already having good luck with hand planishing, keep at it and smooth the upper portion first until you’re happy. It sometimes feels like a slow process, but stay methodical and the work will pay off. Stripping the paint first will help with planishing.
 
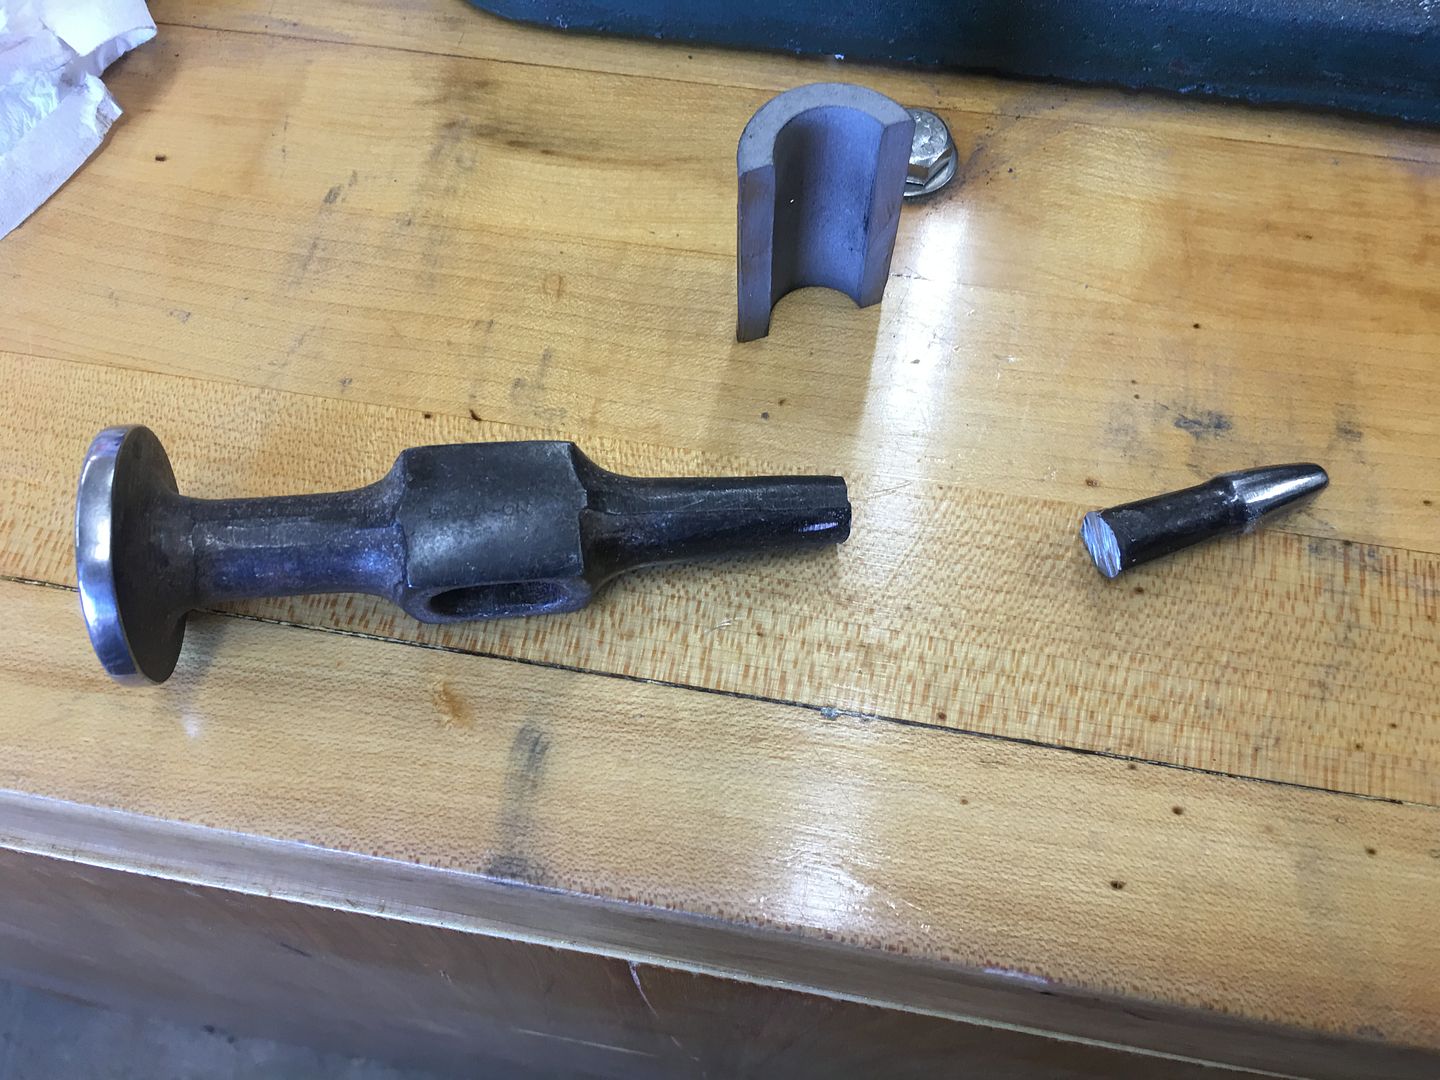
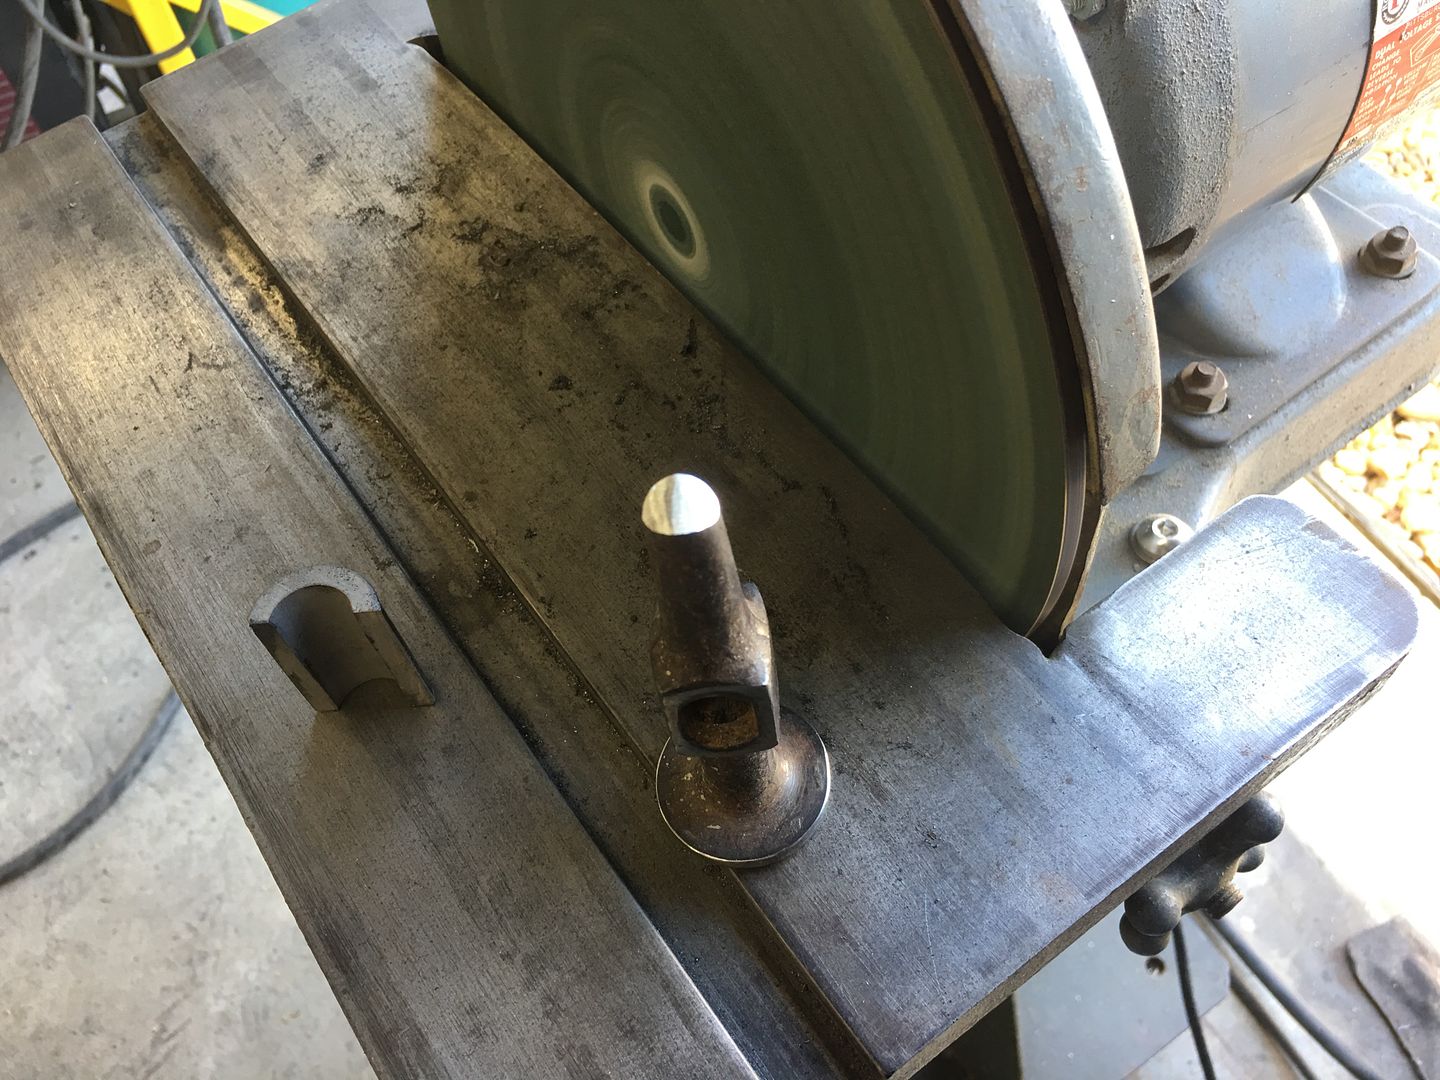
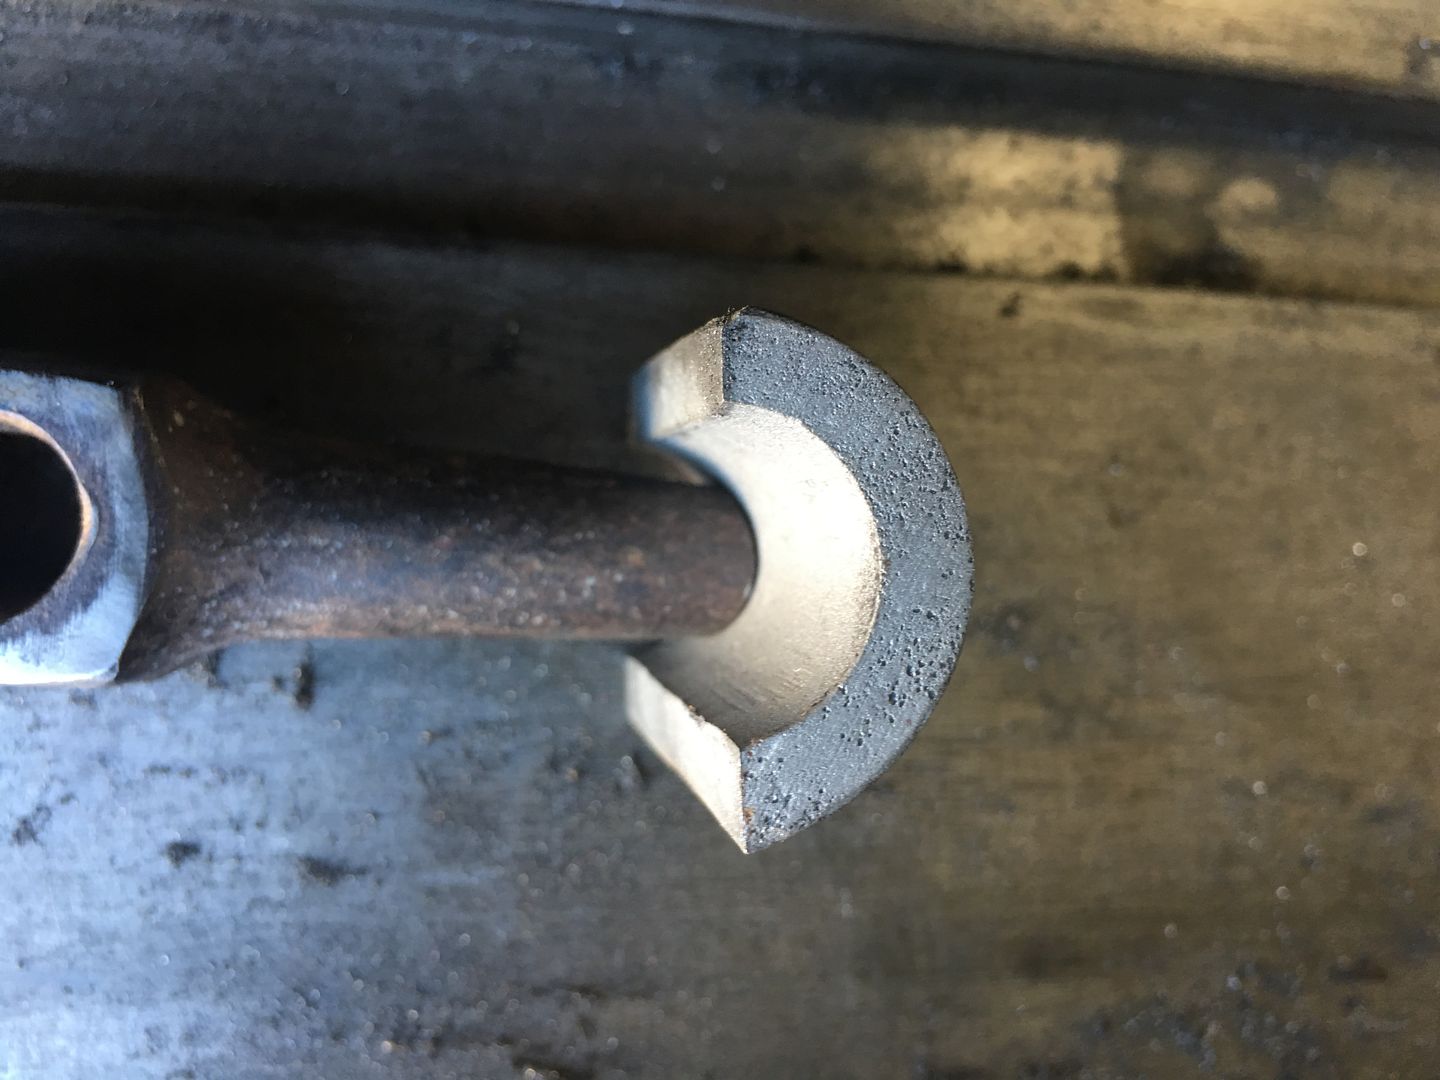
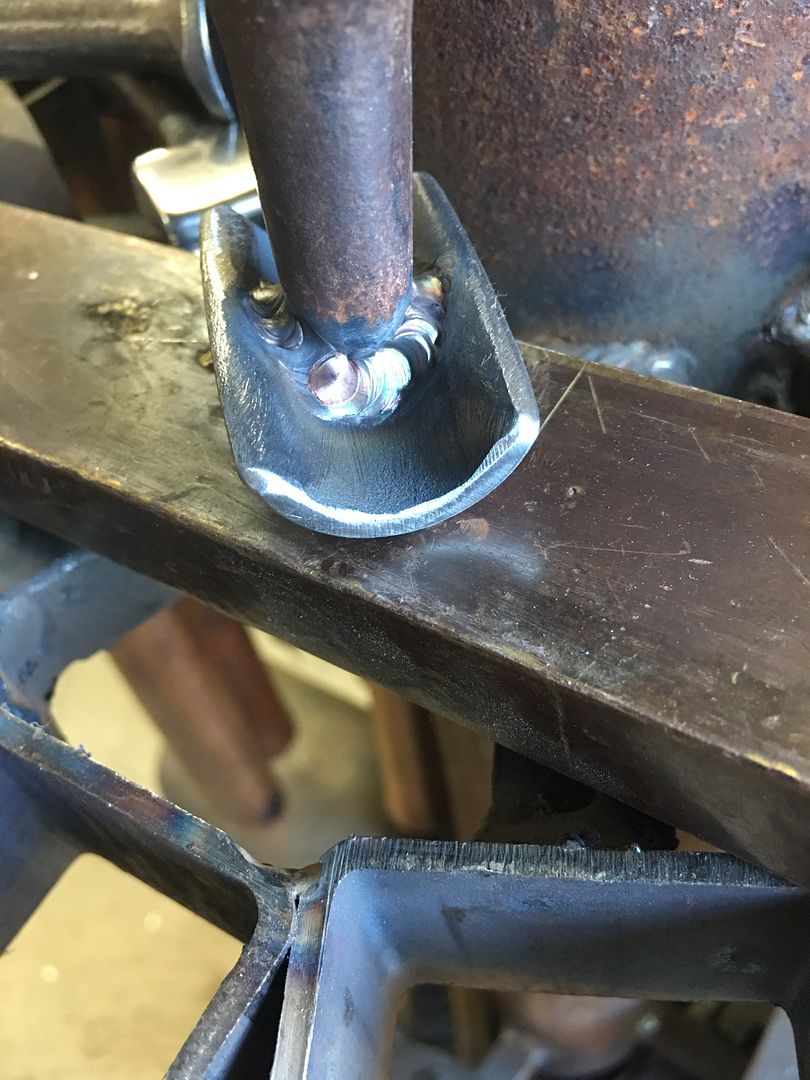
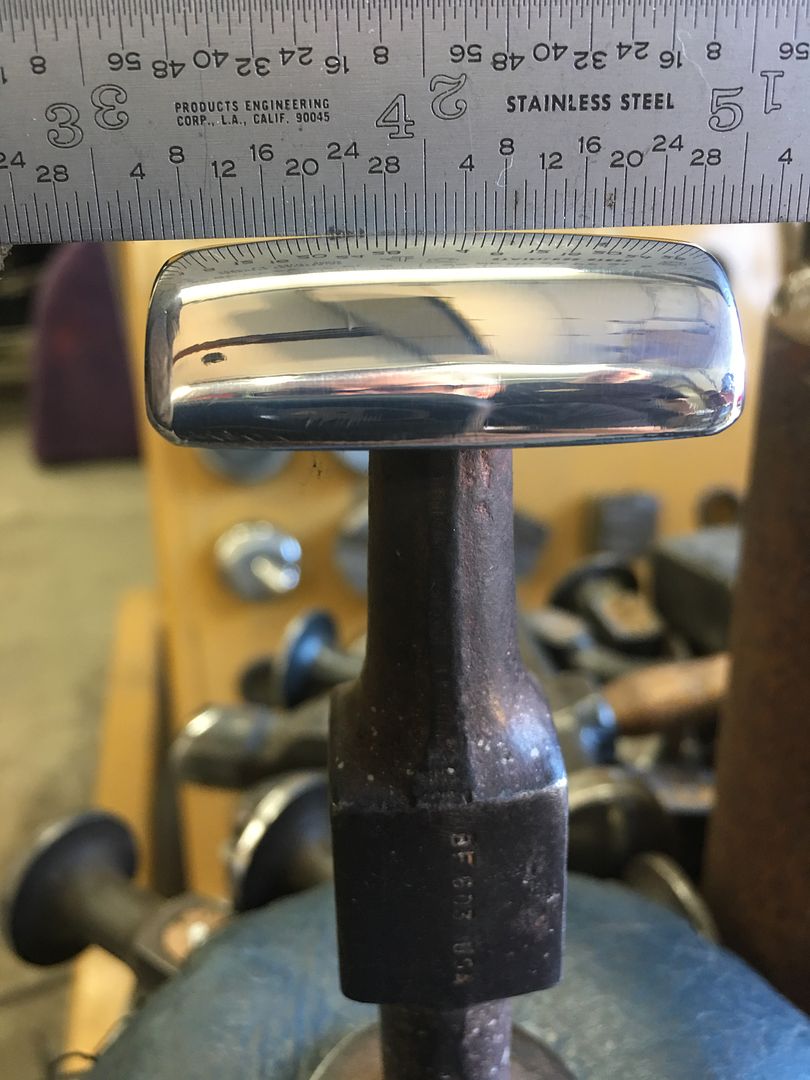
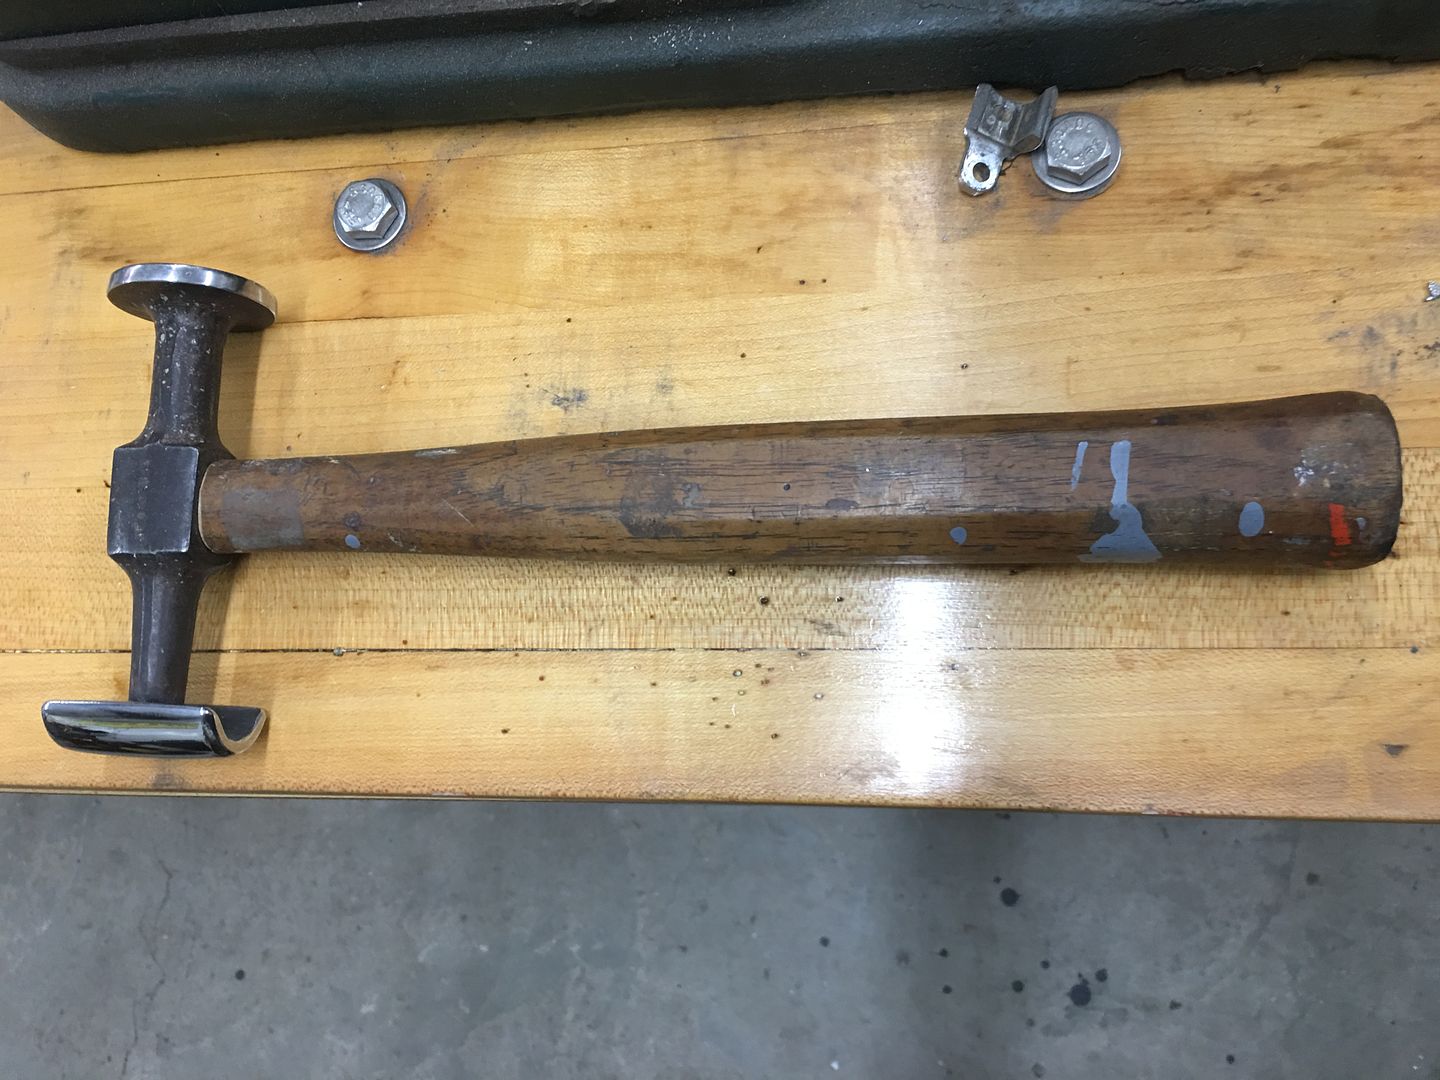
Hammer fabrication for concave valley areas:

We had some dings in the F7 hood to remove that were located in the radius along the sides.. Didn't really have a hammer that fit the exact requirement, so I use a "KIT" that my buddy Will Cronkrite had given me, a piece cut out of a Model A leaf spring.


I had more than one BF603 in stock, and rarely use the pick end, so it became the likely candidate.


IMG_7334.JPG


IMG_7335.JPG


IMG_7336.JPG


TIG welded in place using ER312 rod


IMG_7340.JPG


The ends were tapered off to add some crown long ways, and then polished up...


IMG_7345.JPG


IMG_7346.JPG
 
Absent any rust issues interfering, Ideally you would place the seam just below (about an inch to allow room for dolly from the back side) that bottom crease (under the orange) as this slight crown gets your weld in a nice area for planishing from the outside, and a straight cut horizontally would eliminate any of the puckers normally seen on inside corners. The red and green cuts are going through a substantial crown in the middle of the panel, which is going to pull inward and may require additional planishing to keep things where they should be. The downside to anything that pulls inward is the the most effective planishing is from a hammer strike from the inside or to a lesser extent, pushing outward with the dolly while striking from the outside. Which means limited room available the closer you get to the wheel well.

Given the rust issues present, the area below the bottom crease is too low. The next best option IMO would be to go about an inch above the crease in the concave valley. Here any shrinkage is going to pull OUTWARD so it will be easier to planish with hammer swings from the outside. This means your hammer face will need to conform to the shape of the valley without the edges of the hammer touching. (In much the same fashion as selecting a dolly, as close to the shape of the panel as possible without the edges touching as that will cause coining) I think I’ve shown the fabrication of a body hammer using a leaf spring eye (I’ll try to find a link) and this hammer is ideal in working such areas. Jim Kueneman’s current project included welding on near full quarter panels and I convinced him to use a similar feature just below the top of the quarter, so if you look at his thread you can see the concept of welding through that area.

I think the area above the crease (slightly higher than you show) through the center of the inward radius will be easier to address planishing efforts. If you need to go up into the wheel well flare any higher, I would almost do that as a separate piece as it will give you better options for planishing while the bottom of the quarter is open. Once that is done (and planished) then finish up with the horizontal seam across for the entire bottom part.

Thanks so much for the detailed reply! Especially the information about how the crown impacts the direction of warping, I have missed that in reading other threads. From working that area inside the yellow circle, it is absolutely easier to work from the outside. My neck still hurts from laying under there to rough the lower portion. My thinking was that I needed to get that area back to normal even if I planned to cut it out or it would be influencing the yellow area as I tried to bring it back.

I will look at fabricating something with a matching radius, while I have a hammer that I think is close I can see the advantage of having a very close match to the radius to increase the impact area.

Your suggestion about working near the wheel well is very interesting. I'm trying to wrap my head around the shape of that separate patch, I will see if I can't put a picture together of what I'm thinking and get it posted tomorrow.
 
I agree with MP&C. Keep it down close to the body line. If you’re already having good luck with hand planishing, keep at it and smooth the upper portion first until you’re happy. It sometimes feels like a slow process, but stay methodical and the work will pay off. Stripping the paint first will help with planishing.
Good point on the paint, I will clear the entire area and get a fresh marker before tackling that. It sure does feel slow, sometimes feels like I'm just chasing a high spot in a circle. Then I hit it with the shrink disk and make it worse.... :rolleyes:

Thanks to everyone for taking the time to help a noob.
 
Then I hit it with the shrink disk and make it worse....
Shrink discs are garbage IMO. Do you have a torch? Or a stud gun with a shrinking tip? As for the patch, I could share another way that's different than what Robert described but is very achievable with a minimum amount of distortion if you would like. Planishing MIG welds is not easy. If you can TIG that would be a better easier way to accomplish what Robert described.
 
Shrink discs are garbage IMO. Do you have a torch? Or a stud gun with a shrinking tip? As for the patch, I could share another way that's different than what Robert described but is very achievable with a minimum amount of distortion if you would like. Planishing MIG welds is not easy. If you can TIG that would be a better easier way to accomplish what Robert described.
Hey Chris, I have a HF stud gun but I've looked and not found a shrinking tip that will fit it. I really need to spring for a torch I guess.

I'm always eager to learn different approaches to a problem if you have the time, thanks for offering.
 
Robert as always offers excellent sound advice. I am in no way saying what I'm going to describe is better. If you feel you can do it as Robert described than do so This is just a different way. DOing it how I described I wouldn't be afraid to work at the redline. Only thing I would do is round that corner. Get your patch out. Lay it out on the quarter. Mark it out with a sharpie. Then cut away your old quarter leaving a few inches (2"is good), at/below the marked line. Then fit your patch to the quarter. Clamp where neccesary, and use some self tappers at the very top to fasten the patch to the original 1/4 at the marked line. Then using a cut-off wheel and a THIN 1/32 (no thicker than .035 actual measurement) cutoff wheel, start in the center of the patch and carefully cut through both panels several inches (4-6") peel it back inside and out. Then using a small flat blade screwdriver carefully line up the two panels in the cut area and make a tack. When I say tack I mean just that. On and off. This is critical. You need to have the proper gap (.030-.035) between the panels and you need to be able to tack it quickly. On and off. Dial in your settings by practicing on some scrap of the same gauge beforehand.

After you tack continue to cut out to the left and right as I described above. Peel back, line up and tack. Don't make your initial tacks close at all. 6 inches or so is good. Continue until you have the entire thing cut and tacked every 6 inches or so. Pay very close attention to lining up the panels and concentrate on short tacks.

Once it's completely cut and initially tacked, then start lining the panels up and putting another tack halfway between each previous tack. Skip around to keep the panel from heating. Stop occasionally and let it cool naturally. DO NOT cool the panel in any way, like with a blow gun. Continue tacking and skipping around. NEVER do anything more than tacking, On and off. As you start to get some tacks on there, use a die grinder with a weld grinding wheel (thick cutoff wheel) and work your tacks down some. Maintain that .030-035 gap between the panels. If it close up, use your thin cutoff wheel and carefully open it up. Remember never let the panel get to hot too touch. Critical that you do that. As you progress keep occasionally grinding your tacks. As you get close, position your tack so that it slightly overlaps the tack beside it. This will help with reducing the number of pinholes you have. You can eliminate any pinholes by putting a light to the backside and tacking where you see light. Save that until the end. Keep in mind that you need to work slow to avoid getting the panel hot. Keep the panels aligned with a screwdriver when making your tacks. And never weld more than a tack, on and off.

Doing it this way, even putting the seam in the middle of the panel you will have very little distortion. Ask any questions if you need me to clarify anything.

Just to be clear, all you will ever do doing it this way is tack. Nothing more than that. You tack and fill the seam that way. If you do anything more than tack you start to get more distortion.
 
Last edited:
I wrote above about rounding the corner. I should correct myself and say that unless you have a lot of experiece with a cutoff wheel trying to round the corner with one will make the gap bigger than it should be. Better to work in straight lines and tack in the manner described. In that corner tack and let it cool alot before making another tack in that corner area. Skip around, letting the panel cool, never let it get hot and the distortion will be minimal. If you get some in that corner grind then hammer and dolly on the weld to alleviate it.
 
Robert as always offers excellent sound advice. I am in no way saying what I'm going to describe is better. If you feel you can do it as Robert described than do so This is just a different way. DOing it how I described I wouldn't be afraid to work at the redline. Only thing I would do is round that corner. Get your patch out. Lay it out on the quarter. Mark it out with a sharpie. Then cut away your old quarter leaving a few inches (2"is good), at/below the marked line. Then fit your patch to the quarter. Clamp where neccesary, and use some self tappers at the very top to fasten the patch to the original 1/4 at the marked line. Then using a cut-off wheel and a THIN 1/32 (no thicker than .035 actual measurement) cutoff wheel, start in the center of the patch and carefully cut through both panels several inches (4-6") peel it back inside and out. Then using a small flat blade screwdriver carefully line up the two panels in the cut area and make a tack. When I say tack I mean just that. On and off. This is critical. You need to have the proper gap (.030-.035) between the panels and you need to be able to tack it quickly. On and off. Dial in your settings by practicing on some scrap of the same gauge beforehand.
After you tack continue to cut out to the left and right as I described above. Peel back, line up and tack. Don't make your initial tacks close at all. 6 inches or so is good. Continue until you have the entire thing cut and tacked every 6 inches or so. Pay very close attention to lining up the panels and concentrate on short tacks.
Once it's completely cut and initially tacked, then start lining the panels up and putting another tack halfway between each previous tack. Skip around to keep the panel from heating. Stop occasionally and let it cool naturally. DO NOT cool the panel in any way, like with a blow gun. Continue tacking and skipping around. NEVER do anything more than tacking, On and off. As you start to get some tacks on there, use a die grinder with a weld grinding wheel (thick cutoff wheel) and work your tacks down some. Maintain that .030-035 gap between the panels. If it close up, use your thin cutoff wheel and carefully open it up. Remember never let the panel get to hot too touch. Critical that you do that. As you progress keep occasionally grinding your tacks. As you get close, position your tack so that it slightly overlaps the tack beside it. This will help with reducing the number of pinholes you have. You can eliminate any pinholes by putting a light to the backside and tacking where you see light. Save that until the end. Keep in mind that you need to work slow to avoid getting the panel hot. Keep the panels aligned with a screwdriver when making your tacks. And never weld more than a tack, on and off.
Doing it this way, even putting the seam in the middle of the panel you will have very little distortion. Ask any questions if you need me to clarify anything.
Thanks for the detailed write up Chris!

So I've read about using this method or similar multiple times, and have always been intrigued. I've personally been afraid of getting unequal amounts of metal in the patch vs in the body between the tacks. I have a long section across the trunk pan that I was already planning to try this method on. I purposely left a couple inches overlap so I could use this method after I tacked the pan in. I figured there was no way to get tight gap if tried to mark/cut before tacking it down to the frame rails. I'm not in a hurry to tackle the quarters. :(

To be honest, a lot of the patch welding I've done to date has used the "wing nuted" clamps that force about a 1/32" gap between the panels (when you're lucky). So I'm comfortable tacking that gap and keeping the HAZ small. I've just recently started trying to get the gap tight as possible using magnets to hold the panels level and work the tacks as I go. Those clamps don't hold the panels very well as the tacks shrink.

I fully agree on grinding down the tacks, I just recently bought some of the 3/16" discs from 3m specifically for grinding down welds, they get the job done quick. I found my subsequent tacks piled up too much when trying to get started off an existing (unground) tack no matter how flat it was.

You mention cutting again if it tries to close up, would you recommend giving the adjacent tacks a few taps to try and relieve the stress first (assuming you have access to both sides of the tack)?

For what its worth, I recently bought Black Hawk 1/32" cut off discs from Amazon, and they are a great alternative to the 3M green discs at half the cost.
 
You mention cutting again if it tries to close up, would you recommend giving the adjacent tacks a few taps to try and relieve the stress first (assuming you have access to both sides of the tack)?
You should just use your judgement. I find it easiest to cut, assuming everything else is correct in terms of fit in that area. Sometimes the metal just wants to expand and going back in with the cutoff wheel is the simplest way to alleviate it.
 
I wrote above about rounding the corner. I should correct myself and say that unless you have a lot of experiece with a cutoff wheel trying to round the corner with one will make the gap bigger than it should be. Better to work in straight lines and tack in the manner described. In that corner tack and let it cool alot before making another tack in that corner area. Skip around, letting the panel cool, never let it get hot and the distortion will be minimal. If you get some in that corner grind then hammer and dolly on the weld to alleviate it.
Interesting you should mention that, I just bought a set of power shears today. Made several test cuts and was disappointed with the achievable radius.

Trying to radius two layers at the same time with a cut off wheel, you are right, that's out of my league. ;) I've made a few 45/90s, and like you said, you have to go super slow, grind as you go and it's not terrible.
 
I love my torch for shrinking, especially large, low crown panels. Learned how to use it repairing substantial blasting damage :rolleyes:

Yeah I would love to have one. I've read up on the Lincoln "mini bottle" sets, etc and it sounded like getting the tanks filed is the big open question. I just need to go by the local AirGas and talk to those folks I think.
 
A small thin flat blade screwdriver is the best way I've found to align the panels in the tack area. Magnets can work but oftentimes don't level it exactly. With a screwdriver you can align it with one hand, then run your other hand over the seam to verify. With a little practice you can leave the screwdriver where it's at with your one hand, and tack with the gun in the other hand while using the screwdriver hand to guide the nozzle. Hard to describe it clearly.:oops:

Getting some bottles is a real PITA now if you don't already have an account with companies like AirGas and Arcet. I had Oxy-Acetylene bottles that were in someone else's name and been using them for a long time, recently opened an account with AirGas and they wanted me to provide so much info it was crazy. Would be very easy for an employee to steal your identity. I ended up contacting AirGas corporate to guide me in establishing a Cash only account. Had to contact corporate because my local Airgas guys told me that you can't set up a cash account, only credit:oops:. Hopefully your branch is more helpful than mine.
 
How did you determine that starting point?

Web capture_29-12-2021_41852_www.spiuserforum.com.jpeg


Of course you need to be beyond the rust, but you also need to cut the outer panel high enough to allow good access to repair and clean up the inner panel. I'm not familiar with those cars, but what was the blockage that caused the rust out?
 
How did you determine that starting point?

View attachment 18775

Of course you need to be beyond the rust, but you also need to cut the outer panel high enough to allow good access to repair and clean up the inner panel. I'm not familiar with those cars, but what was the blockage that caused the rust out?

Ahh the "b-body curse" (just made that up).

Here's the hole from the inside, where you can see the design. The design has these "trunk extensions" that run from the edge of the main pan, over within about a inch of the quarter panel and then down to the bottom of the quarter where they spot weld together. The quarter panel, extension and outer wheel well all come together there, and make a great place for crap to collect.

trunk_ext.jpg


After I cut out the quarter and extension apart, this is what came out (plus the sockets, lug nuts, etc I mentioned above).

PXL_20211227_215632587.jpg


I plan to deal with the quarters before putting the trunk extensions back (with the exception of holding them in place with pliers to check fit).

Here's without the trunk extension in place, looking along the quarter panel towards the wheel well. You can see the area where I already cut a bit of the bad rust out.

wheel_well_hole.jpg
 
Back
Top