Products needed to cut, shorten, & splice a bumper cover

Just in case you wanted a laugh, here's a pick of a custom nose I made for my el camino in the 90's, now sitting on someone elses project.
DSC00036.JPG
 
Nope, that is an 83 el camino nose with some custom fiberglass work. Hand bent aluminum housing around bucks & made phantom grilles from 1/8" x 3/4" aluminum. Used epoxy resin & mat since it was an old part. Shaped & embedded a section of aluminum in the nose peak for durability. Frenched in factory park lights. Custom 2 tone painted air dam was damaged & someone dared me to make one out of diamond plate, so I did.

Still looks the same today, that pic was from approx 2004. Had I had SPI epoxy in the 90's, those chips might not be as bad. Later replaced with a 2010 camaro nose in late 2009' ( seen with hood up in profile pic) and then a 2016 camaro nose in 2016. A friend has the bird nose & tucked bumper, so it lives on........

Just in case you wondered if I actually did any fiberglass work or liked TA's. :rolleyes:
 
Has anyone ever fiddled around with getting the stock side spoiler pieces to fit TIGHT to the quarters? Too often I see them pulled away from the quarters in various locations. The fit between my spoiler pieces and quarters is no exception. See the attached pics.
IMG_20210912_073454~2.jpg

IMG_20210912_071808~2.jpg

IMG_20210912_071818~2.jpg


The PS spoiler piece fits better, but it still needs work. I still think I have to cut this one, but the amount of material added in the pie cut will be pretty minimal.
IMG_20210912_071859.jpg


I have spent a lot of time positioning the holes in the top of the quarter. I have wiggled these things around in every which way. This is not an installation error. I think these cars always for poorly here. It's always just a matter of how poorly. As you can see, my DS is PRETTY poorly. Lol. I want a tight fit with the quarters on the front and back edges of the spoiler all the along the pieces' edges. I want them to fade into the quarters.

So does anyone have experience with this work? These are fiberglass aren't they? I can't tell if they're glass or plastic, and part descriptions on OER's site for reproductions didn't specify. I'm guessing they're glass, and I just need to cut and fit them better. If anyone can confirm this, discuss a time when they did this, or give ideas it'd be much appreciated. Thanks.
 
The old factory bolts on spoilers I've worked with on camaros were white smc fiberglass . Just grind a spot on the backside & see. If it turns out to be yellow urethane, we will need plan b.
Me personally I would try to avoid cutting through the main outer fin area, as it will be more likely to reshow. On the drivers side I might grind just a hint off the tight fitting mounting surface first if it will help and not hurt with the fit to the center. I would cut upwards between the thinner part of the curve getting into the fin and bolt it back down to pull the flange tight to body. May need tiny slits in flange to help pull down. Would be much easier to hide repair in the curves than on the more fragile face of fin.

Another option here is to use panel bond adhesive & bolt and bond parts to metal. Wipe a thin bead of panel adhesive between part & body like you would caulk. Since bonding will be in a curve , shadowing won't be an issue. Will give a much more seamless look . Won't have water dripping out when trying to dry car either.
I think these attached pictures show an idea that are slightly different from what you've described. However, your idea got me thinking about the plan I've outlined in the pics below. The idea is to reconstruct the flat, inner face. This eliminates or mitigates the concern of showing over time with shrinking and other time-related issues, and it requires less skilled body work since it's a flat face. Let me know what you guys think of this plan.
00100lPORTRAIT_00100_BURST20210912085742689_COVER~2.jpg


00100lPORTRAIT_00100_BURST20210912085736343_COVER~2.jpg
 
No one method here. What you're thinking of doing on a larger scale was my suggested starting point. Need to eye ball & measure both end caps to not noticeably be different. Final lower corner of both could be filled to body & top side of flange adjusted. Some here, some there is many times the best plan. You get the idea, stay away from major surgery if possible.
Personally, I would panel bond it to car. I've seen many add on gm parts bonded in place, just looks more finished than bolt on only. To adjust & fatten upon top of flanges just a little, you could use fillers instead of the matt/resin mess. Being this is old fiberglass as opposed to your new stinger parts, I'd probably use some newer high tech stuff.
 
Poor camera pic of a 110 pic here, but this is a 77' chevy monza coupe I fit a 77 camaro spoiler on in high school & later fit the early round camaro lights on. Guess I just love confusing people.
20210912_104733.jpg
 
No one method here. What you're thinking of doing on a larger scale was my suggested starting point. Need to eye ball & measure both end caps to not noticeably be different. Final lower corner of both could be filled to body & top side of flange adjusted. Some here, some there is many times the best plan. You get the idea, stay away from major surgery if possible.
Personally, I would panel bond it to car. I've seen many add on gm parts bonded in place, just looks more finished than bolt on only. To adjust & fatten upon top of flanges just a little, you could use fillers instead of the matt/resin mess. Being this is old fiberglass as opposed to your new stinger parts, I'd probably use some newer high tech stuff.
I will consider this. Learning the panel bonding would just be one more thing I'd be doing for the first time and adding to my arsenal of knowledge. Why not at this point?

You mentioned water getting under these and dripping out when drying the car, but another, more annoying aspect of this is actually the wax that gets under these pieces when waxing. If ever this mistake is made it seems the white wax line is perpetually under these pieces and visible.
 
Yep. you get the point. Bolt on stuff is never pretty up close. for many reasons.
3m 8115 is the most common adhesive used. It has automix tips, which make applying easy. Need a 2 part gun for it. Have also used the cheaper Smart adhesive from Finishmaster stores, couldn't tell a quality difference.

Per Barry's suggestion, have used vette panel adhesive for a filler over steel and fiberglass where I had to have a little more thickness with durability. I'd say it's at about jb weld hardness, but way more workable.
 
Farming season is coming to a close, so I'm getting a little more time opened up. I have the covered screwed to the bumper. I mounted it to the car. These pictures show what I'm working at. Issues that need addressed:
1.) The DS license plate cutout is further outboard than the DS inner taillight edge (the edge/face where the license plate light is embedded in the taillight {TL}) by ~15mm. Can I build this up with fiberglass layers? What's the limitations on thickness and will a thicker area on a part be subject to tracking or showing differences in paint?

2.) The DS and PS "flanges" or sides of the bumper cover are out too far past the quarters' outer faces and hang down lower. I've drawn some notes on pictures for.ideas I've had on the trouble areas.
3.) Gap between bottom of TL and top of bumper cover is 15mm, but the TL is gapped nicely with the quarter and deck lid on its top edge. The bumper cover can't come up because the same edge is against the quarter panel.
IMG_20211024_172855~3.jpg
IMG_20211024_172844~3.jpg
IMG_20211024_173043~2.jpg
IMG_20211024_172639~2.jpg
IMG_20211024_173145~2.jpg
IMG_20211024_172838~2.jpg
IMG_20211024_172912~2.jpg
IMG_20211024_172729~2.jpg
IMG_20211024_172742~2.jpg

Any help is appreciated. I'm trying to "measure twice and cut once" by asking the questions now!!


IMG_20211024_173052~4.jpg
 
Ore pics that didn't fit in the last post. Does the cover need cut on the sides in the low body line to bring the bottom edge up to meet the quarter panel lower edge?

IMG_20211024_172539~2.jpg
IMG_20211024_172855~2.jpg
 
If those parts are indeed glass you really need a can of Adtech P17. It's really good to rebuild edges with etc...
This last pic, I'd be inclined to cut the backing rib on that edge, pull the contour where you need it and re-glass the rib on the backside. ??
 
WOW, looking at the pic before that, that's as bad a fit as I've ever seen!
I can push it up with my knee. Then the only bad for is the difference in the radius where the upper radius of the bumper cover meets the quarter panel (see 2nd last picture). The bottom comes up to meet the quarter bottom edge too. I don't like adding the stress though. I wouldn't want to bolt it in place like that. I'll cut it and make it match perfectly in a tested position.

I like your idea of the backing rib. I'm not sure if this piece has a backing rib, but I understand your concept and will look at this.

Is this the adtech product you're suggesting?
 
Yep that’s p17. You can recreate that radius with it. The rib im talking abt is the mount flange there, that the screws go through to attach cover to the lower quarter. Thats locking in shape, modify that if possible and maybe preserve the outer contour somewhat if you can visualize what im saying. Im not the best at describing things sometimes. :)
 
Yep that’s p17. You can recreate that radius with it. The rib im talking abt is the mount flange there, that the screws go through to attach cover to the lower quarter. Thats locking in shape, modify that if possible and maybe preserve the outer contour somewhat if you can visualize what im saying. Im not the best at describing things sometimes. :)
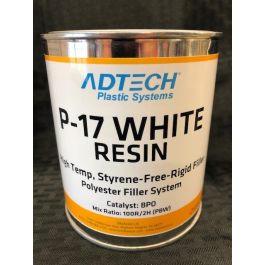
Yes I know what "rib" you're talking about. I'd call that the "mounting flange." Regardless of what it's called I certainly know what you mean and understand how that can be locking in the shape on the outer "wings" of the cover.

The p17 is great for edge profiles unlike “bondo”. The Adtec is very strong.
Is there any thickness limitation of it that needed to be followed to prevent cracking, swelling, different paint color and ghosting down the road, etc?
 
Back
Top