Dean Jenkins
Promoted Users
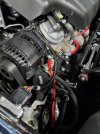
Drove the car about 10 miles to the muffler shop to have exhaust installed.
Nothing leaked, smoked, or burned up, and I didn't get pulled over for having an insanely loud car, so that is all good And it was fun. Lot's of looks . . .
I thought about getting a kit and doing it myself, but heard too many stories that the only thing with worse fit than repop sheet metal is an exhaust kit
Plus, the kits I looked at were about $1000 and the shop is doing it for about $1300. All custom bent and fitted perfectly.
They recommended either 2 1/2" mandrel bent, or 3" compression bent. Actually cheaper to go with the 3" compression bend so I did.
Mufflers are "Flowmaster" type, but by a different manufacturer that Victor recommended (he is highly respected in the area and is the GO TO exhaust guy."
Feels a little weird to have someone else working on my car since I've put every nut, bolt, screw, washer and part on it. But, they know what they are doing and are very careful.
Can't wait to see and hear the result!

Nothing leaked, smoked, or burned up, and I didn't get pulled over for having an insanely loud car, so that is all good
And it was fun. Lot's of looks . . .I thought about getting a kit and doing it myself, but heard too many stories that the only thing with worse fit than repop sheet metal is an exhaust kit
Plus, the kits I looked at were about $1000 and the shop is doing it for about $1300. All custom bent and fitted perfectly.
They recommended either 2 1/2" mandrel bent, or 3" compression bent. Actually cheaper to go with the 3" compression bend so I did.
Mufflers are "Flowmaster" type, but by a different manufacturer that Victor recommended (he is highly respected in the area and is the GO TO exhaust guy."
Feels a little weird to have someone else working on my car since I've put every nut, bolt, screw, washer and part on it. But, they know what they are doing and are very careful.
Can't wait to see and hear the result!