Cold weather application - did it adhere correctly?

A

airmenair

Hi all,

This is my first post. I am new to painting and I have a question about cold weather application of SPI epoxy primer.

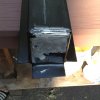
Over the winter I was prepping floor pans for installation in my car. Being my first time really spraying paint of any kind on this car I figured floor pans would be a good place to try first. I live in the Northeast and I have an unheated garage. I was paranoid about cold weather application so I followed the instructions closely. Since I was spraying individual panels I built a foam board “oven” with a heat lamp attached. I would warm the parts up, spray them and then put the cover back on and “bake” them. I’d verify with a infrared thermometer that the surface temp was above 65 before spraying. I think the hottest the surface got was ~150. Once they were dry enough to handle I would bring them inside the house and put them in the warmest spot I could find. House temperature hovers right around 65F.

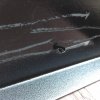
Aside from all the cold weather prep I think I was pretty diligent with the bare metal surface prep.

So with all that said, how can I tell if I got a good cure on the primer and it’s adhering to the metal well?

Thanks all. Glad to be a part of the forum.
Emile
 
A simple test, take a razor scraper and with one swoop try and shave the epoxy off the metal. You should not do anything but scrape the epoxy if done right.
 
Well, not the best news. I checked a couple of panels and I can scrape the epoxy off with a razor blade pretty easily. It comes off in pretty big curls. Probably wasted a lot of paint. Live and learn I suppose. Anyone know what the best method to strip this epoxy off is?
 

Attachments

  • 6D0C9092-471A-4FE3-98AD-D31DD83B27F4.jpeg
    6D0C9092-471A-4FE3-98AD-D31DD83B27F4.jpeg
    232.5 KB · Views: 287
Barry or the community,

So I had another go at this. I stripped down one panel and did all my surface prep and shot it in epoxy black over the summer with warmer temperatures. End result was the same, I can peel that primer off down to the metal in one pass with a razor blade. What am I doing wrong here? Is my primer or activator bad? The primer and activator I used was a couple of months old and had previously been opened but they were sealed and stored in a warm area (~75F). Is this an adhesion issue (bad surface prep) or a curing issue (bad primer or activator/too cold/dormant primer) or something else?

Thanks. Learning one do-over at a time.

Emile
 
I dont want to come off as being nasty because there are only 3 groups of things that can cause this.
3 month old epoxy is not bad.
1) an acid film (the number one cause)
2) poor metal prep like stripping with a flapper wheel and not going over it with 80 grit. Along with cold temps.
3) mis mix or dead activator.

What was put on the metal?
99% of this problem calls is always a do it yourself that bought one of the scam treatments that said will work under all paints.
 
Thanks for the quick reply, Barry. I didn't take your response as coming off nasty, I'm happy to be able to ask these questions and get responses. I'm still tinkering with the process and am trying to do it right before I commit to the car.

The only glaring thing I can think of that might have screwed this test up was I took a shortcut when I was stripping the panel and used Aircraft Remover stripped to get some of the hard to access areas. I washed it with soap and water after, dried it, and then used an 80 grit pad on an orbital buffer to give it a scratch/clear up and surface rust that formed. In the hard to reach areas, I hand sanded with either red scotch brite or 150 grit sand paper. I then used the water borne cleaner, applied it with a lint free rag and wiped it away with a clean dry rag. Repeated this a couple of times and then used the solvent cleaner in the same way. Let it sit for 45 minutes or so and then applied my first coat.

Pictures attached are about 14 days after I applied paint. In some areas I could get a razor blade under the paint and peel whole sections. In other areas I could make large curly q's with a screwdriver with moderate pressure applied.

I think until I do it right, I'm going to try this on something with a simpler contour that is easier to prep.
 

Attachments

  • IMG_0737.JPG
    IMG_0737.JPG
    175.5 KB · Views: 229
  • IMG_0738.JPG
    IMG_0738.JPG
    160.4 KB · Views: 242
  • IMG_0739.JPG
    IMG_0739.JPG
    198.7 KB · Views: 233
No offense meant, but that epoxy looks like bedliner. Epoxy, when shot properly, should lay down relatively smooth and have a semi gloss to glossy appearance. Don't know if that would have an effect on adhesion, though.
 
Thanks for the feedback. I didn’t take offense, I’m learning (the hard way, but learning none the less). In this application, I don’t really care about the surface finish, as long as it doesn’t effect the quality of the adhesion. This is a floor support so a bedliner finish is kind of appropriate. I figured that if this was the first time I was spraying epoxy I might as well do it on metal that isn’t really ever seen. Some of the other panels I shot actually came out with a pretty nice finish like you describe. My equipment is not the most sophisticated either. I’m using an electric sprayer from Wagner (MotoCoat). Again, I figured this is probably OK for primer and especially floor pans and underbody as long as it doesn’t compromise the quality of the adhesion.
 
From your description your procedure sounds OK. Like Texas the thing that sticks out is the texture. Should not look like that. What gun are you using? What is the size of your compressor? Edit I see you are using an electric sprayer. Out of my knowledge there. That may have some affect on adhesion, Barry would know. Did you spray more than one coat? One possibility is that you are not allowing enough flash time and are trapping solvents. Which keeps the epoxy from getting full adhesion. Again Barry would be the one to comment on that.
So when you re-do this is what you should do.
Strip all the old product off.
Sand bare metal with 80 grit on a DA/Orbital sander. Want to see uniform DA scratches all over the piece. If you don't have a DA then hand sand with 80 grit. Back and forth get a good scratch on the metal.
Blow off wipe down with SPI 700 and clean lint free prep cloths. Spray on, wipe off.
Wait at least 30 minutes to ensure that the 700 has completely evaporated.
Stir your epoxy with a paint stick for at least 5-10 minutes. Scrape the bottom of the can while stirring to get the solids off the bottom and mixed. Check the stick occasionally as you are mixing. If you still see clumping at the bottom of the stick it is not mixed enough. Once you see a nice even film on the stick, that will tell you it is mixed.
Mix your epoxy 1:1. 1 part epoxy to 1 part epoxy activator. Example: 10 ounces of epoxy. 10 ounces of activator. Use a mixing cup. You can get them at your local Paint jobber. Don't guess at it, make sure you are mixing it accurately.
Let it sit 30 minutes, you can cover the top with something if you want.
Metal and Air temps above 65, spray your first coat slightly dry (using something other than a spray gun throws this advice off)
Second coat can be wetter.
At least 30 minutes between coats. With the electric sprayer I would wait one hour minimum.

Edit again: More I think about it the more I think the electric sprayer is playing a part in this. How exactly I'm not sure but I would be willing to bet it is putting it on very thick.
 
Wow guys thank you for the very detailed and helpful responses! To answer some of your questions:

- I sprayed 3 coats, waiting 30 minutes between each. I would describe them as wet coats.
- I have been using mixing cups and I have made sure all the solids on the bottom of the can are mixed but I can probably be even more thorough about this
- I bought some painter lint free rags online that cost me like $60 after getting fed up with the Home Depot’s version of “lint free” painters rags. The ones I bought are way better, I don’t see anything left behind.
Auto Paint Prep Wipes, 500/Box, 10" X 14", Blue https://www.amazon.com/dp/B01FMEGF98/ref=cm_sw_r_cp_api_i_ONkmFbKZ0WPPM

- I have been using spray bottles for the 700 waterborne cleaner.

I never really thought about needing to wait longer between coats for it to flash. I also never attempted to lay down a light coat first. Definitely going to try that next!
Another question, I have been using both the 700-1 waterborne cleaner followed by the 710 solvent cleaner. Should I not be doing that? The instructions seem to suggest both but seems like every one here just mentions the waterborne cleaner.
 
Reading your response my gut feeling is that with what you are using (electric sprayer) and the amount of coats, it is spraying each coat very heavy. Possibly 2X the amount of millage per coat. That in itself could be trapping solvents (within the coat) couple that with two more coats and only 30 minutes between and it's possible that you are trapping solvents which never let the epoxy fully adhere to the metal. This is all a guess as the electric sprayer is a wildcard. I've never really run into an issue with trapping solvents in epoxy so like I said a guess. Ideally if you are using that you would want to wait at least an hour between coats maybe more. Unlike urethane's epoxy is re-coatable for a long period so waiting longer won't be an issue.
Barry hopefully will comment and be able to say whether this is an issue or not. But my gut feeling is that electric sprayer is hosing it on and that is the problem.
 
I think the 10 dollar purple harbor freight gun will get you where you want to be on these floor pan parts. When i had my little paint room built, the spray foam was yellow and i wanted it white. I went to home depot and bought 5 gallons of white and an electric sprayer. It ran the mess out of that paint. I dont know why couldnt get it to spray right. I end up thinning the paint a little and sprayed it with my 2.0 tip primer gun.
 
I think you are doing everything fine as far as prep, so im saying the electric sprayer does not have enough scfm to kick out the solvents or break up the paint, so you are getting bad orange peel and trapping lots of solvents and they are breaking adhesion.
 
I dont want to come off as being nasty because there are only 3 groups of things that can cause this.
3 month old epoxy is not bad.
1) an acid film (the number one cause)
2) poor metal prep like stripping with a flapper wheel and not going over it with 80 grit. Along with cold temps.
3) mis mix or dead activator.

What was put on the metal?
99% of this problem calls is always a do it yourself that bought one of the scam treatments that said will work under all paints.
Barry,
I have a question on #2. What are you calling a 'flapper wheel'? I am currently stripping the old paint, rust, other crud off my project with a 4 1/2" flap disk on a angle grinder. I am using a 80 grit flap disk. Do I have to then go back with 80 grit on a DA sander?

thanks
Rusty
 
Yes, you need to sand flap wheel scratches with DA 80. Flap wheels dull rapidly and can leave a smeared residue on the surface. Page 11 of the tech manual clearly states the prep method for epoxy. The only other suitable surface prep is freshly media blasted with media that is harder than the base material.
 
Back
Top