Sata 2000 Digital HVLP Recovery

Bob Heine

Oldtimer
Thanks to the information on this site I felt reasonably confident that I could clean up a spray gun disaster.

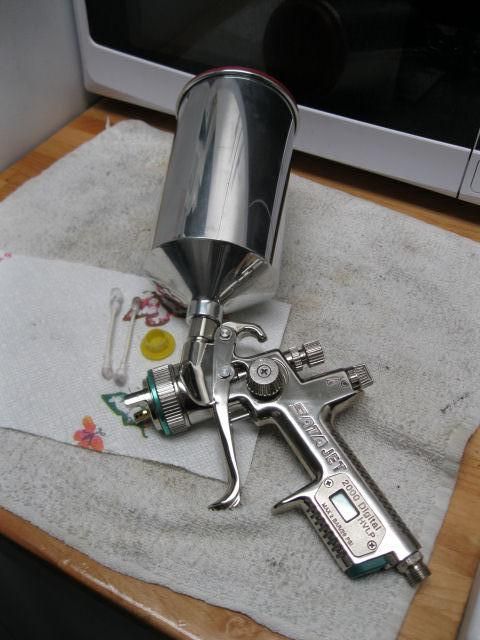
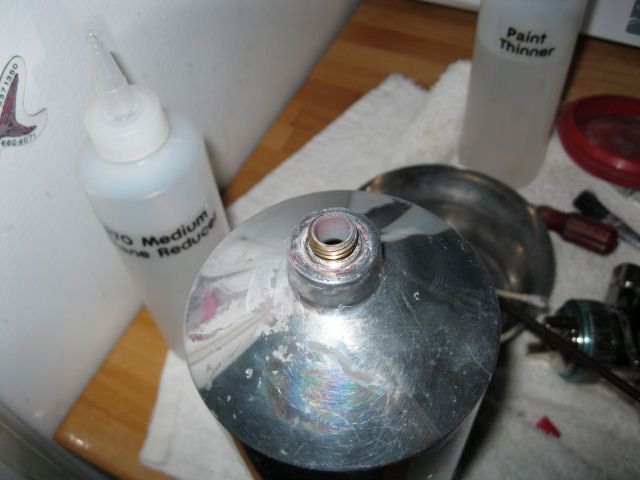
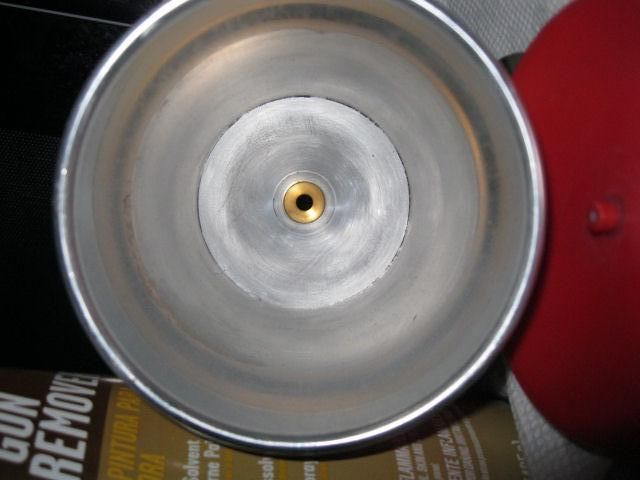
I bought a Satajet 2000 HVLP gun on this site that the previous owner said he used on a couple of paint jobs. I paid $200 including shipping and thought it was a good deal. From the outside it looks like a pretty nice gun; from the inside not so much. The cup should have been a hint. Not sure what that is but it looks like primer and red or pink basecoat.
1-CupOutsideBefore_zps8fc79302.jpg


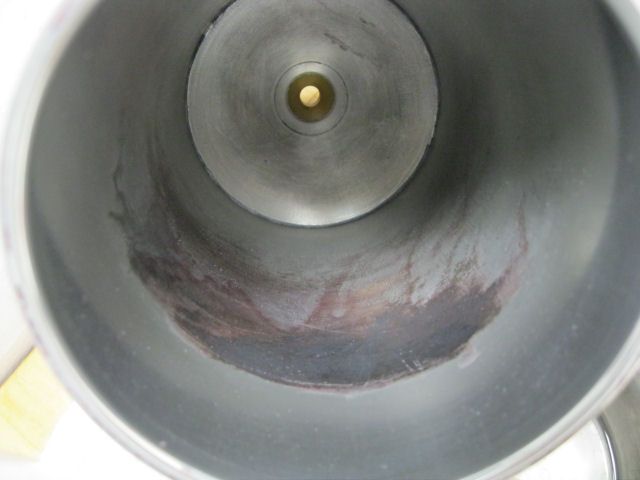
Inside the cup it looks like the gun was laid down and just left there.
2-CupInsideBefore_zpsfd877923.jpg


Not knowing what kind of paint this is, I tried cutting it with lacquer thinner and that did nothing. Moved on to SPI Urethane reducer and some paint came off on a Q-tip. I had similar results with acetone so I figured it must be a 2K primer.

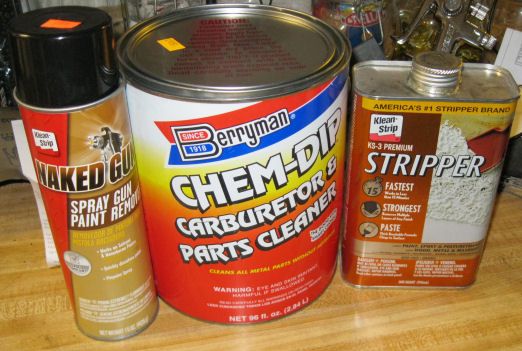
Based on Barry’s recommendation, I ordered a gallon of Berryman Chem-Dip Carburetor & Parts Cleaner. As long as I was ordering, I bought a spray can of Klean-Strip Naked Gun Spray Gun Paint Remover. I already had a can of Klean-Strip KS-3 Stripper just in case the other two weren’t strong enough.
3-CleaningProducts_zps25f7689f.jpg


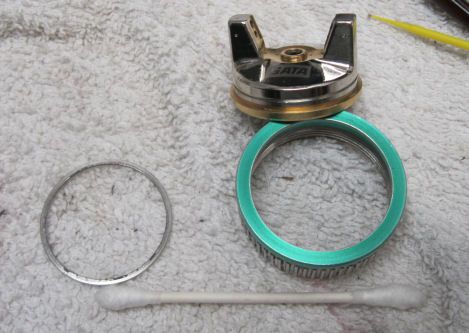
I was able to submerge the cup in the Berryman after removing the basket. I gave it 15-minutes and there was very little change so I put it in for another hour. I was able to remove a couple of spots but the large deposit inside the cup was holding strong. Back in the Berryman overnight and when I removed it in the morning the part of the cup that was submerged had gone from a bright shine to a dull aluminum finish. The deposit was still hanging on. I tried some of the stripper on the brass threads and it was more effective than the other chemicals but it’s so strong I am only going to use it as a last resort and I don’t plan on leaving parts soaking in it.

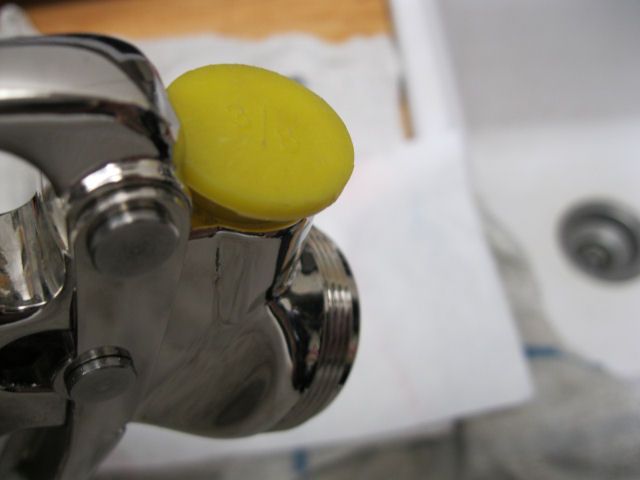
I went back to the acetone but this time I capped the outlet, soaked a paper towel with acetone and placed the towel over the deposit. Put the cap on the cup and set it aside for a day. Next morning there was still a deposit but rubbing with acetone was removing some of it. I gave up and used a gray Scotchbrite and got rid of the deposit.
4-CupInsideAfter_zps0ed0c74b.jpg


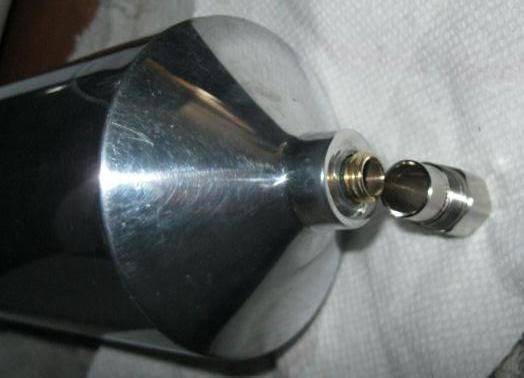
I used an old Mothers buffing ball (waste of money) with compound to clean up the inside and my stationary buffer to clean up the outside. I had removed the cup adapter from the gun because it was lined with primer as well. Because it was chrome, it cleaned up faster and better than the aluminum cup.
5-CupOutsideAfter_zps09a49061.jpg


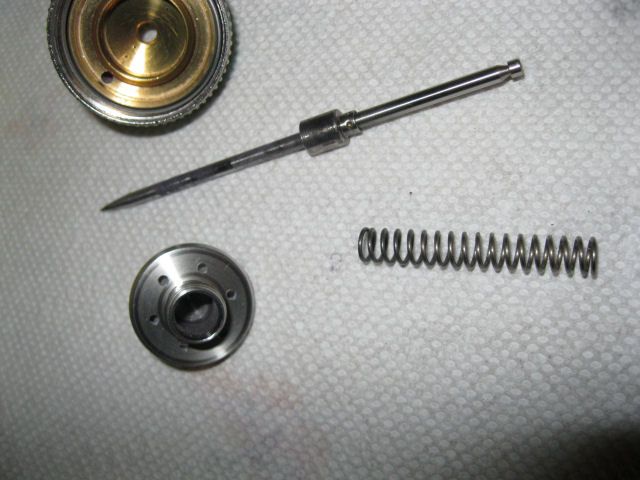
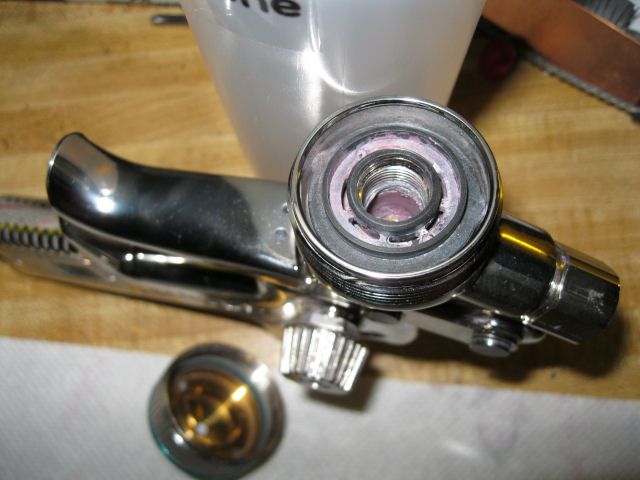
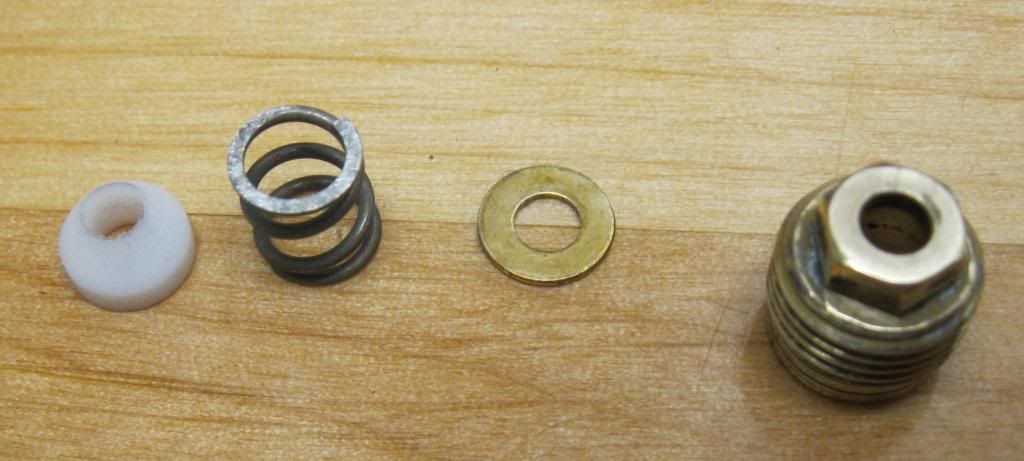
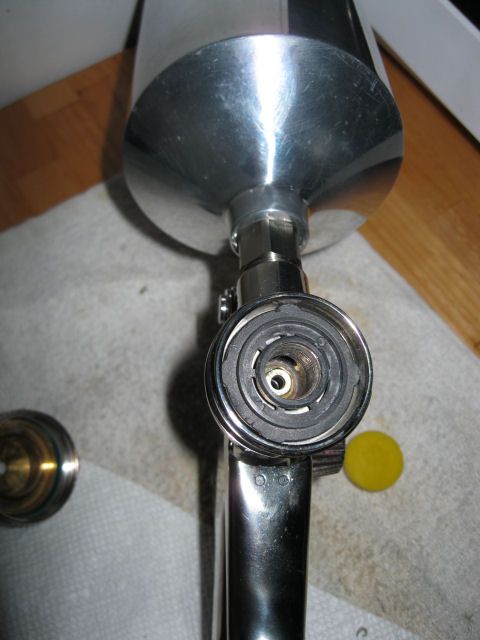
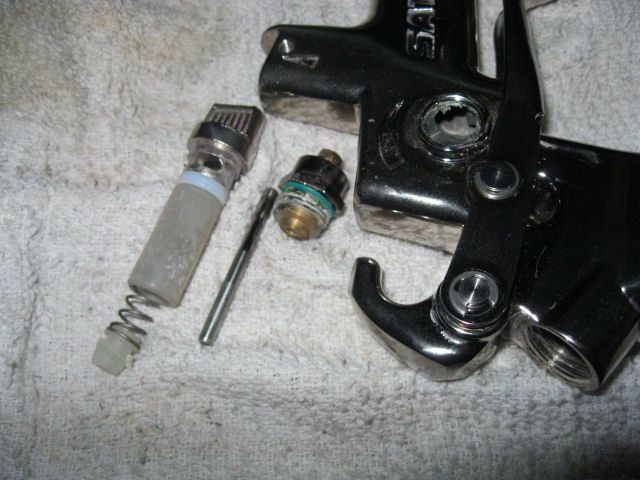
Once I finished with cleaning up the cup I figured it’s time to break down the gun and have a look inside.
 
If you have children in the room, now would be a good time to have them leave because it’s gonna get ugly. The cap had minor paint residue on the outside but the inside looked OK. The needle was really hard to remove but I was able to get it out without resorting to tools. It’s hard to see in the photo but the section of the needle that was inside the seal was polished to a bright shine, indicating that the seal was probably dirty (no sign of lubricant anywhere on the gun).
6-NeedleandNozzleBefore_zps9602023c.jpg


The nozzle had some dried paint inside but it wasn’t caked solid. The plastic ring under the nozzle has quite a bit of primer and red paint residue and the packing nut inside the gun was surrounded by even heavier paint deposits. It is so thick I can’t even tell the packing nut is a hex.
7-PassageBefore_zps38848721.jpg


I won’t bore you with the details but I was able to get the nozzle, needle and cap cleaned up without abrasives or harsh chemicals. Acetone, SPI reducer and plenty of patience did the job.
8-CapAfter_zpseee2dc9d.jpg


To clean the inside of the gun, I found a 3/8” A/C line plug that would seal up the cup mounting hole.
9-Seal_zps283e9835.jpg


I installed the needle, nozzle and cap and then poured acetone into the gun through the cup hole. Plugged the hole, stood the gun upright and let it soak overnight.

The paint softened up enough so I could get it out using a small pick just to break it up by just pushing the point into the paint. Chunks would break off and eventually I was able to loosen and remove the 7mm packing nut. I was able to push the little brass washer and Delrin (Nylon?) seal out using the gun’s needle.
10-PackingNutampSpringBefore_zps2c16079e.jpg


For some reason the brass packing nut and the associated parts cleaned up pretty easily. Maybe the time sitting with acetone inside the gun helped. The paint on the packing nut hex refused to give up completely so I did the final cleanup on the buffer. It looks a lot better.
11-PackingNutAfter_zps8793ba8d.jpg


I probably didn’t need to but I removed the fluid control knob and found more paint residue but this looked more like overspray than full immersion in paint. Q-tip and acetone cleaned it up fine. I tried to remove the control but it didn’t budge and I wasn’t sure how that valve works.
12-FluidControl_zps5052360d.jpg


After I used a few dozen Q-tips soaked in SPI reducer to clean up the internal threads and passageways, there was a whole lot less paint residue but I gave it one more overnight soak. Another round of Q-tips made the passages fairly clean. As a final step I assembled the gun and sprayed a couple of pints of acetone and disassembled the gun one more time. I still got a little more paint out but I guess it’s going to take a few more acetone flushes before I use the gun to spray paint.
13-FinalClean_zps3ac2de83.jpg


I think I may actually have a decent Sata gun – even the digital pressure gauge works.
14-Finished_zpsd9255f21.jpg
 
Thanks Dan, patience is my ace in the hole. A lot of my friends just throw stuff out because it takes too long to fix it.
 
Nice job and looks like a good gun, now.

The new Berrymans is not as strong as the old stuff, for the bad jobs I dissemble the gun and put the whole thing, gun and ll in the can and then the next weekend pull the gun out and usually cleans up pretty good.
The old berrymans, you could do the same thing in 30 minutes (thank you EPA)
 
Thanks Barry. I think just about everything is weaker these days, including me. I had planned to submerge the gun but figured the digital gauge would not be happy. I couldn't figure out how to get the gauge out of the gun. Tried removing the faceplate and the battery cover, then gently pushing on the circuit board from the back. It didn't budge so I figured I'd just leave it.

I'm going to try the Berryman instead of the acetone and pour it into the gun and then seal it up with the cap. Then I'll give it a week.

When I was flushing the Acetone through the gun, I was amazed at how much material it pushes. Makes the Iwata (which I love) seem like a mister compared to this hoser..
 
Soaking has never hurt the gauge on mine, my RP 2000 over the last 15 or so years has most likely spent months in the can, in it lifetime.

I also soak the plastic cups and tops from the other guns in the carb cleaner and does a great job and no ill effects.
 
I am not sure about this brand of carb cleaner, but many of them used to have a water layer on the surface to seal the good stuff from the air.

If you pull some out to soak your parts with use a ladel,lower it straight down, then lift straight up, the water will all remain in the can that way. If you just pour some off, you might get a lot of the water and little of the good stuff.

Well that is how we did it back in the day when I worked at a motorcycle shop. The boss bought the cleaner in a 5 gallon can, I always "stole" some out of the can and keep it on my work bench. Made it convenient to put a carb in. I bet it was 4 months or so before Jerry asked what is that can for on your bench. After I told him, the other 2 benches soon had the same thing.
 
Barry;34336 said:
Soaking has never hurt the gauge on mine, my RP 2000 over the last 15 or so years has most likely spent months in the can, in it lifetime.

I also soak the plastic cups and tops from the other guns in the carb cleaner and does a great job and no ill effects.
Barry,
I appreciate the advice. I disassembled the gun again and put all the parts and pieces in the Berryman. I managed to get the fluid and air controls out and they look like they could use a little cleaning as well. The entire gun is in the can and now I have to figure out a failsafe reminder so I don't forget it's in there and report the gun stolen.... "officer, I'm not sure of the caliber but it has a 1.3 cap."
15-FluidandAirControls_zps884ac6bc.jpg


Senile Old Fart;34370 said:
I am not sure about this brand of carb cleaner, but many of them used to have a water layer on the surface to seal the good stuff from the air.

If you pull some out to soak your parts with use a ladel,lower it straight down, then lift straight up, the water will all remain in the can that way. If you just pour some off, you might get a lot of the water and little of the good stuff.

Well that is how we did it back in the day when I worked at a motorcycle shop. The boss bought the cleaner in a 5 gallon can, I always "stole" some out of the can and keep it on my work bench. Made it convenient to put a carb in. I bet it was 4 months or so before Jerry asked what is that can for on your bench. After I told him, the other 2 benches soon had the same thing.
SOF,
There doesn't seem to be a water layer on this new stuff. It has a very mild smell and I've gotten it on my hand with no ill effects. It's a long way from the parts cleaner I grew up with.

Speaking of old stuff, here's my contribution to memory lane tonight. I bought this can of Gunk 35 or 40 years ago but could only open it outside and down wind of the house. It's almost pre-EPA so it has all the smelly, caustic, animal dissolving stuff us old folks remember. It really brings back memories; I'd dip a piece of paper in it, seal it up in a Ziploc bag and mail it to you but I'm pretty sure it would attract a really cranky bunch of guys in yellow hazmat suits.
Gunk_zpsa4ade3fd.jpg
 
Back
Top