1967 Camaro ss/rs restoration

Mitch

Promoted Users
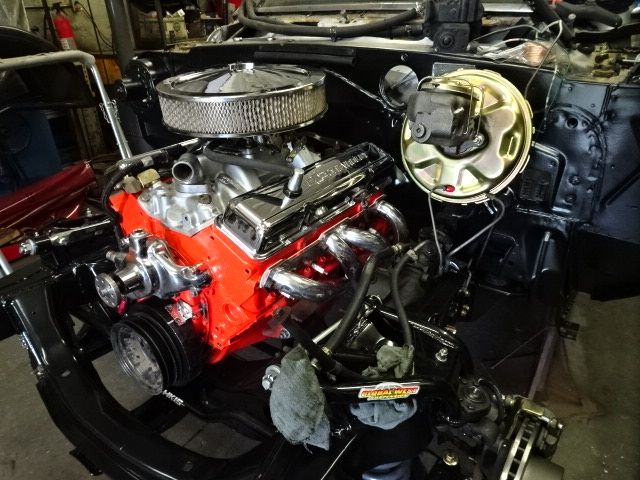
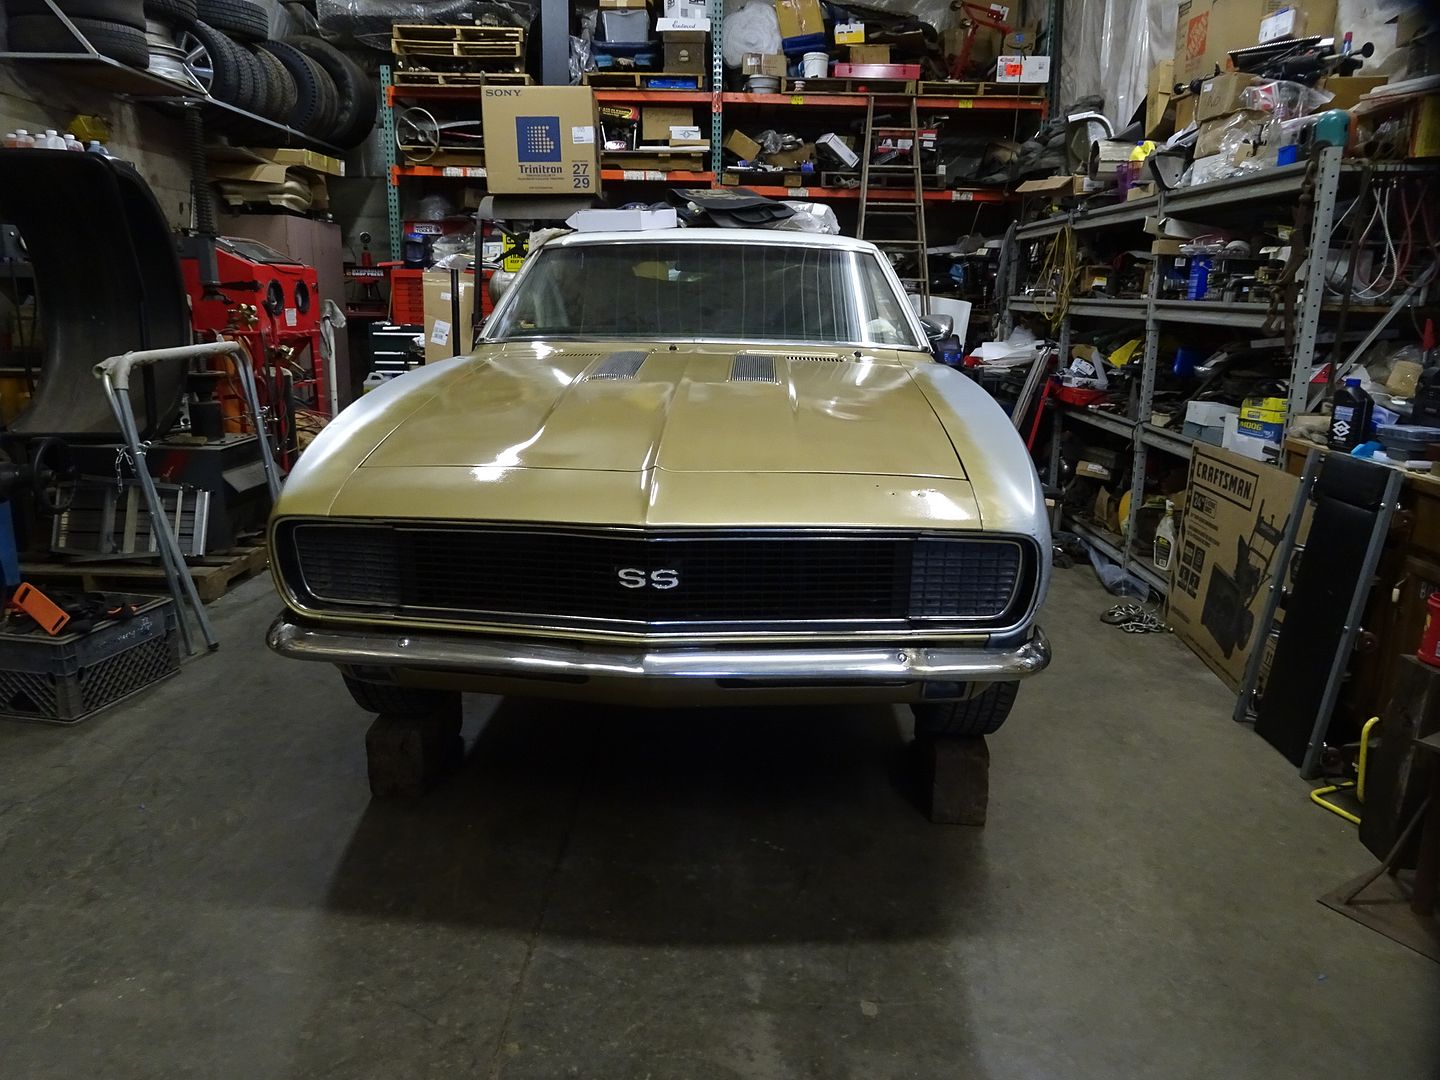
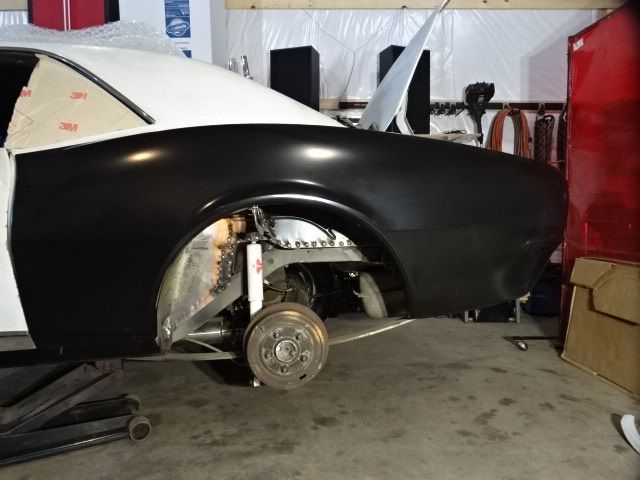
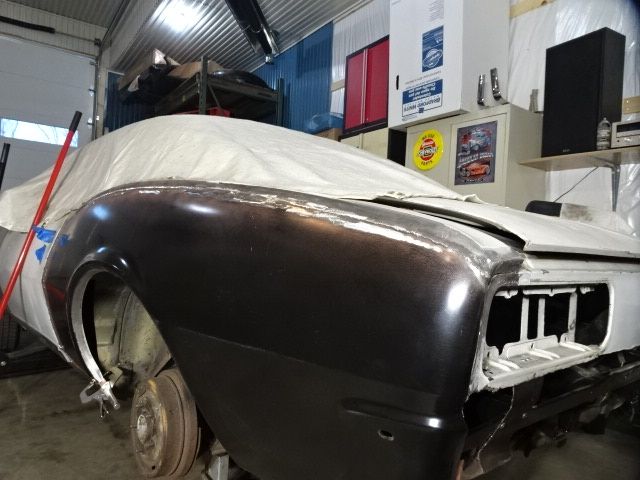
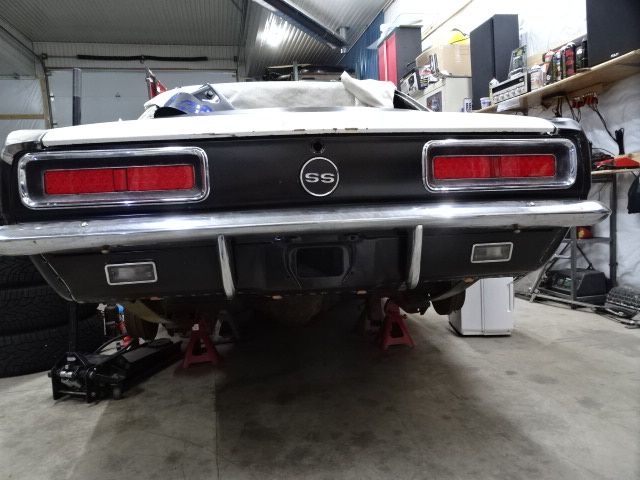
Since my avatar pic is obviously a car in resto, I thought I would share a little about it. I bought this Camaro in about 2008 as a basket case. It was in Spring Valley WI and had been brought up there from the San Fran area and blown apart for a resto that didn't happen.

67%20Camaro%20001_zps4uv8umdt.jpg


67%20Camaro%20007_zps039peiob.jpg


67%20Camaro%20006_zpseug3gjxu.jpg


67%20Camaro%20011_zpsuxyjnh9c.jpg


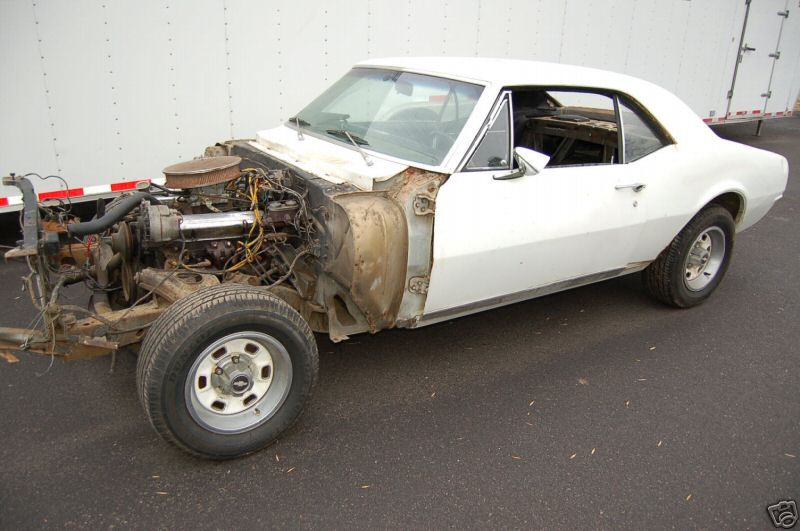
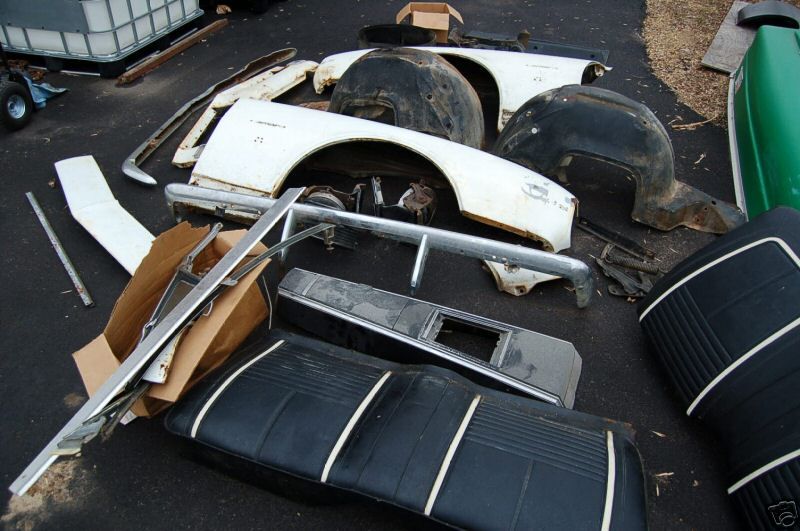
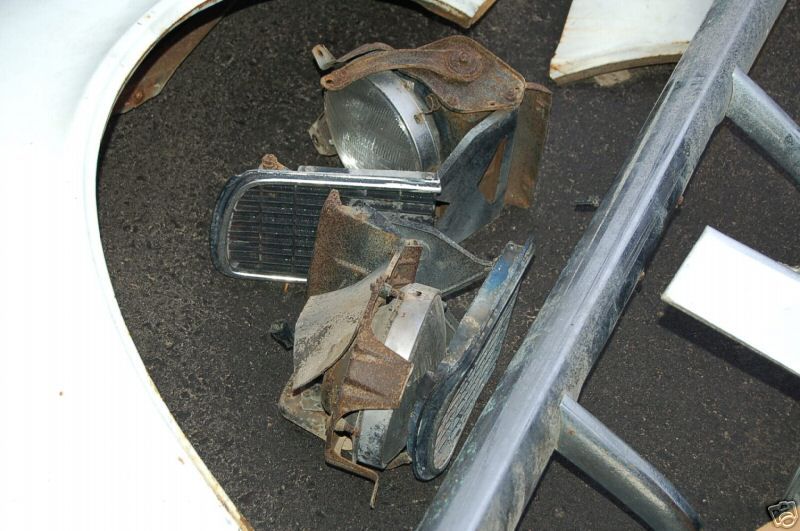
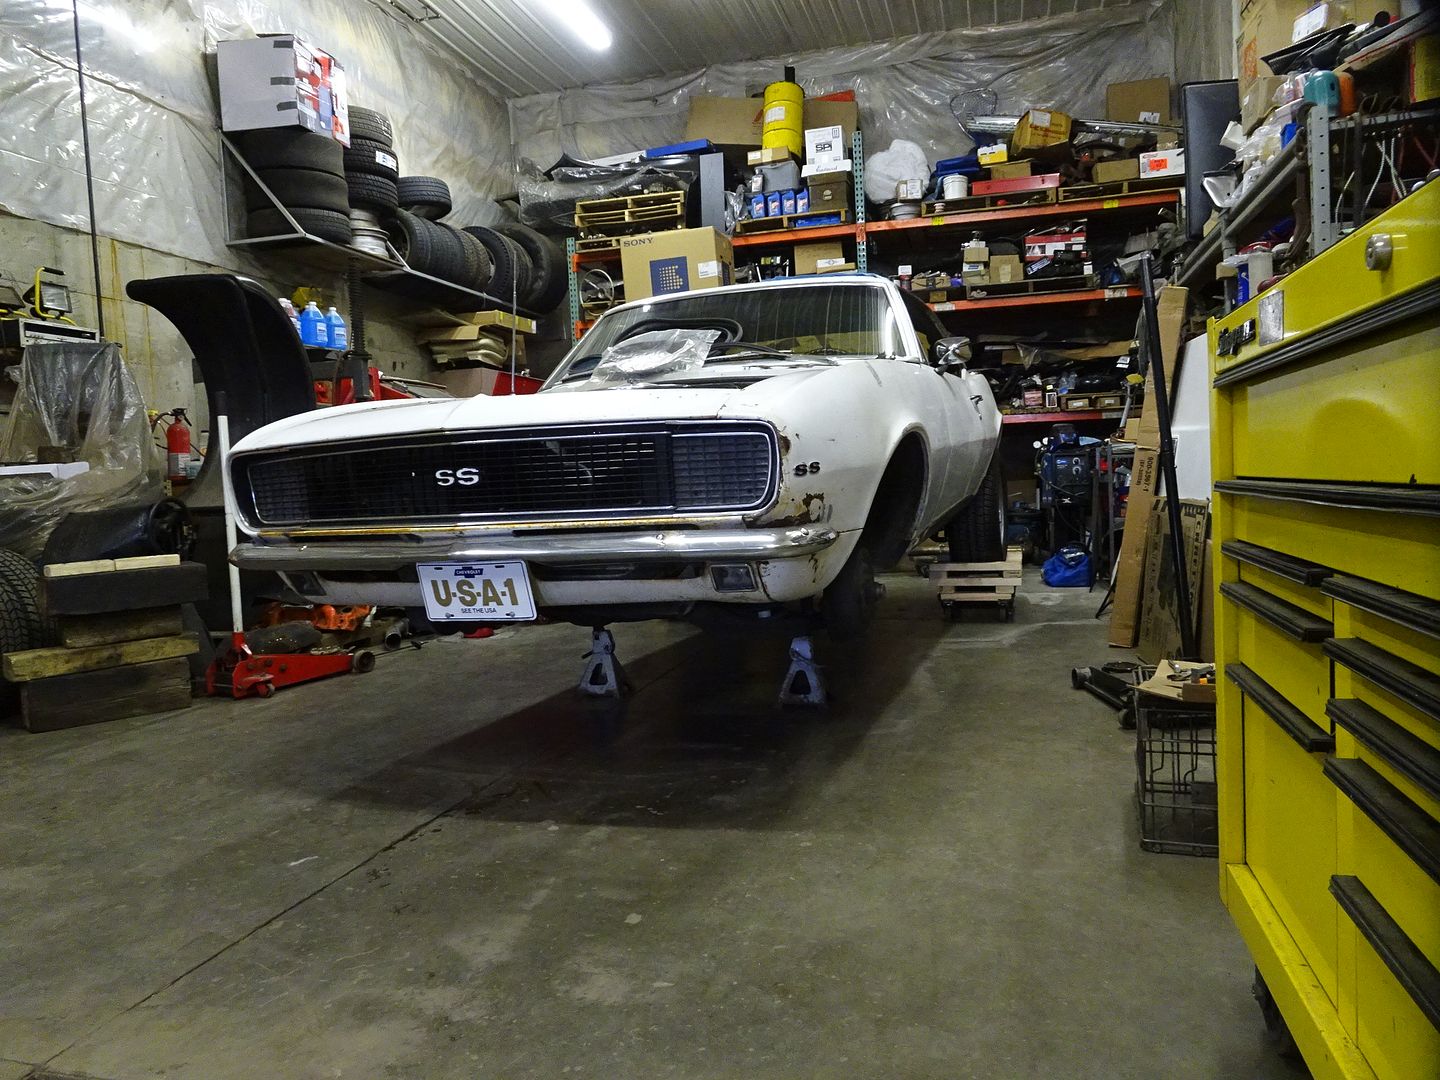
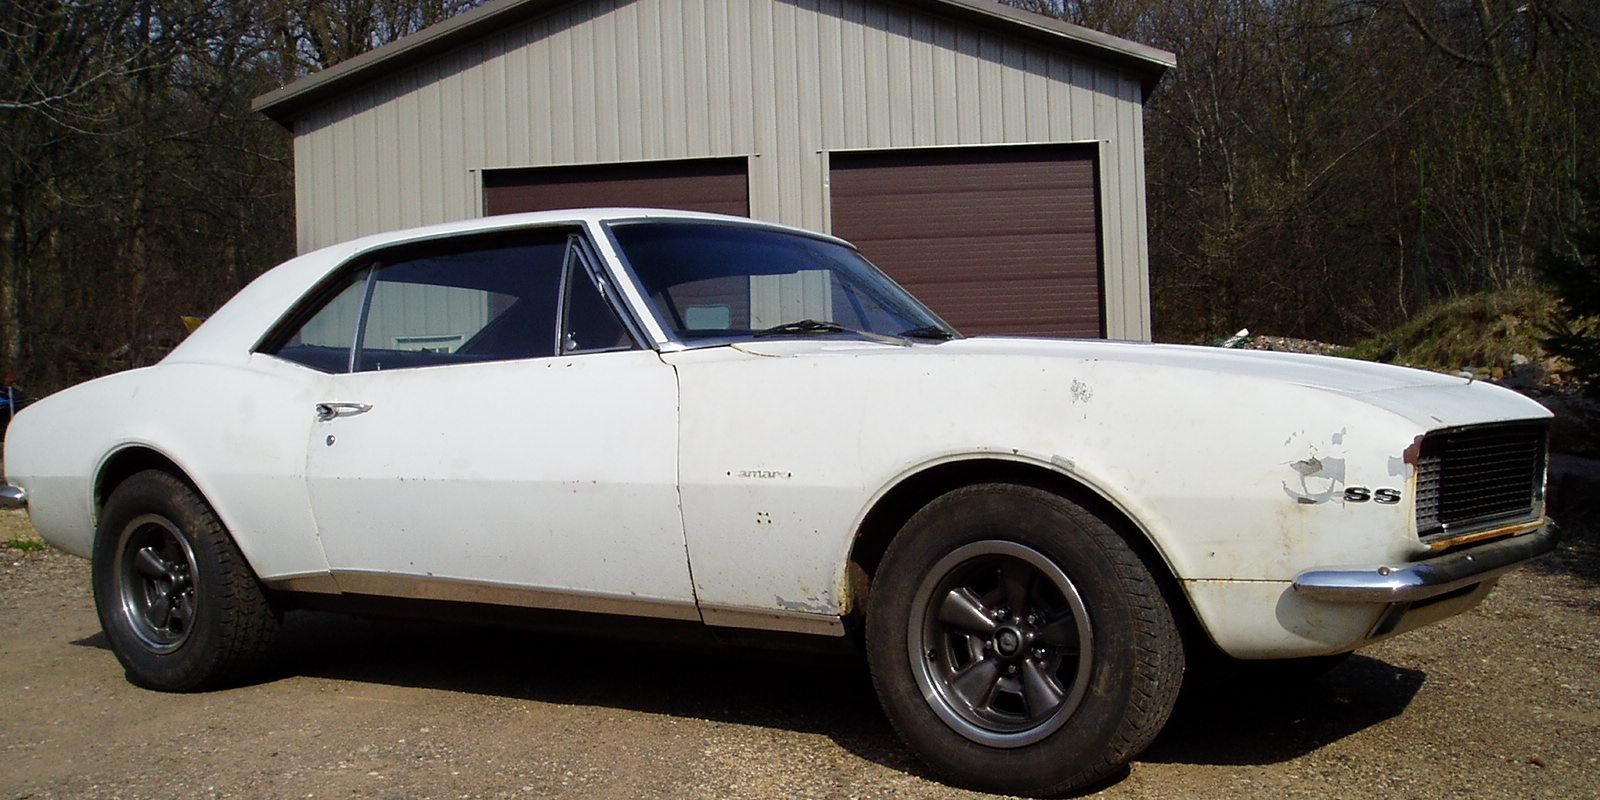
I was told by the seller that it had been a driver before he blew it apart, so I had the big idea I would reassemble it and drive it for a while before restoring it. So 2 weeks later, I drove it out of the shop. Still needed a lot of work to be decent, but it was a "driver" again.

67%20Camaro%20161-2_zpsef100oip.jpg


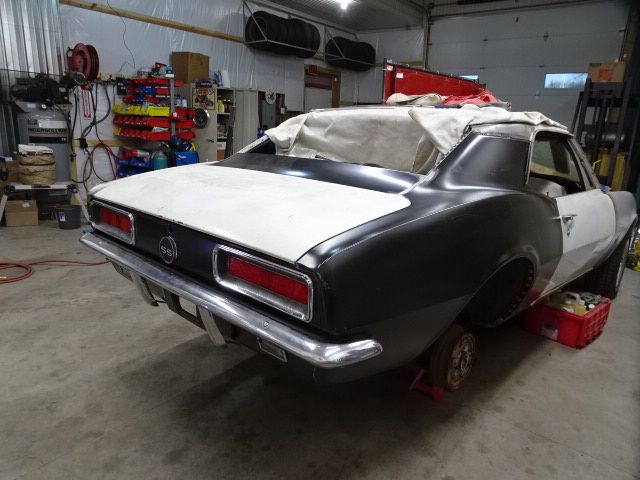
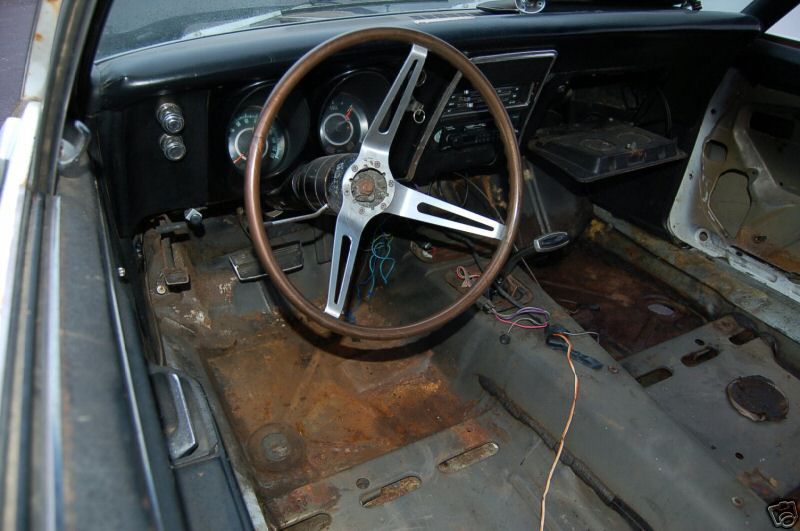
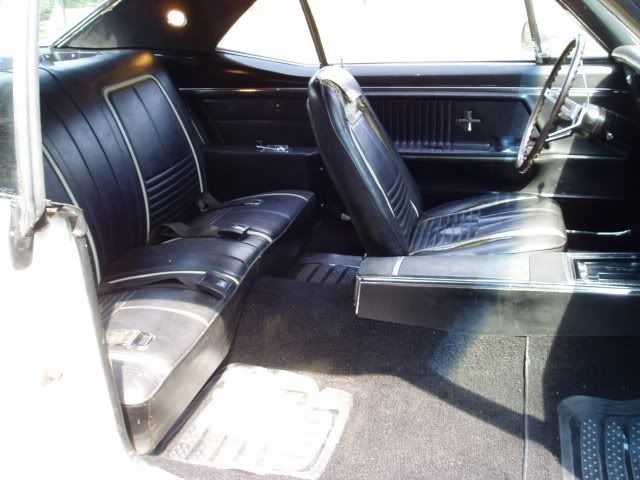
I repainted the metal door sills, put in new carpet, repaired the lower door panels and bought a pair of nice, standard, seats. It stayed like this until 5 years ago.

2429246090100567145sZomYr_ph_zpso5jbftwn.jpg


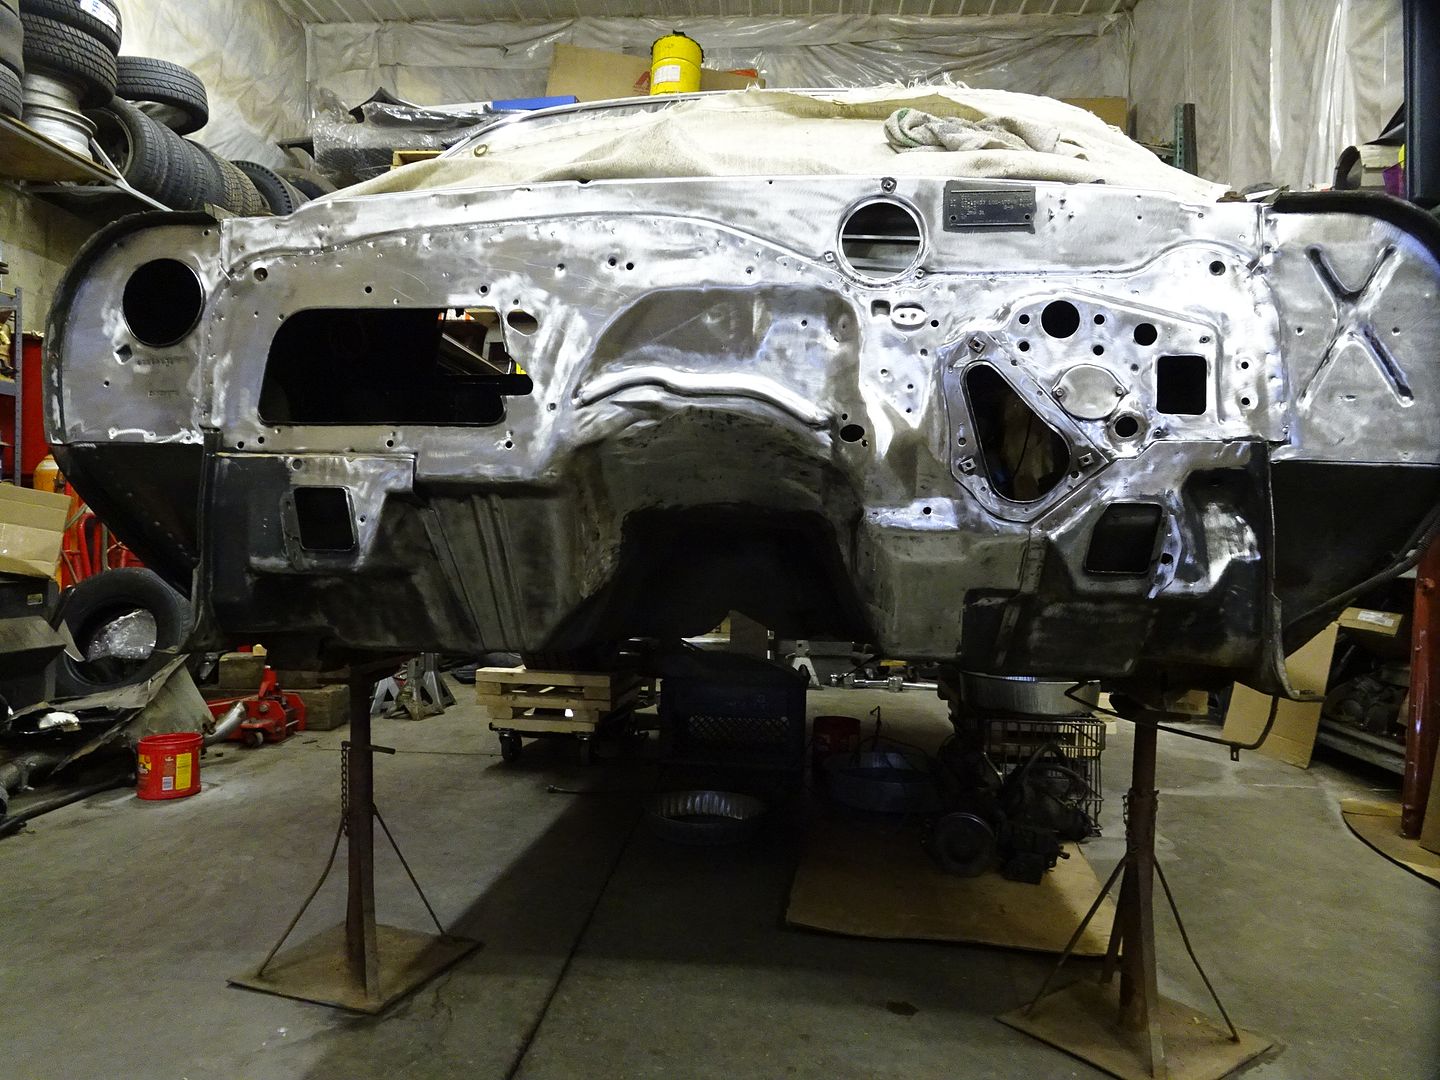
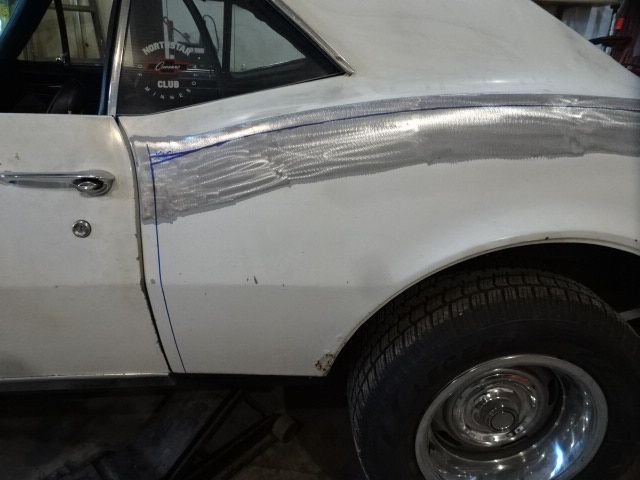
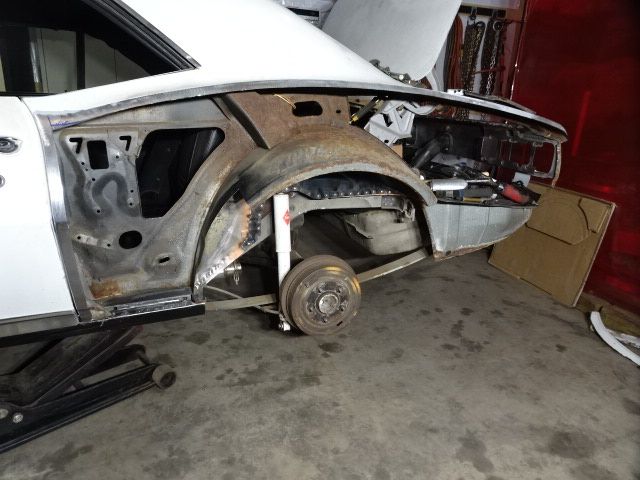
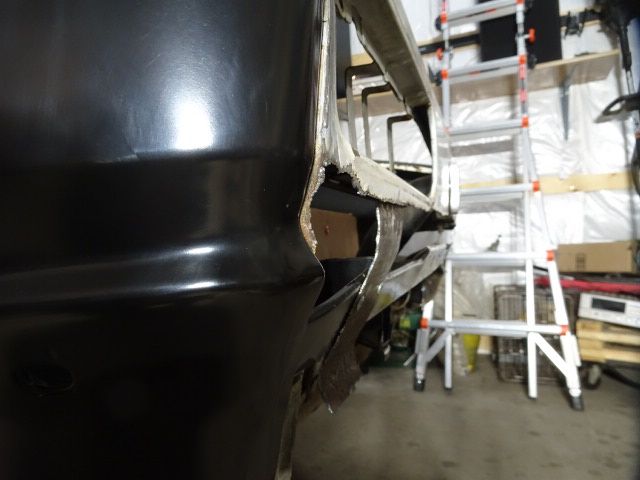
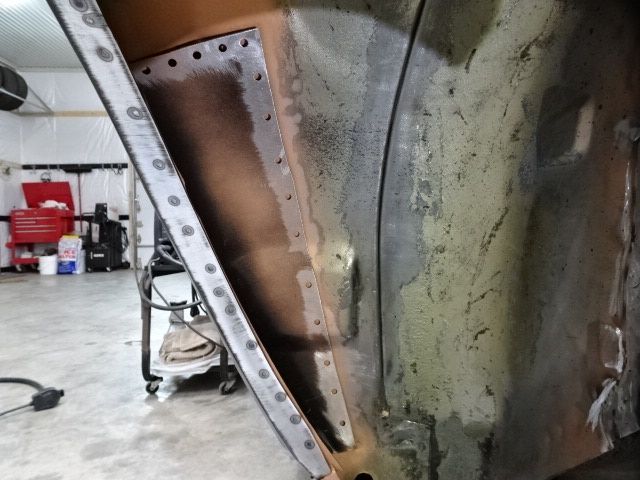
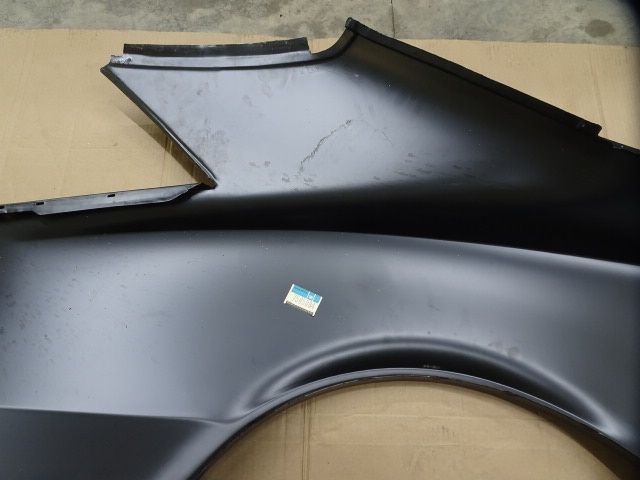
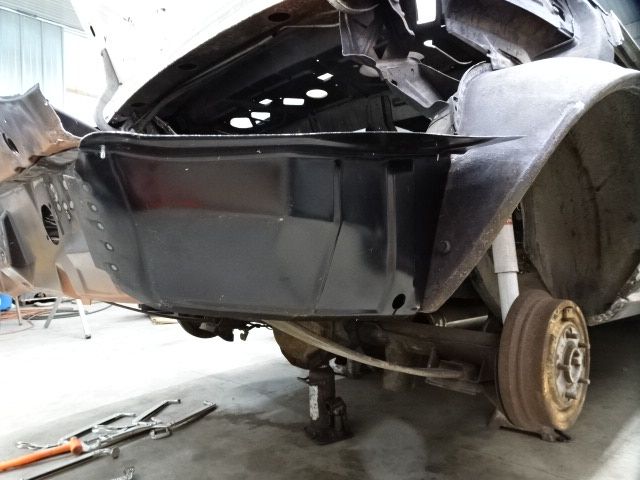
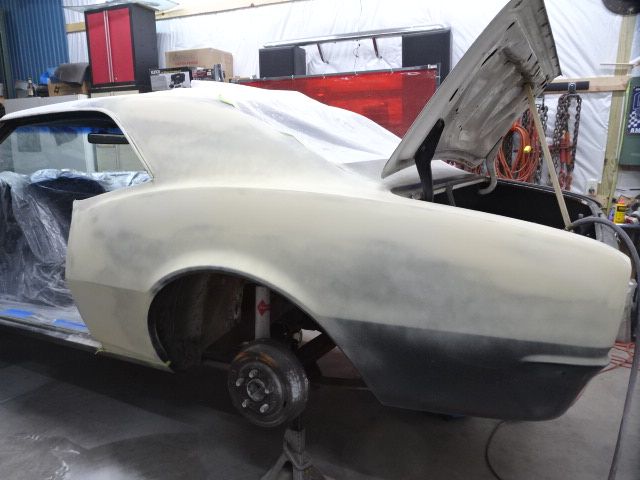
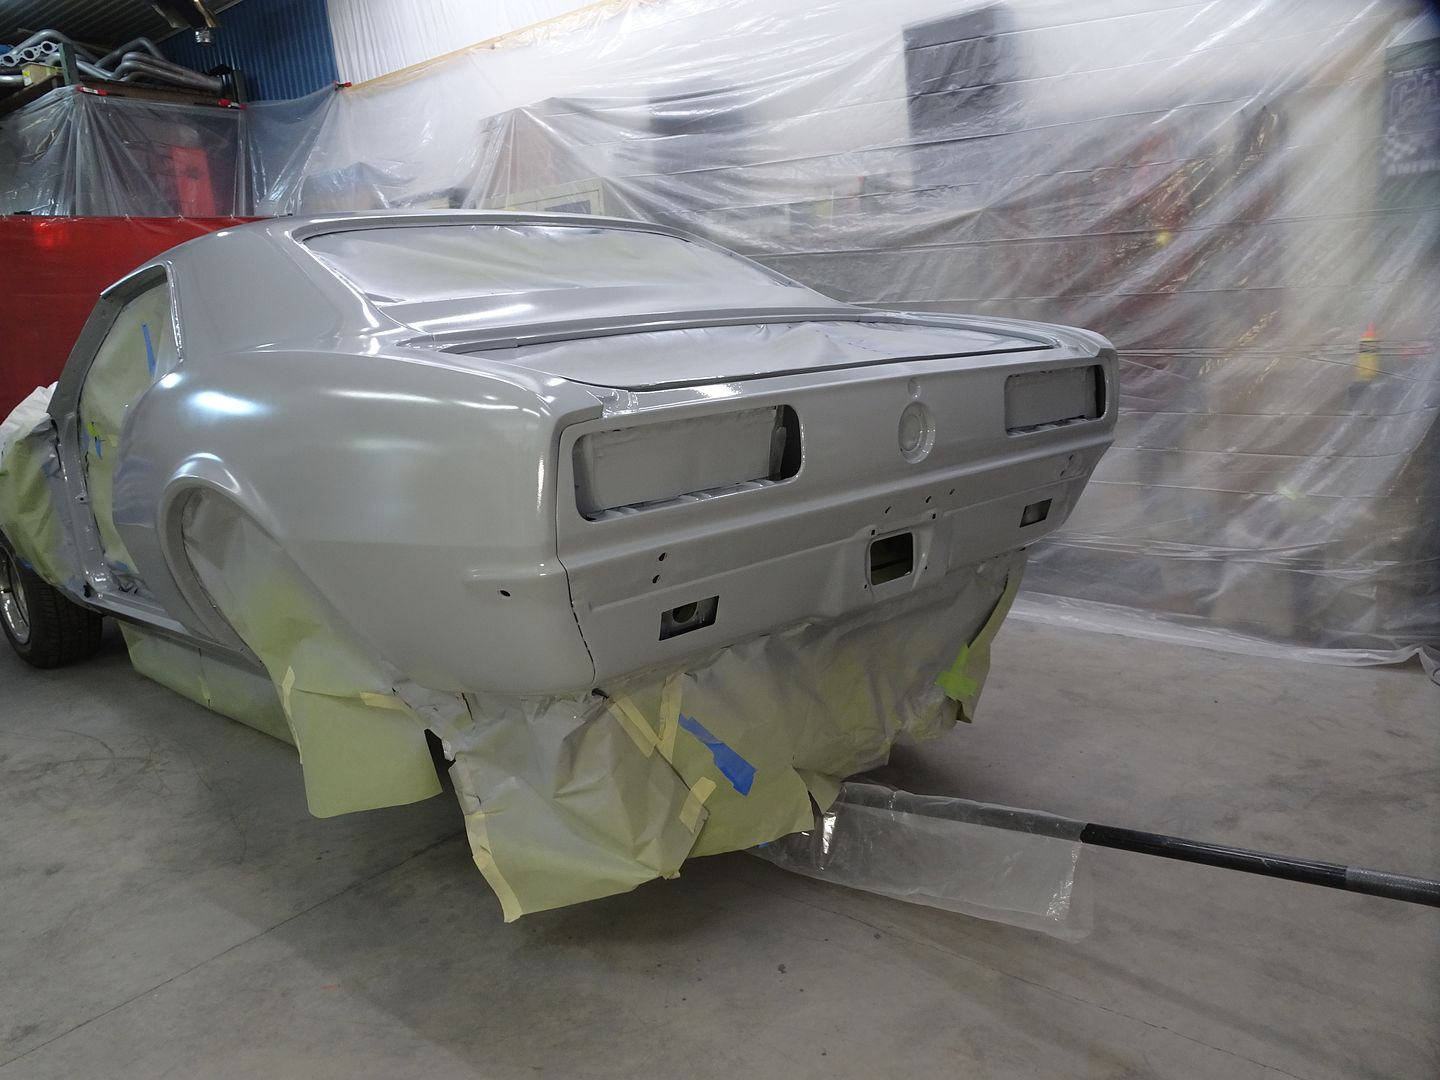
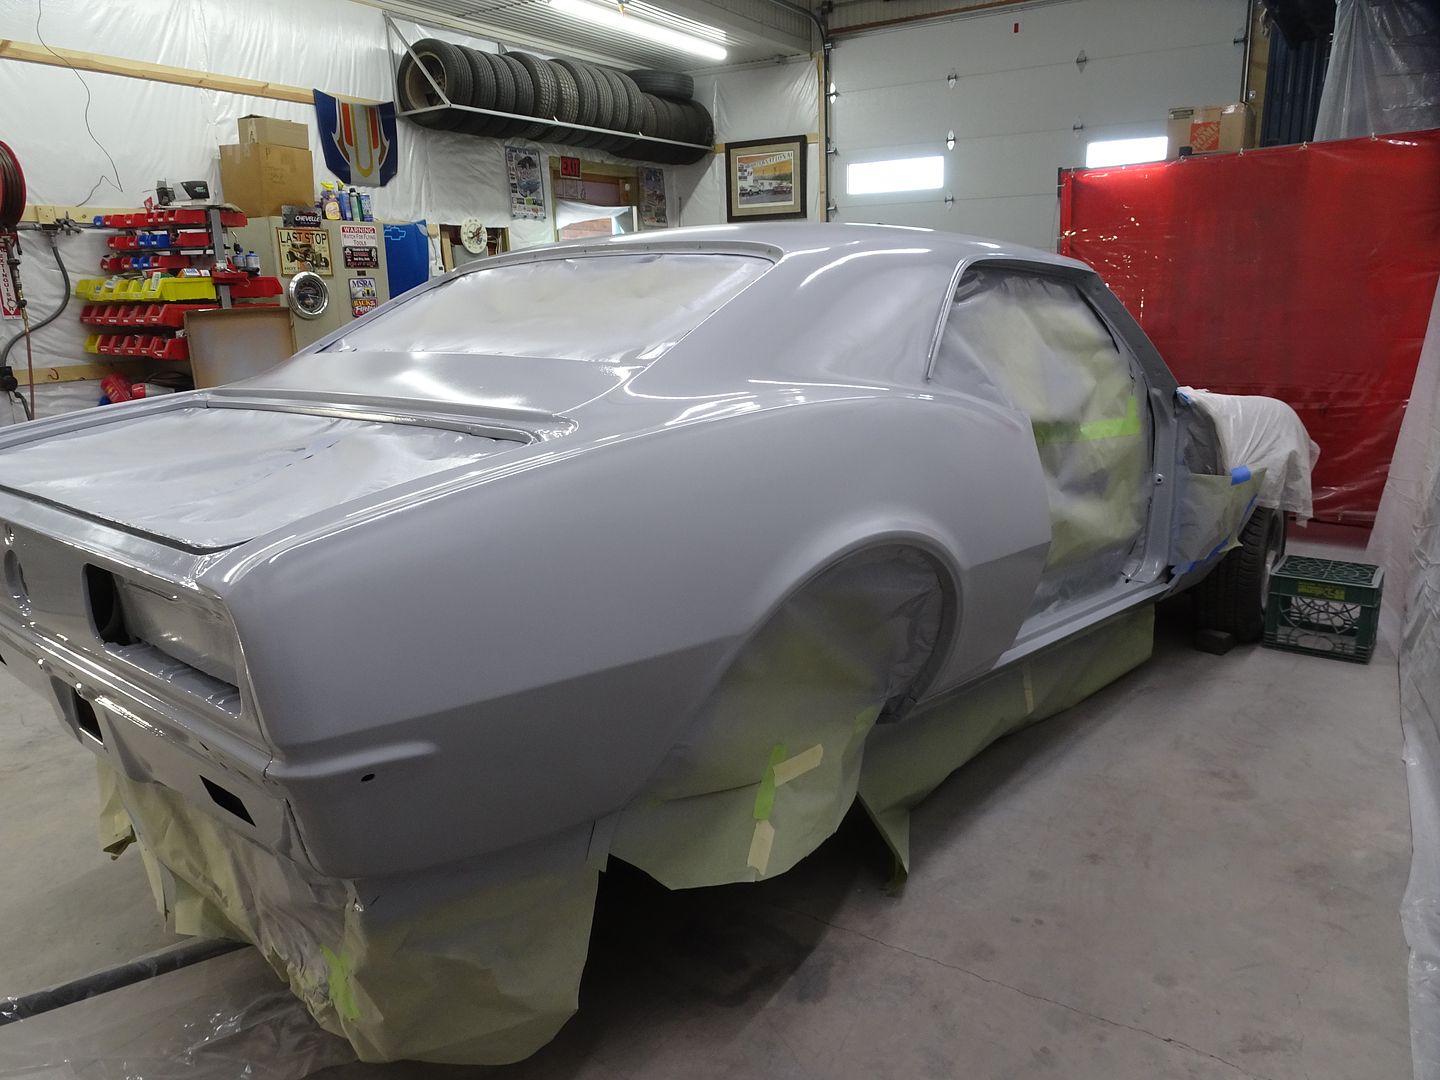
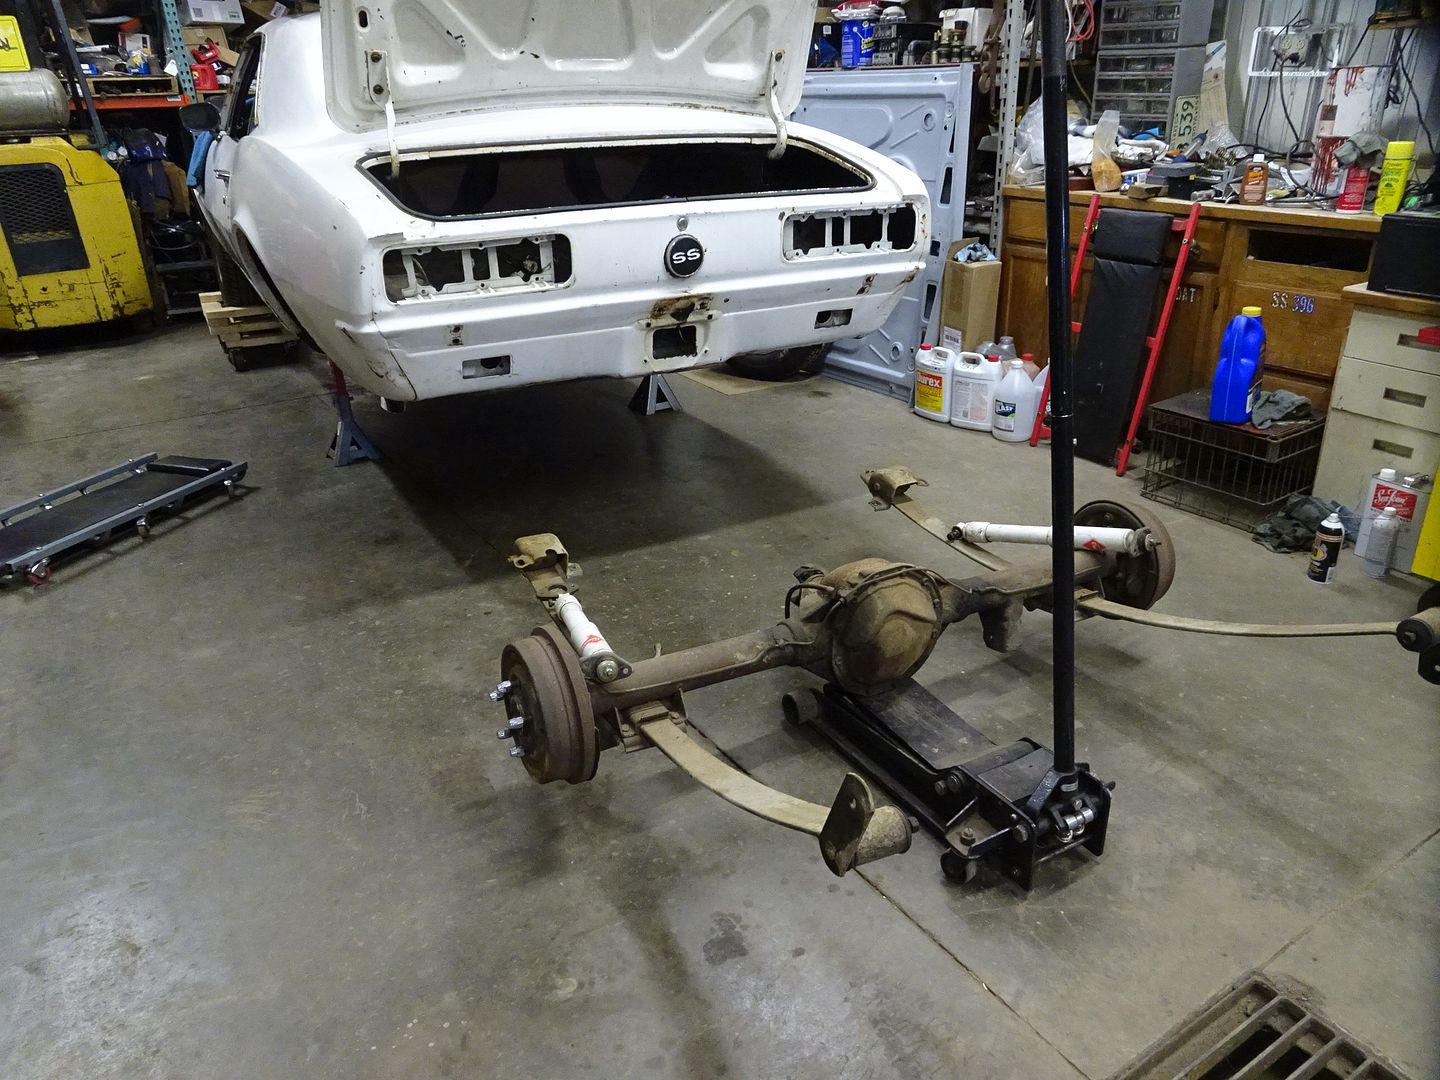
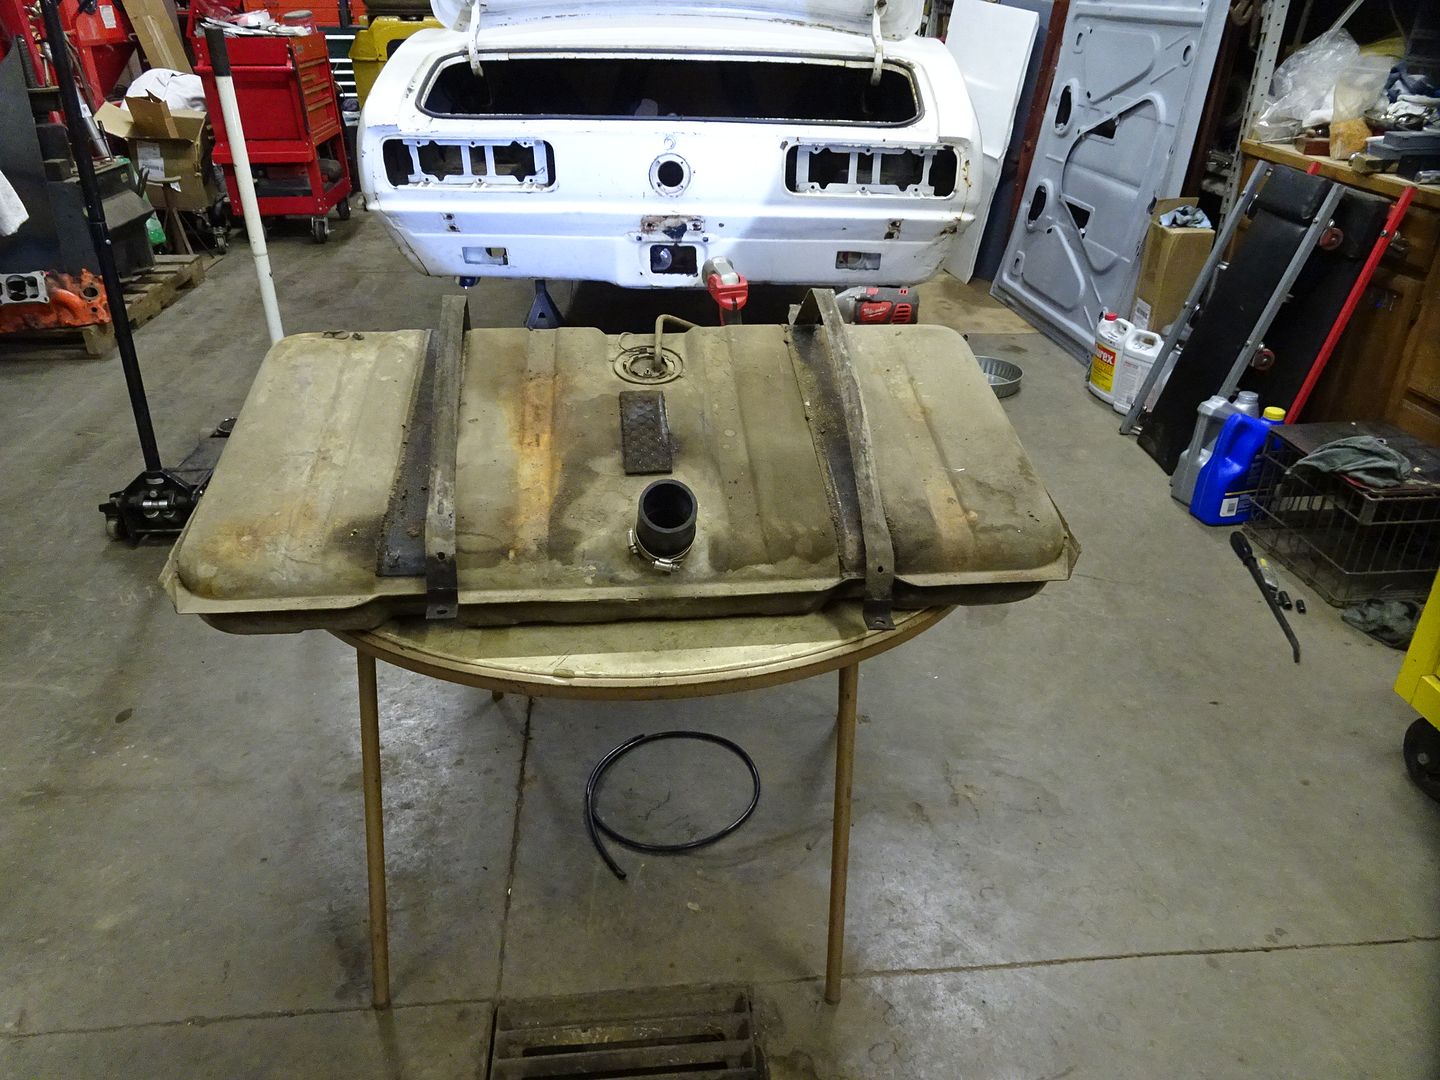
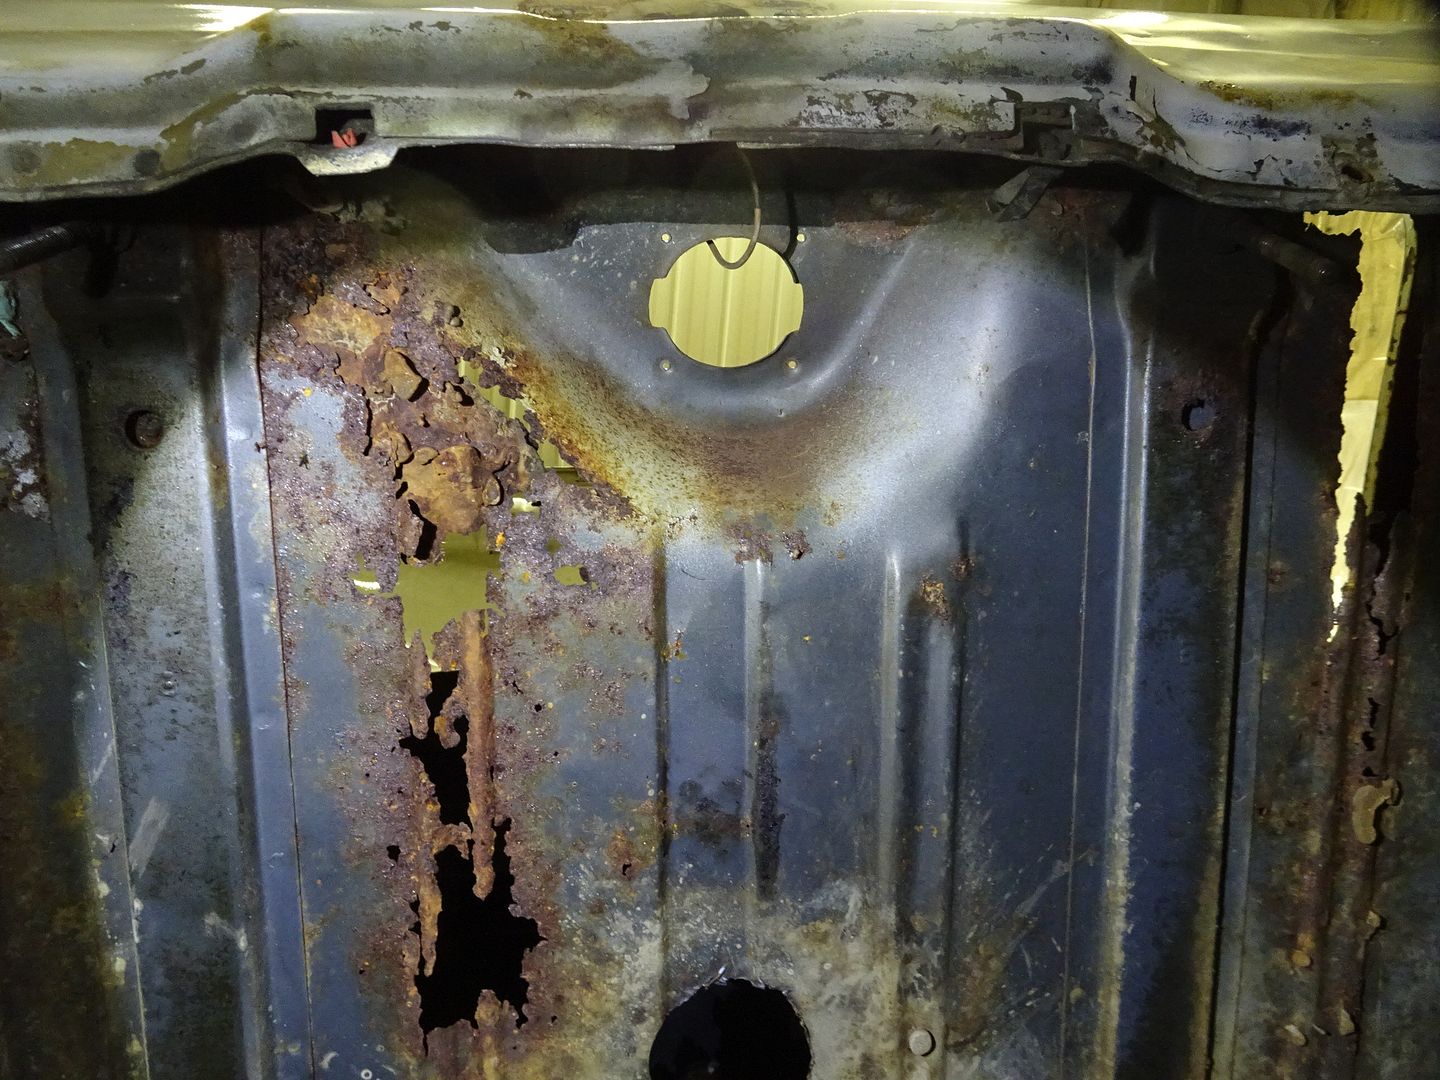
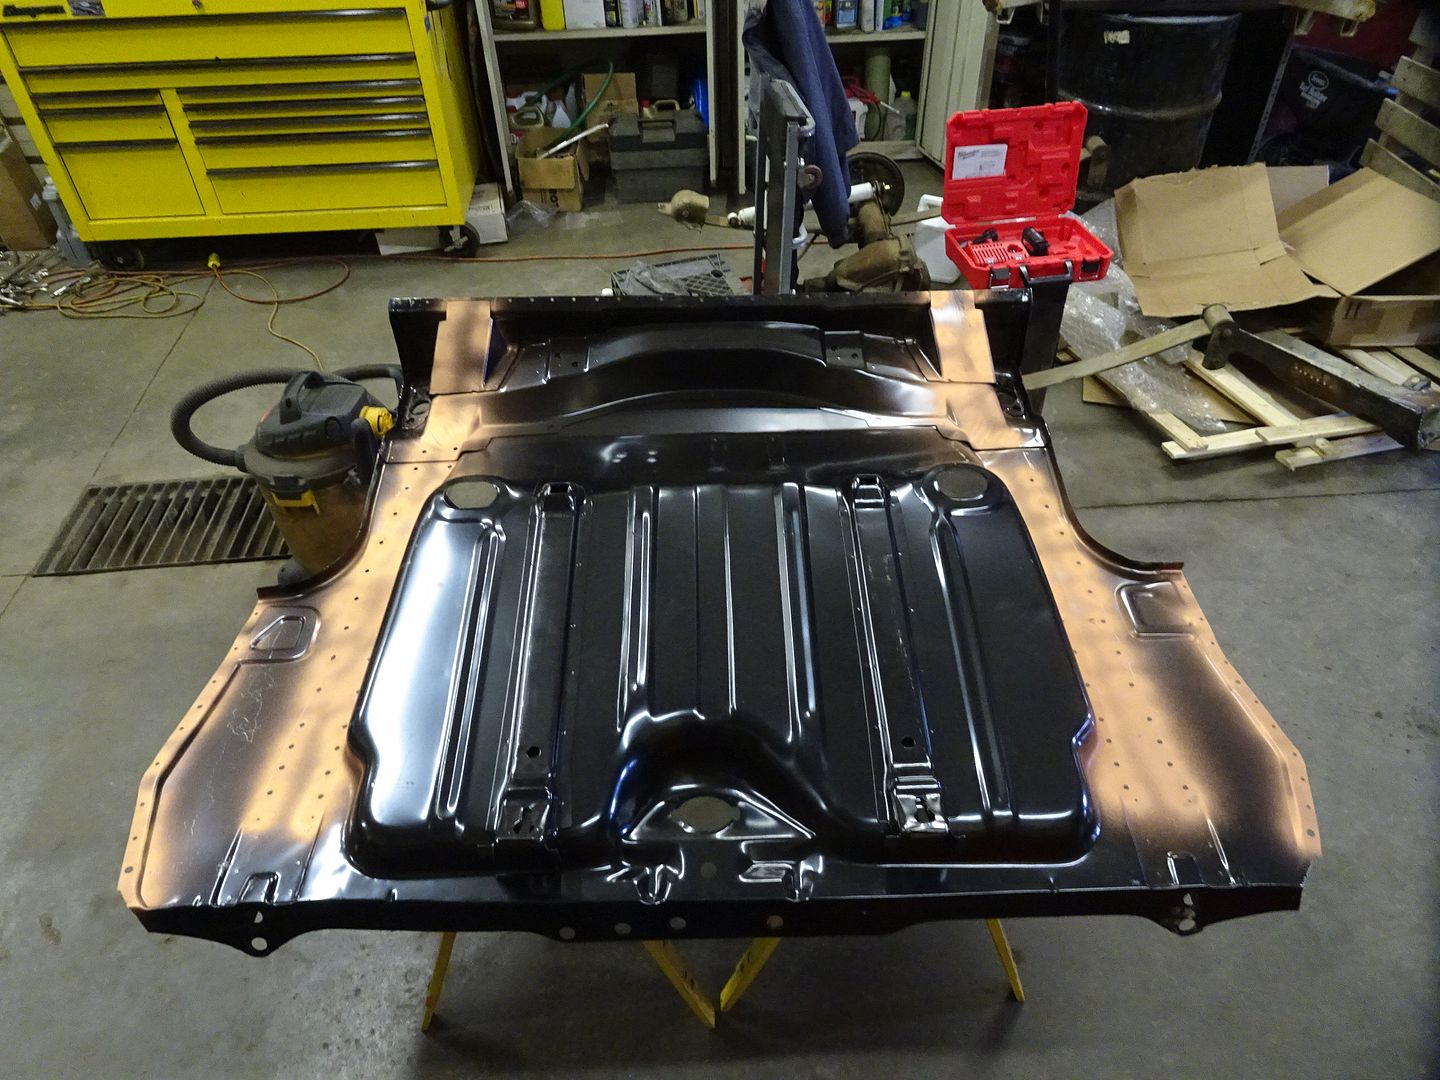
The trunk floor was badly rusted out and had crash damage in the right rear corner that was never straightened very well. The right quarter had a section brazed on over some of the remaining original quarter and the tail panel was sectioned on thru the left tail light. These would be replaced later. For now, I was replacing the entire trunk floor with an AMD 1 piece. Dropped the rear axle and fuel tank and got going with the plasma cutter.

DSC03901_zpshnqip4o1.jpg


DSC03915_zpsu63fzrxv.jpg


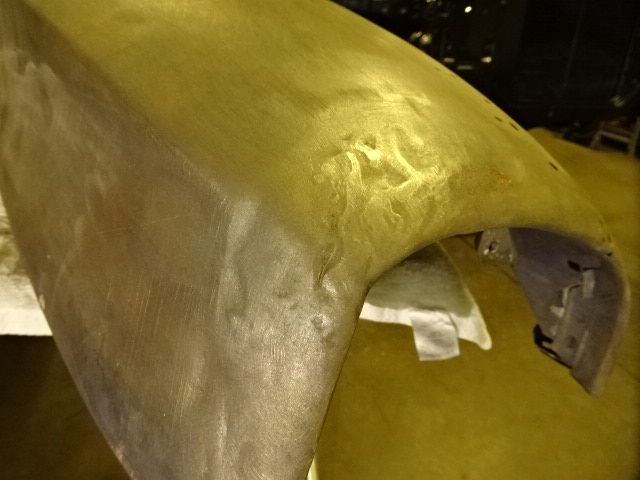
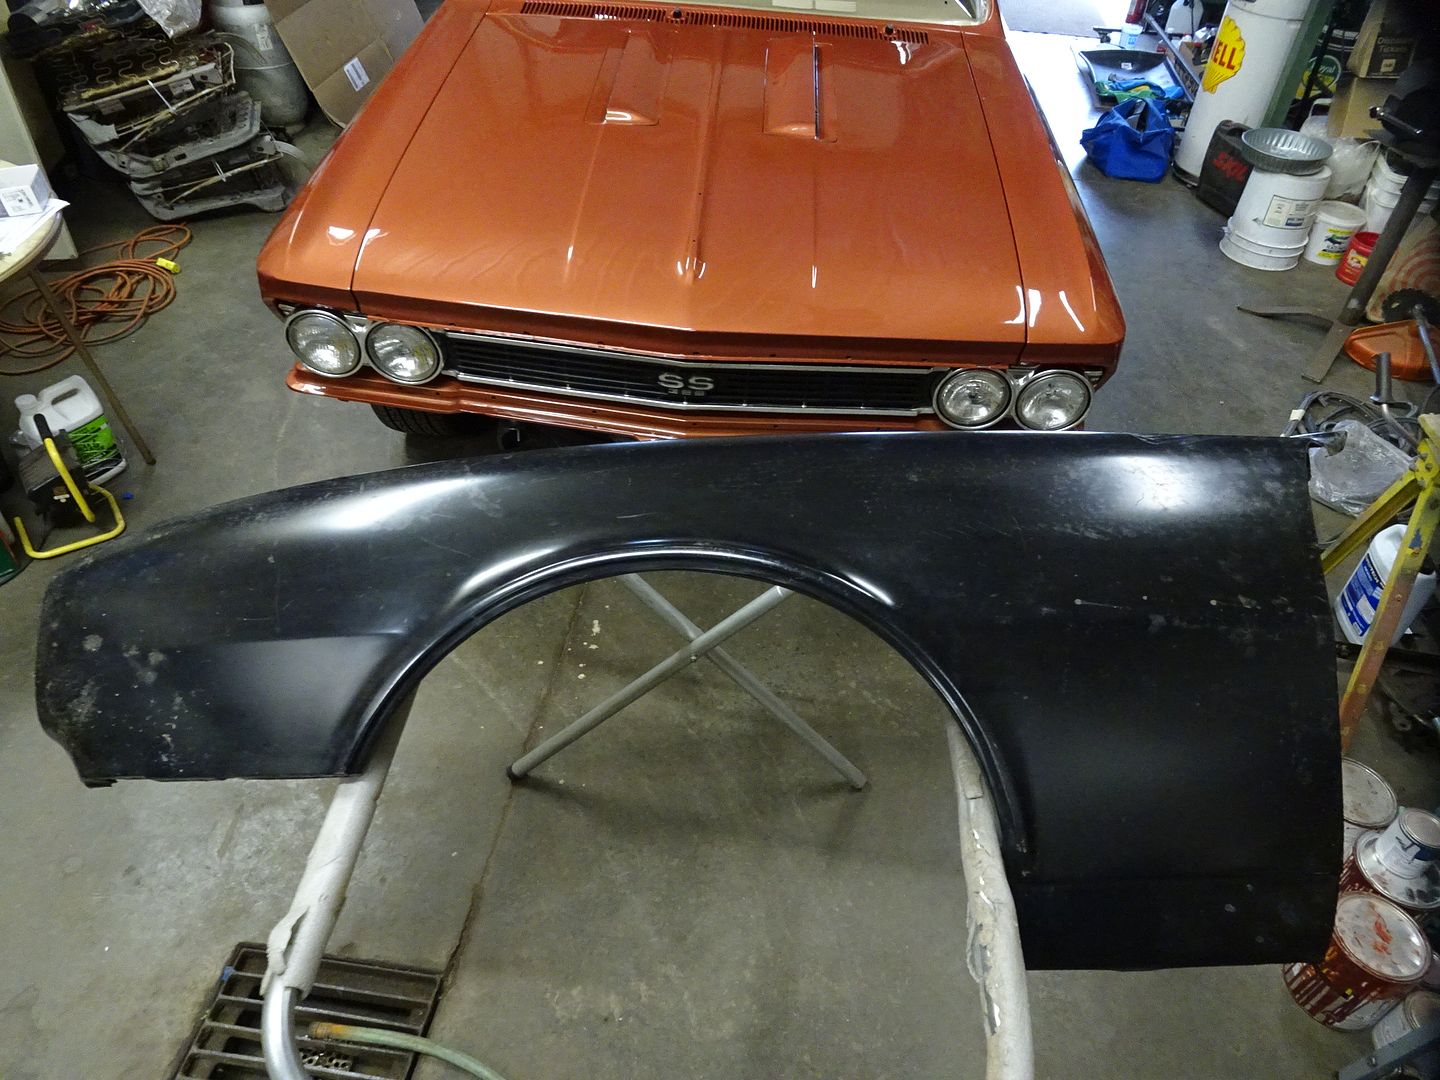
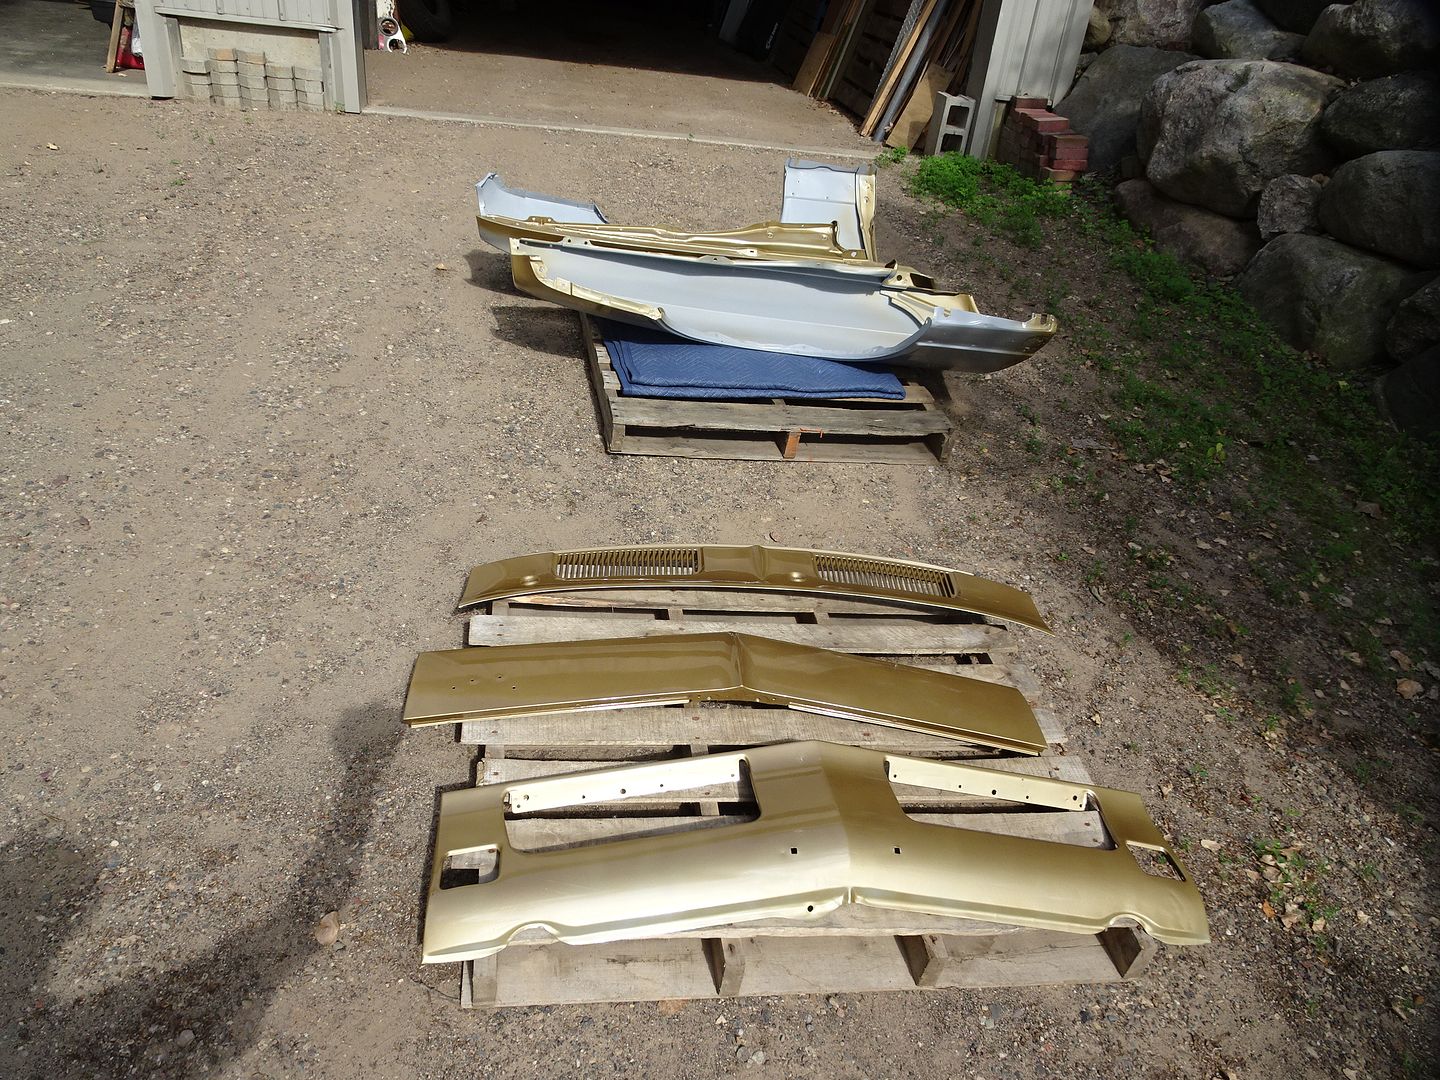
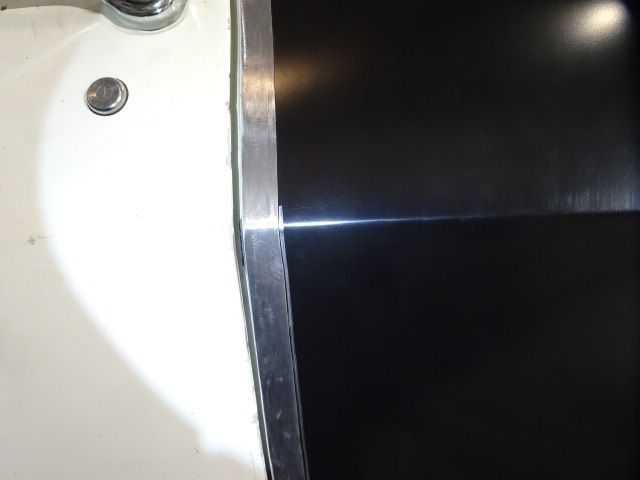
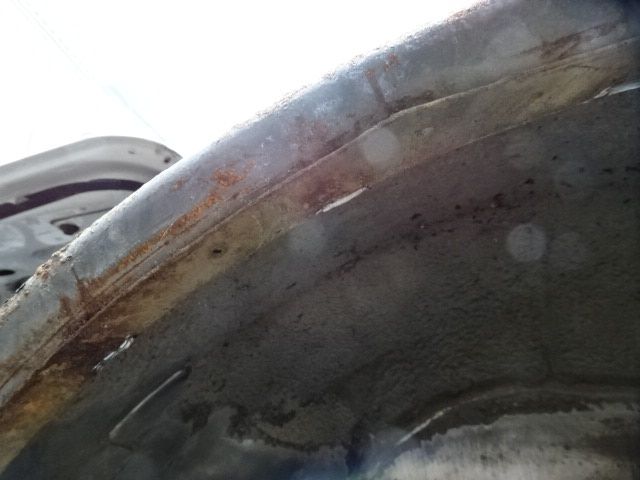
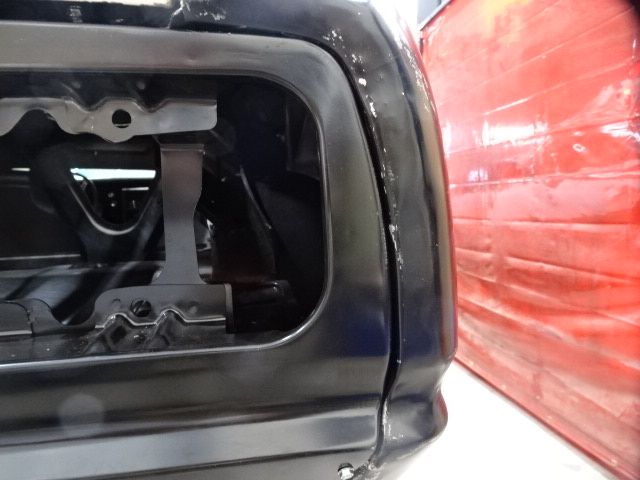
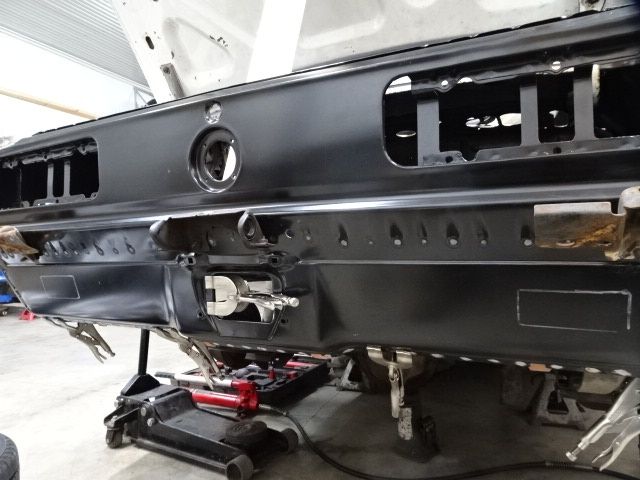
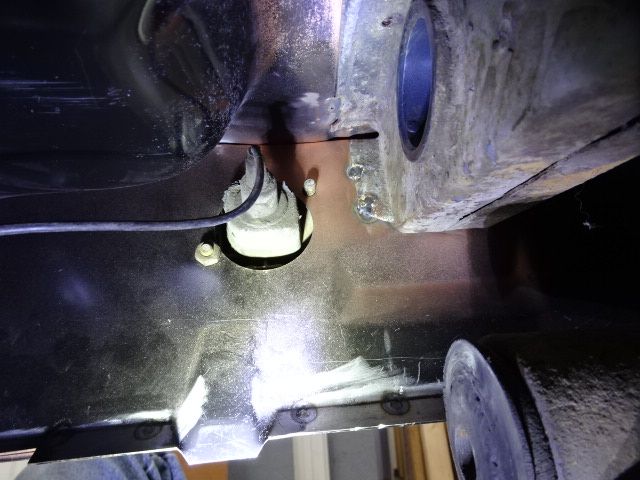
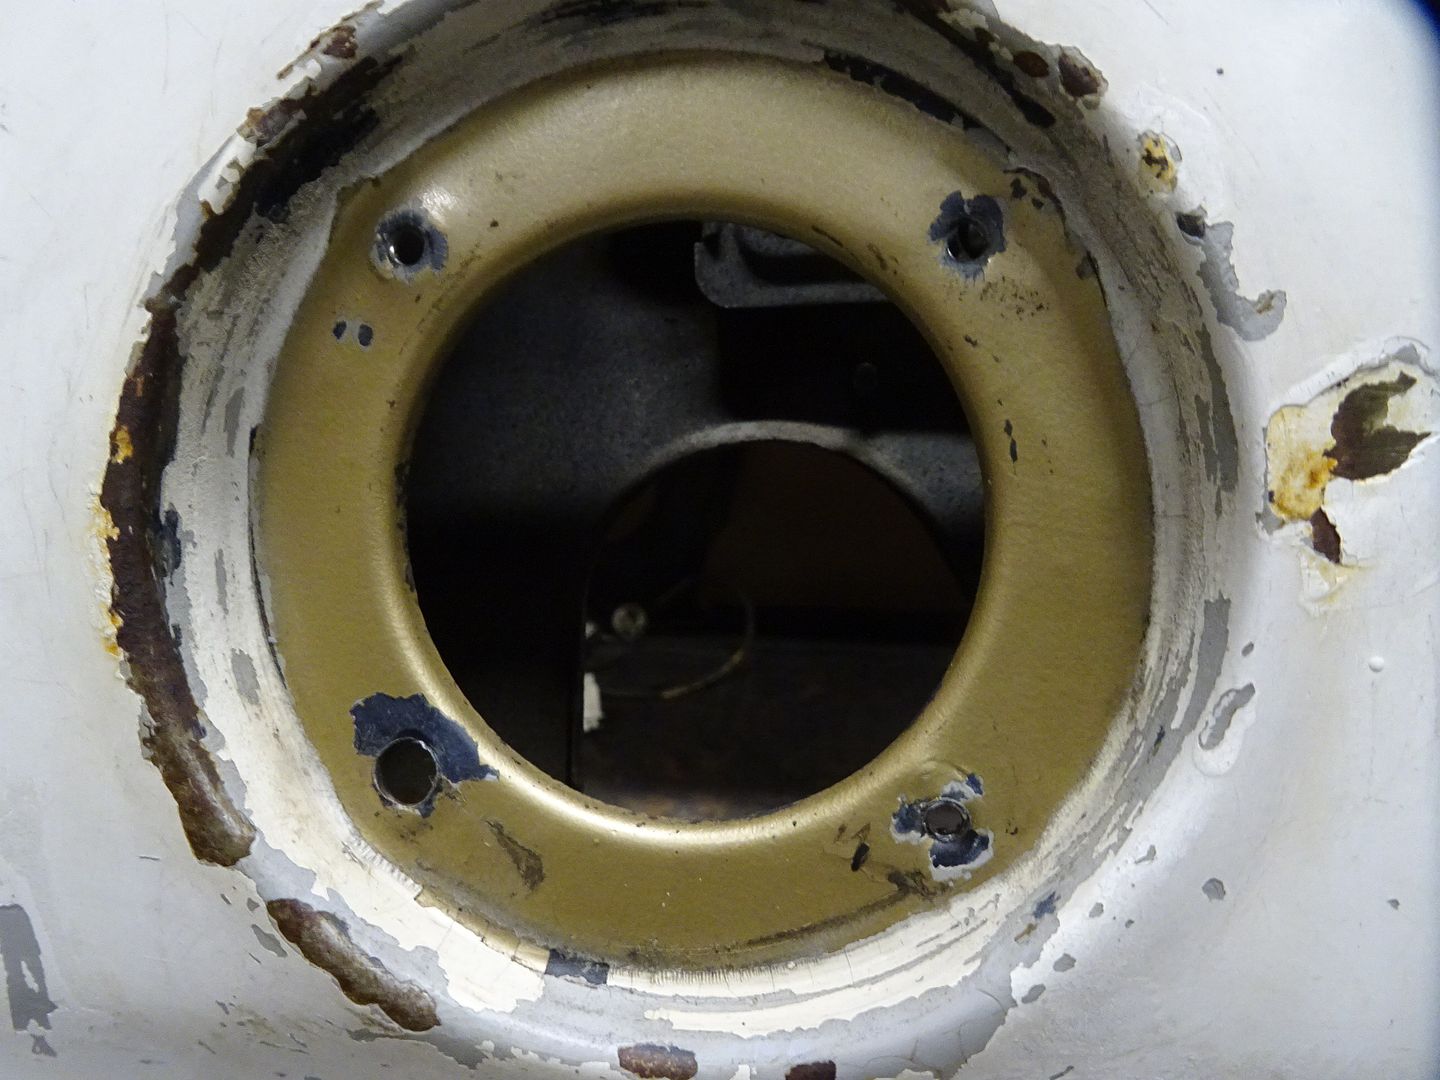
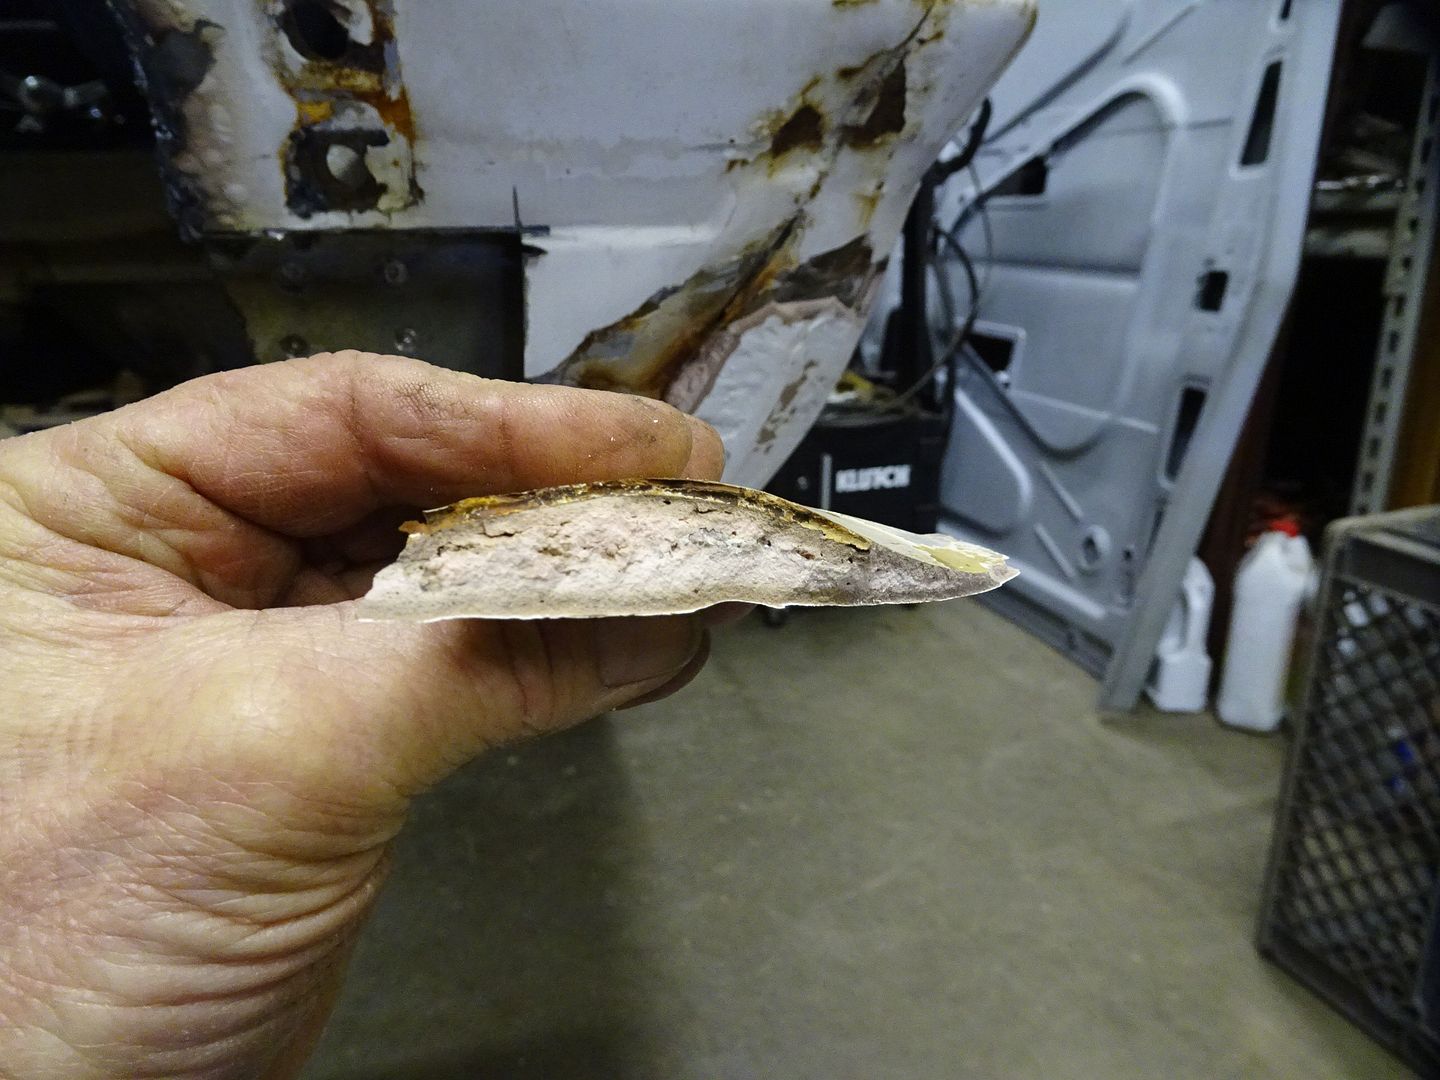
Original paint under the filler neck, Granada Gold, which it is going back to.

DSC03916_zpscir0h7rb.jpg


DSC03918_zpsb88qngzm.jpg


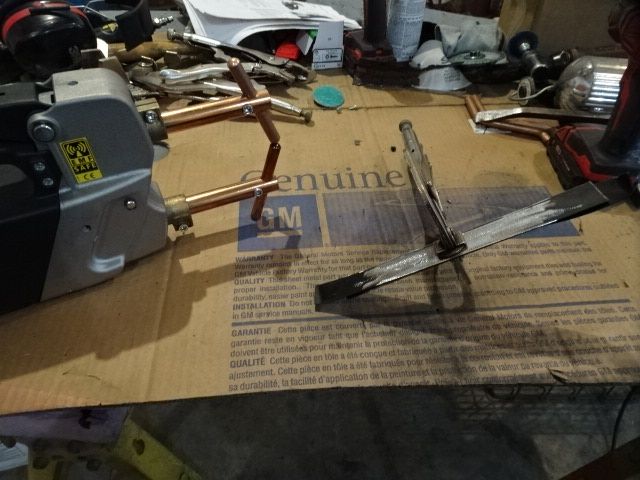
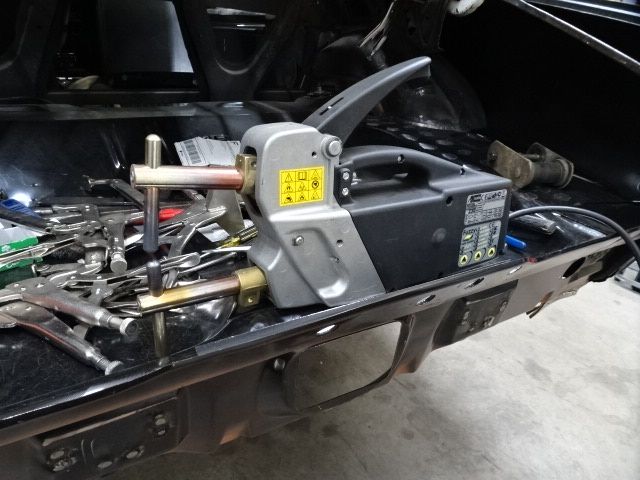
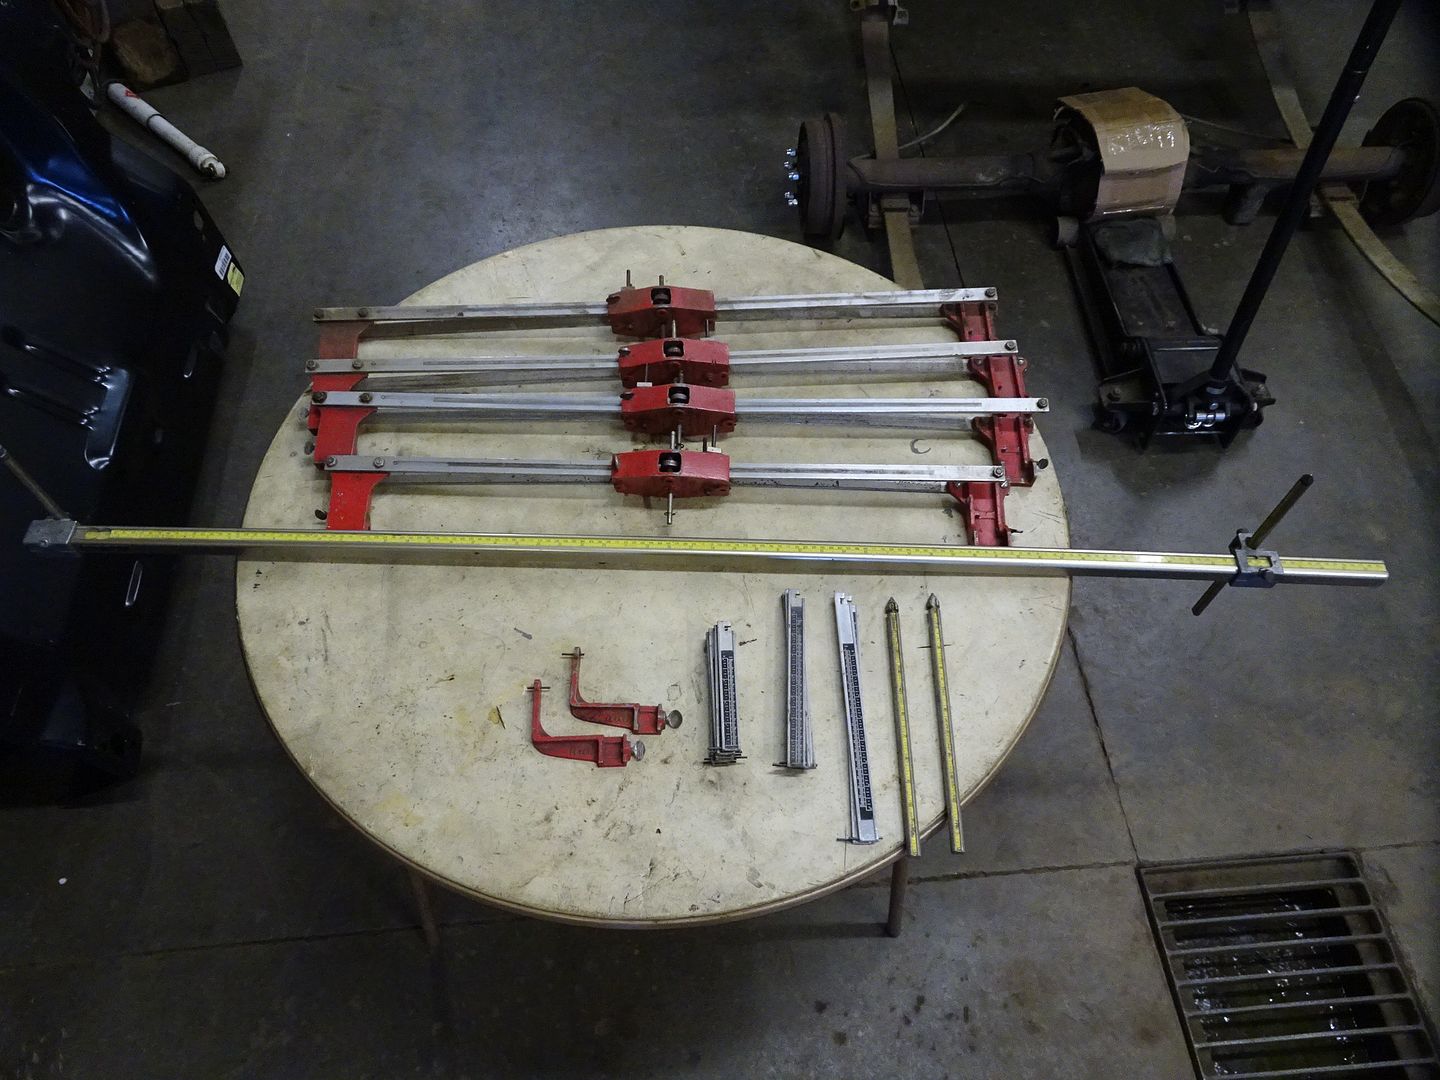
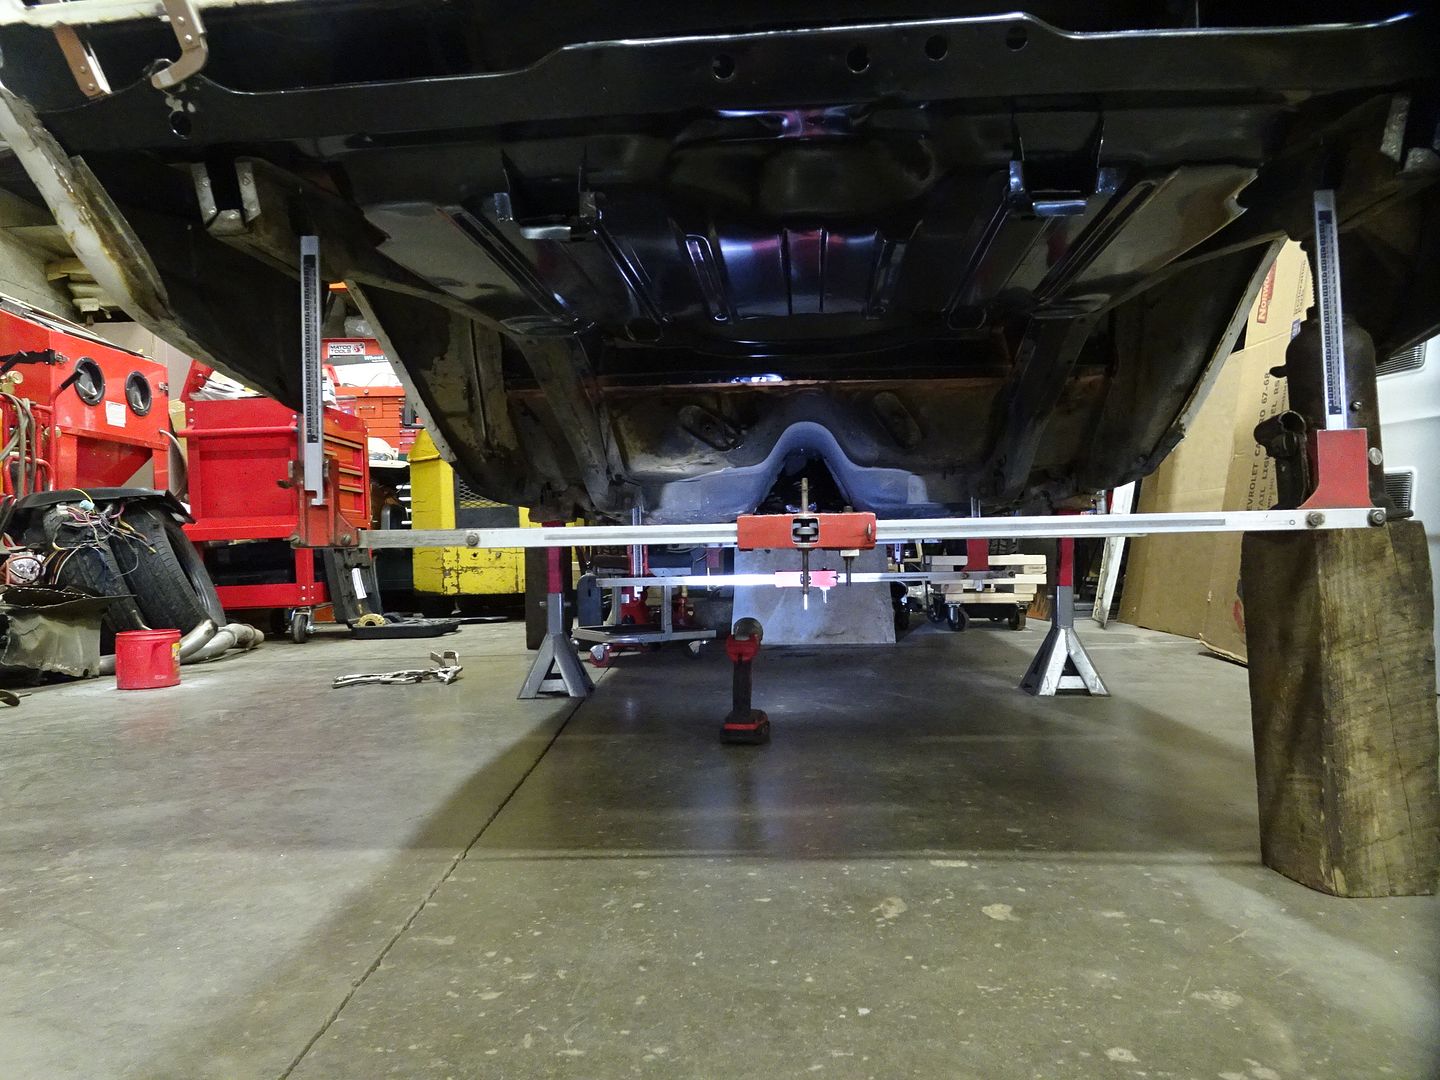
I worked part time at a major collision repair shop, but in the back room doing restoration work. I was fortunate to be able to borrowed a set of gauges and tram to get the floor installed correctly.

DSC03969_zpsn1bihzvw.jpg


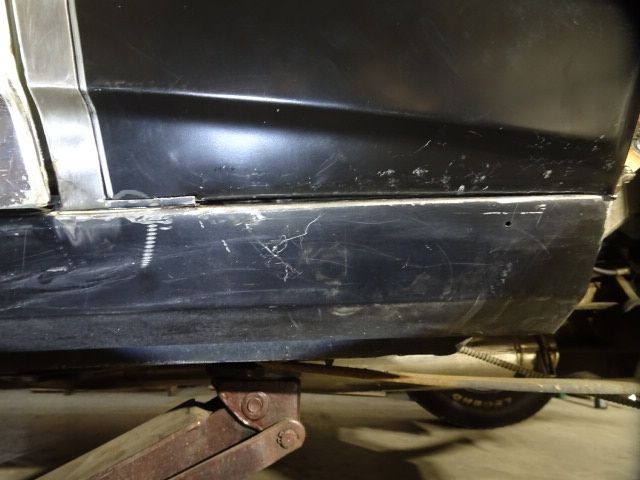
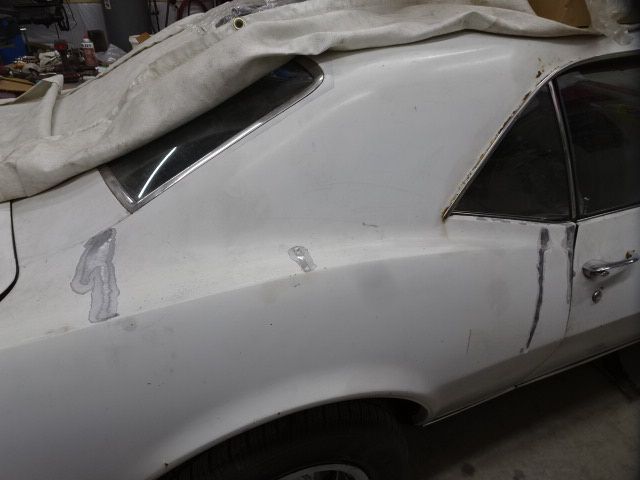
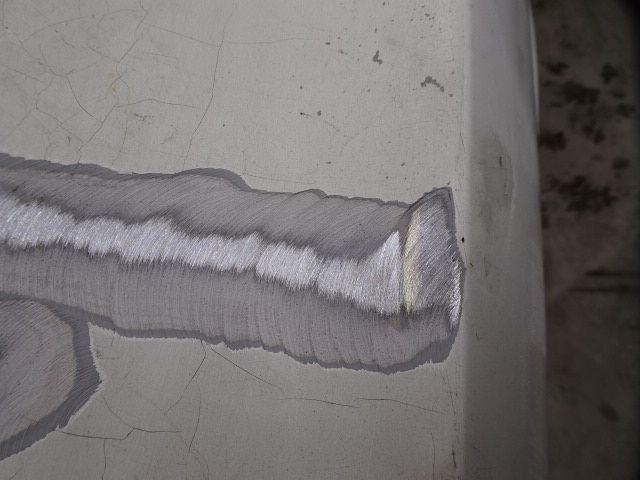
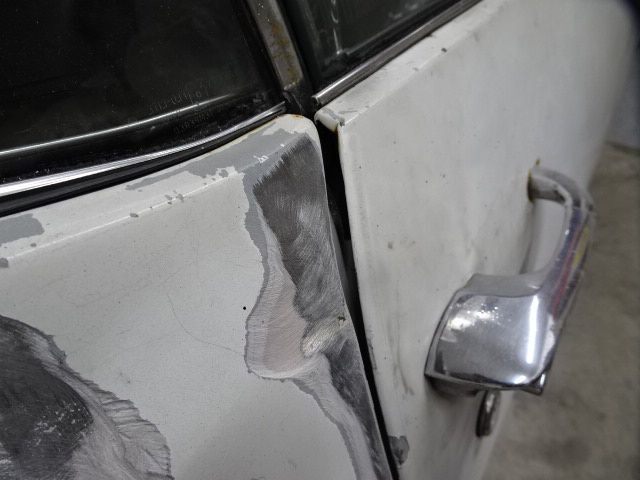
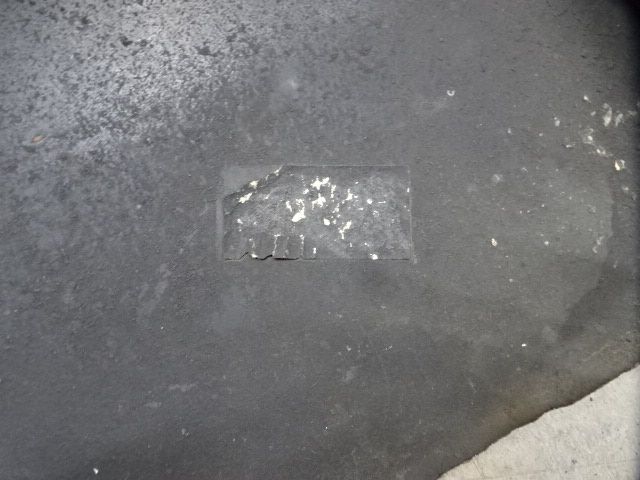
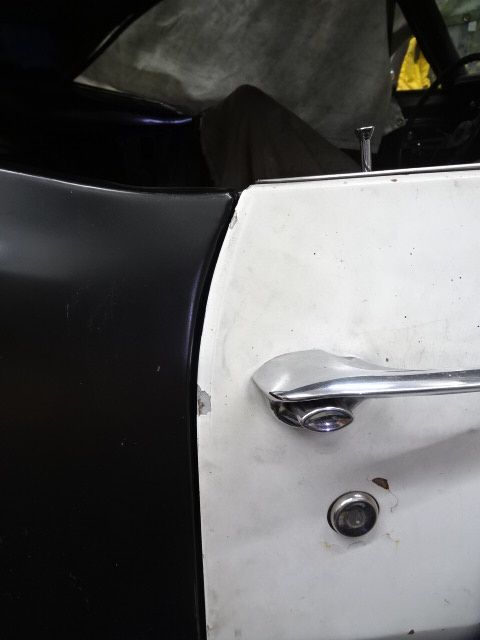
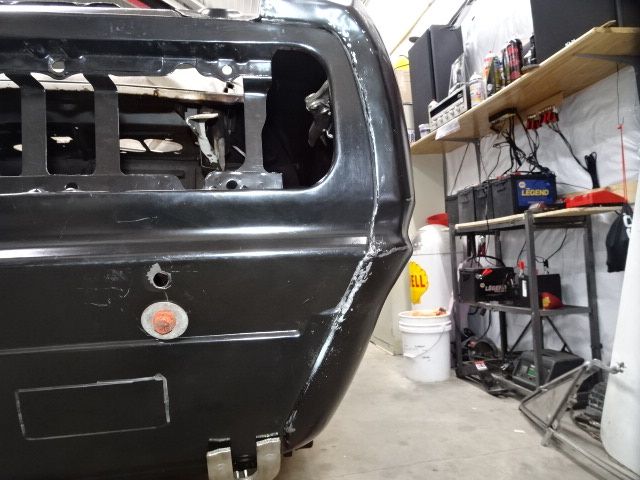
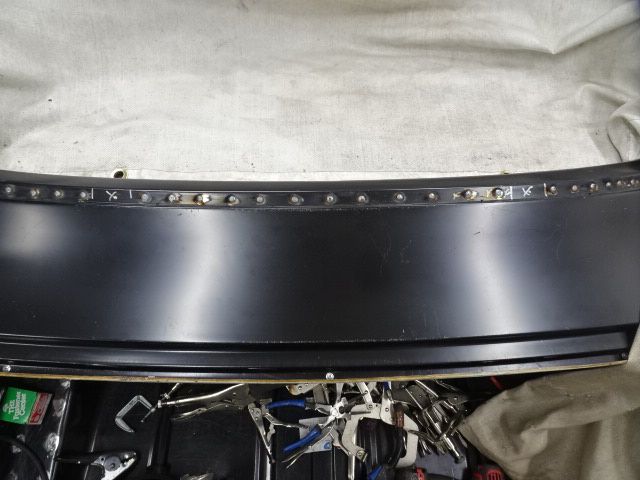
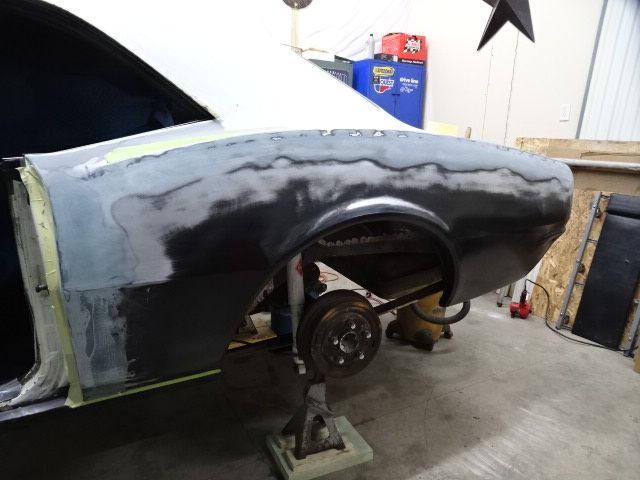
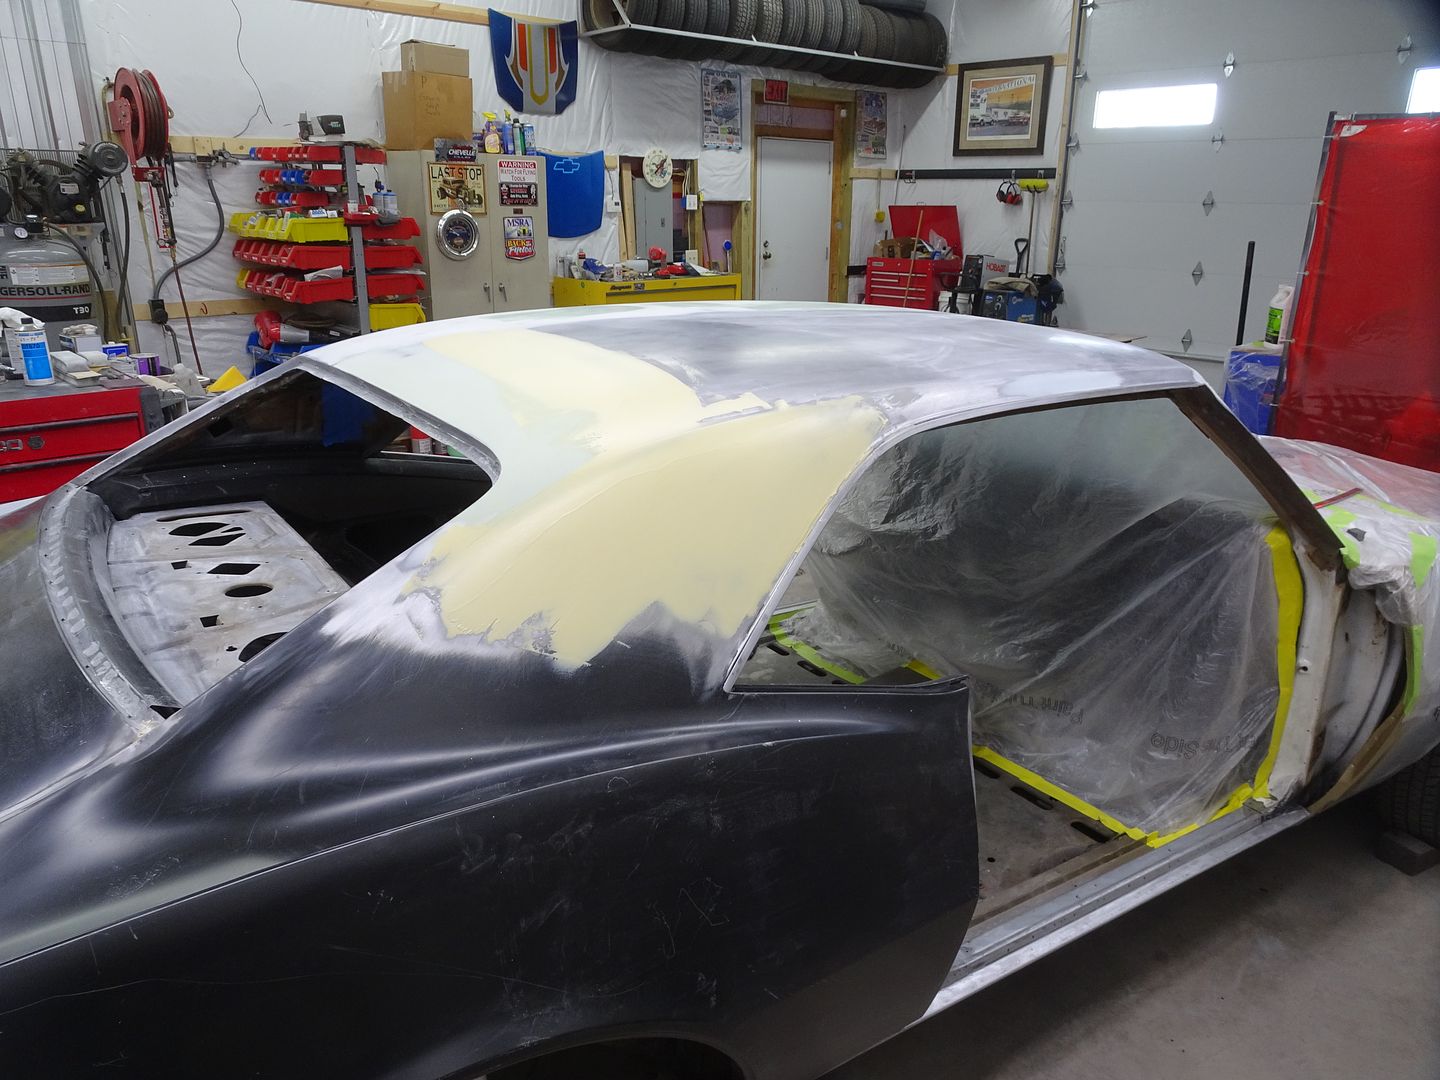
This poor car had been smacked around multiple times and this was one of the "neat" bondo repairs it had done to it.

DSC04005_zpszxw04wx6.jpg


DSC04006_zpst86qjyzc.jpg


DSC04008_zpsxeapgvy7.jpg

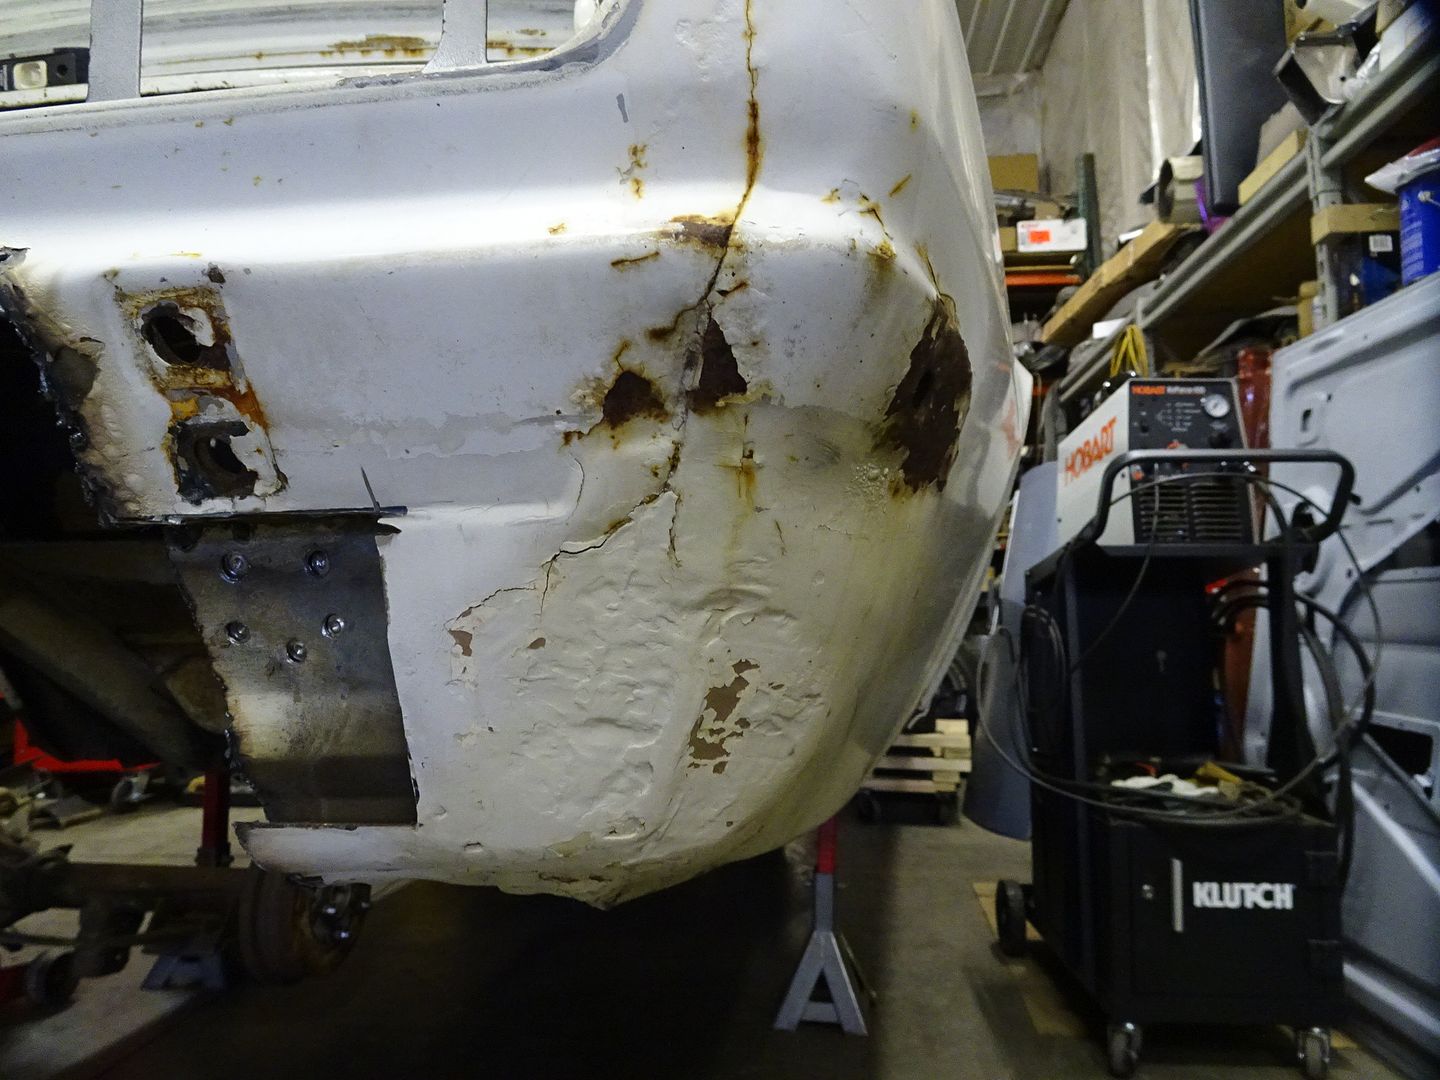
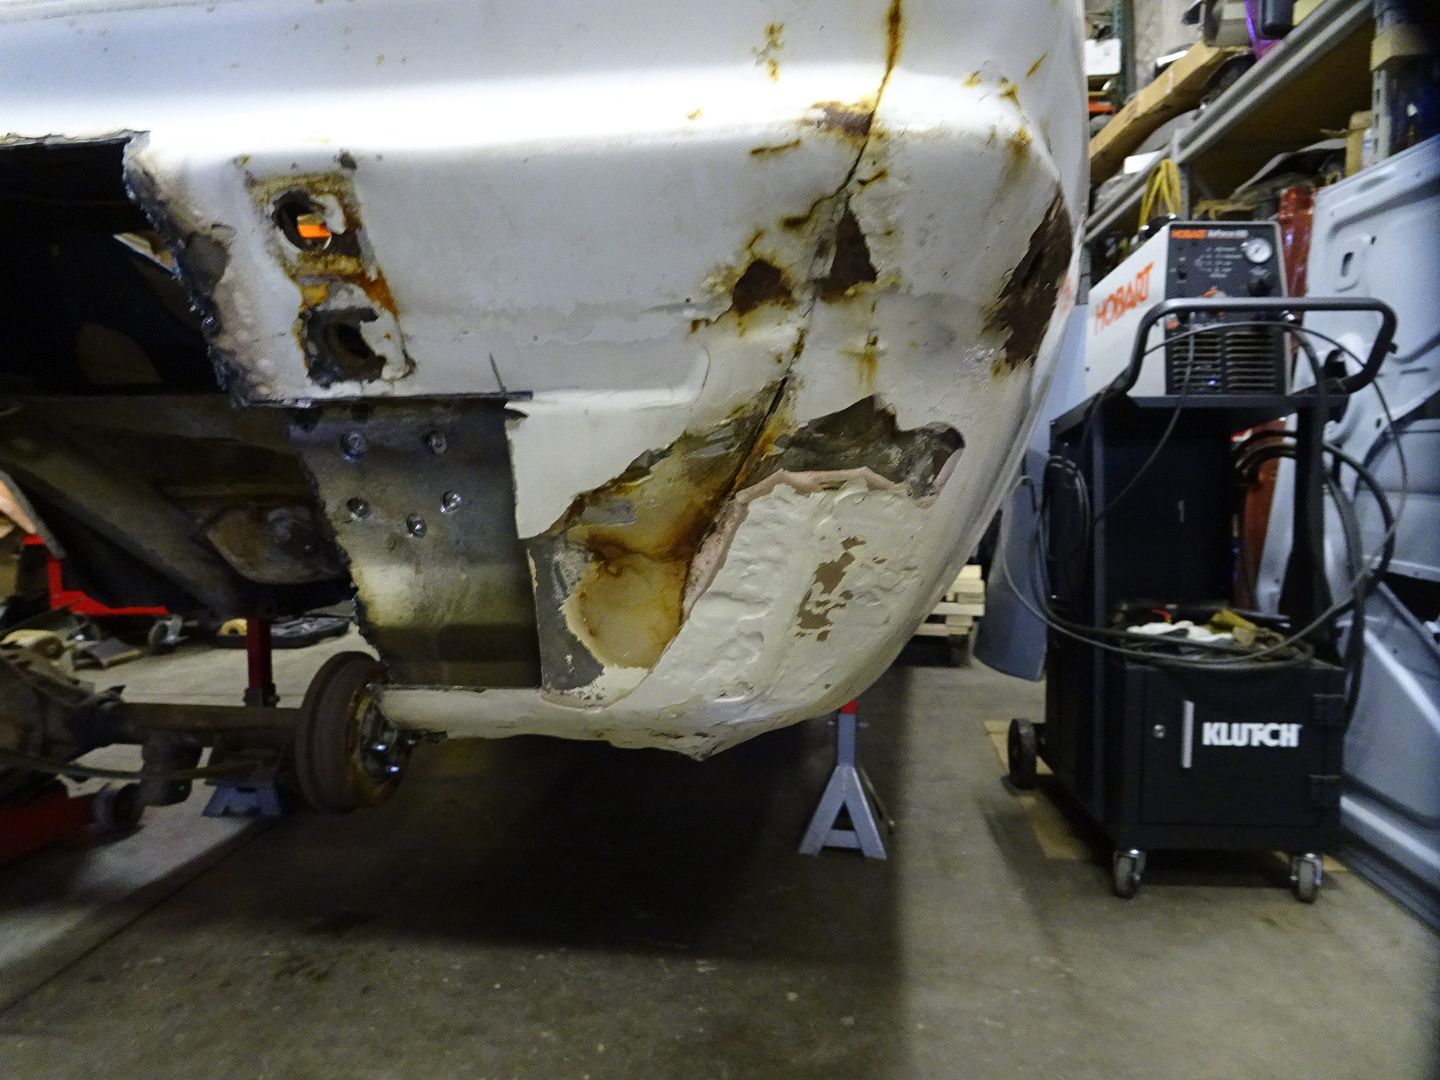
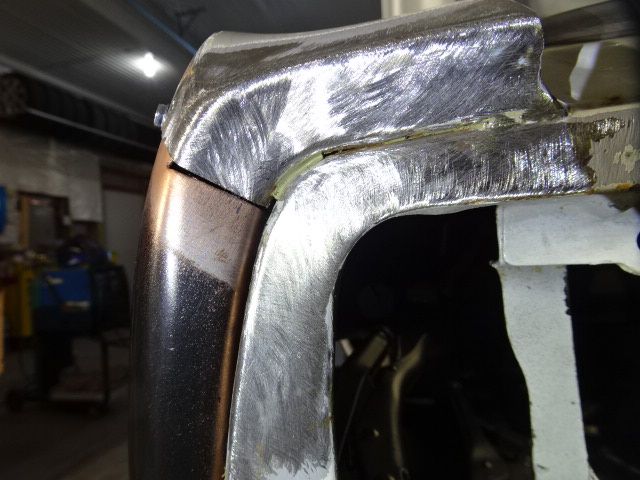
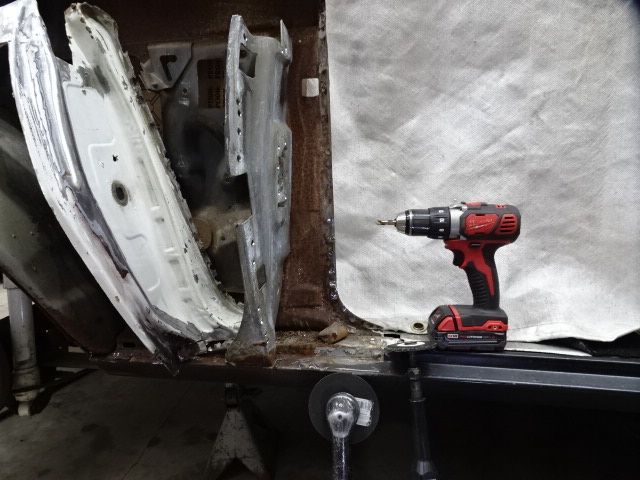
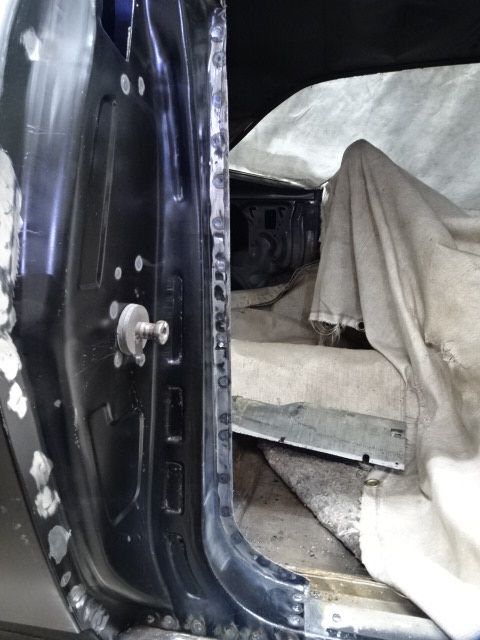
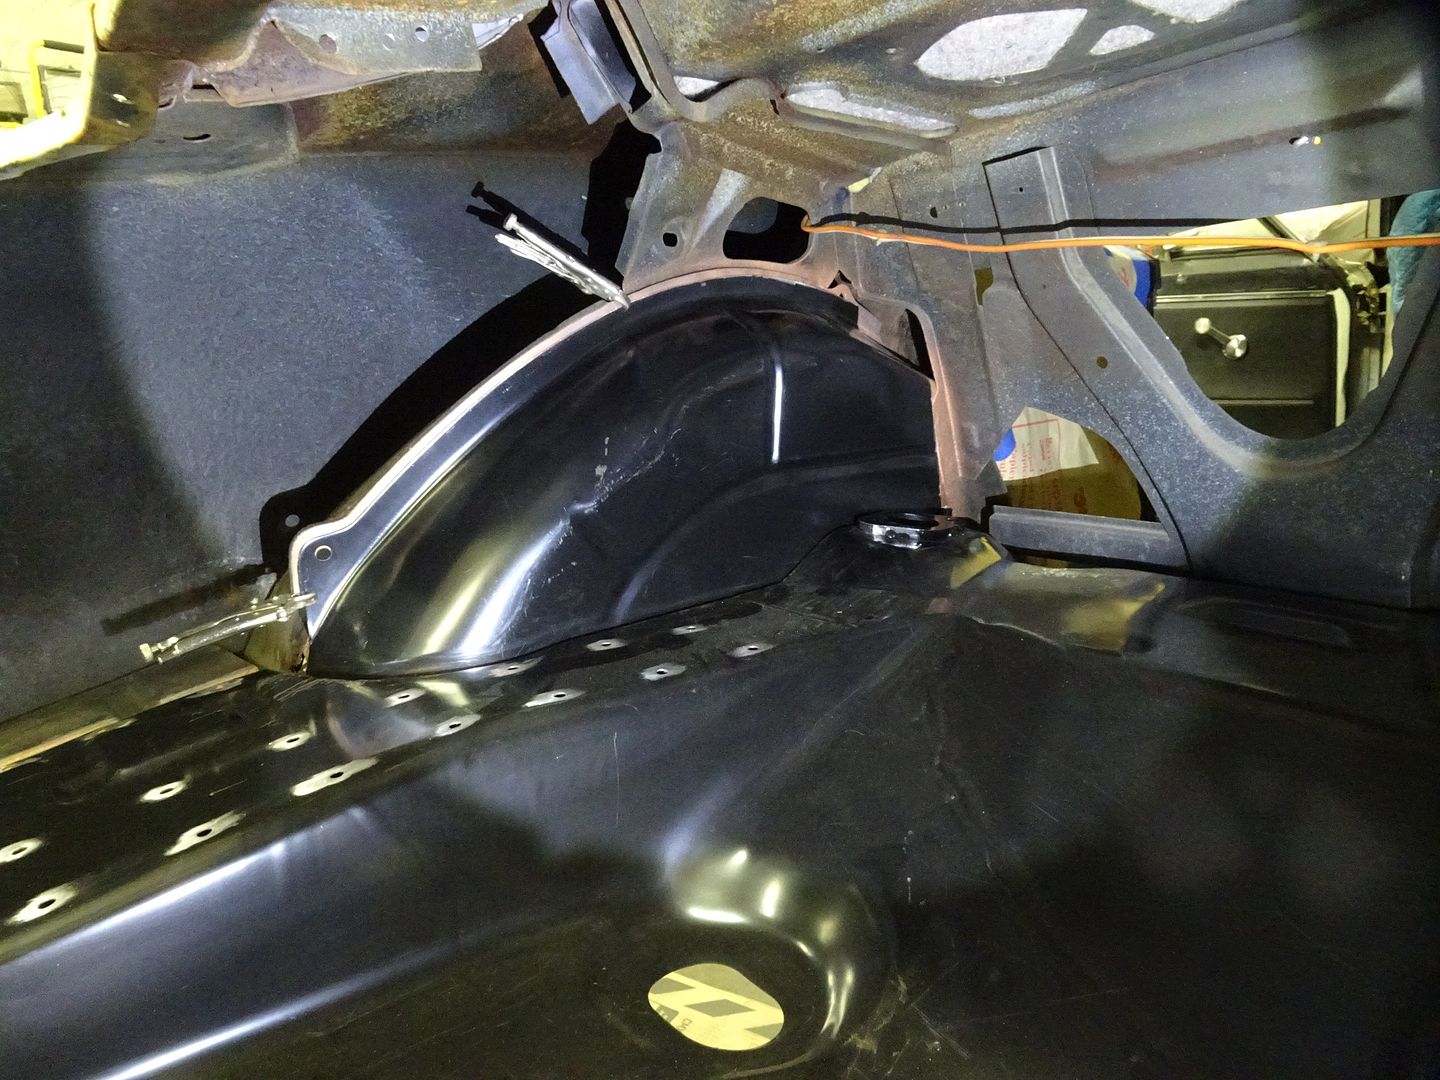
Long story, short version, I did many small repairs and "adjustments" along the way to replacing the floor as well as most of the left inner wheel house.
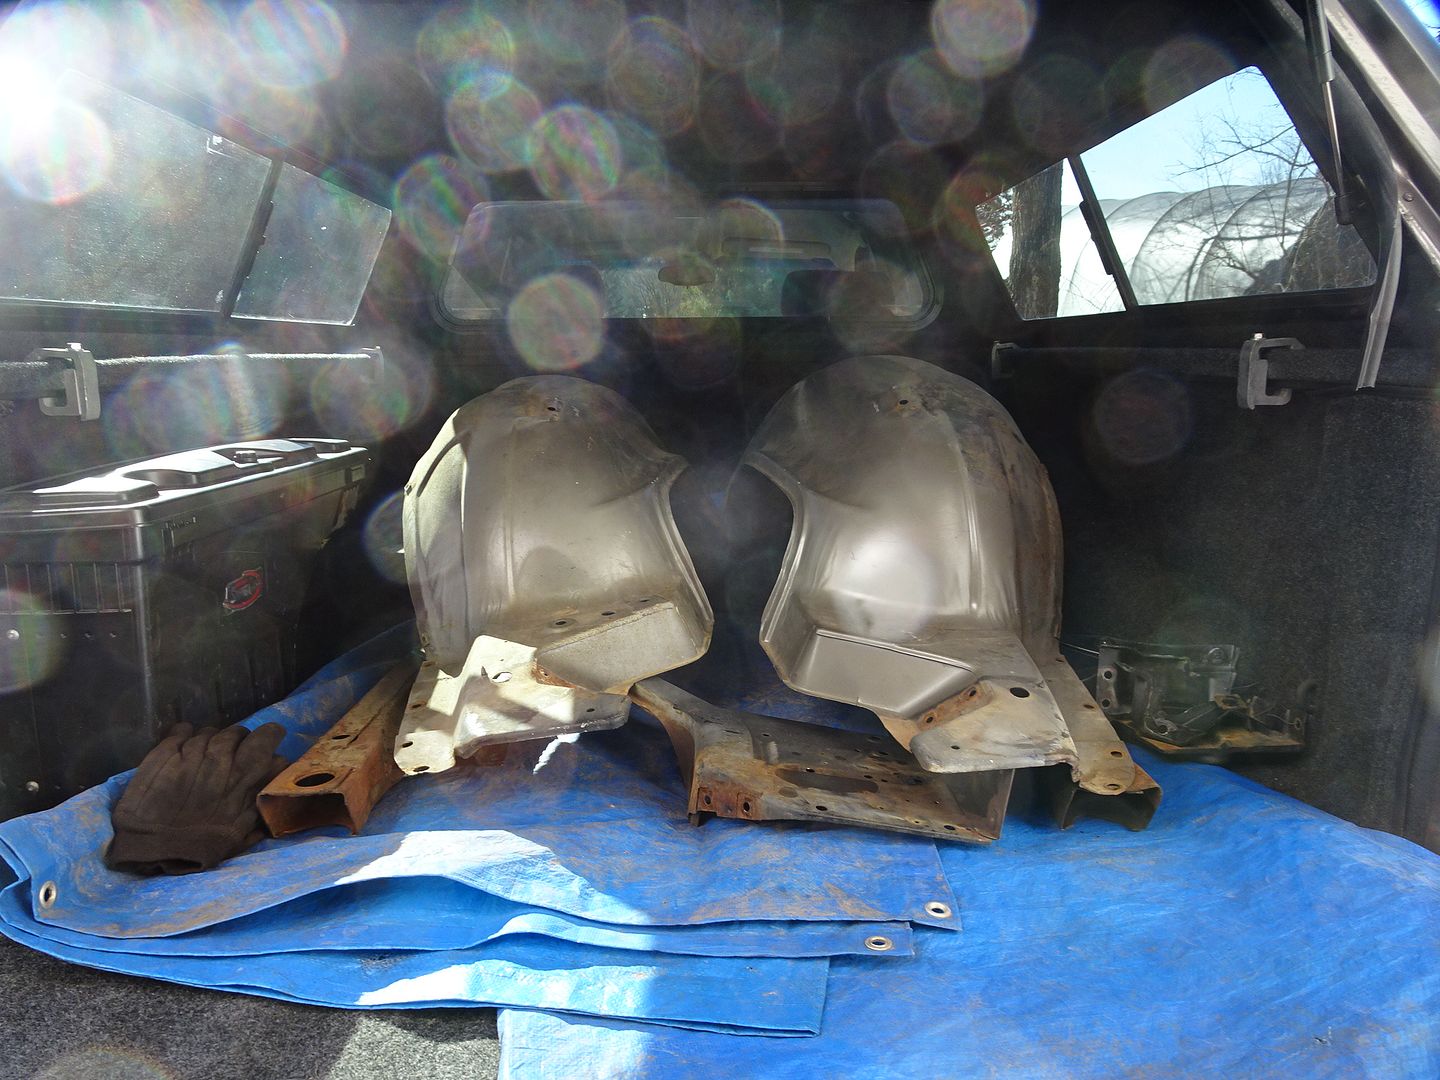
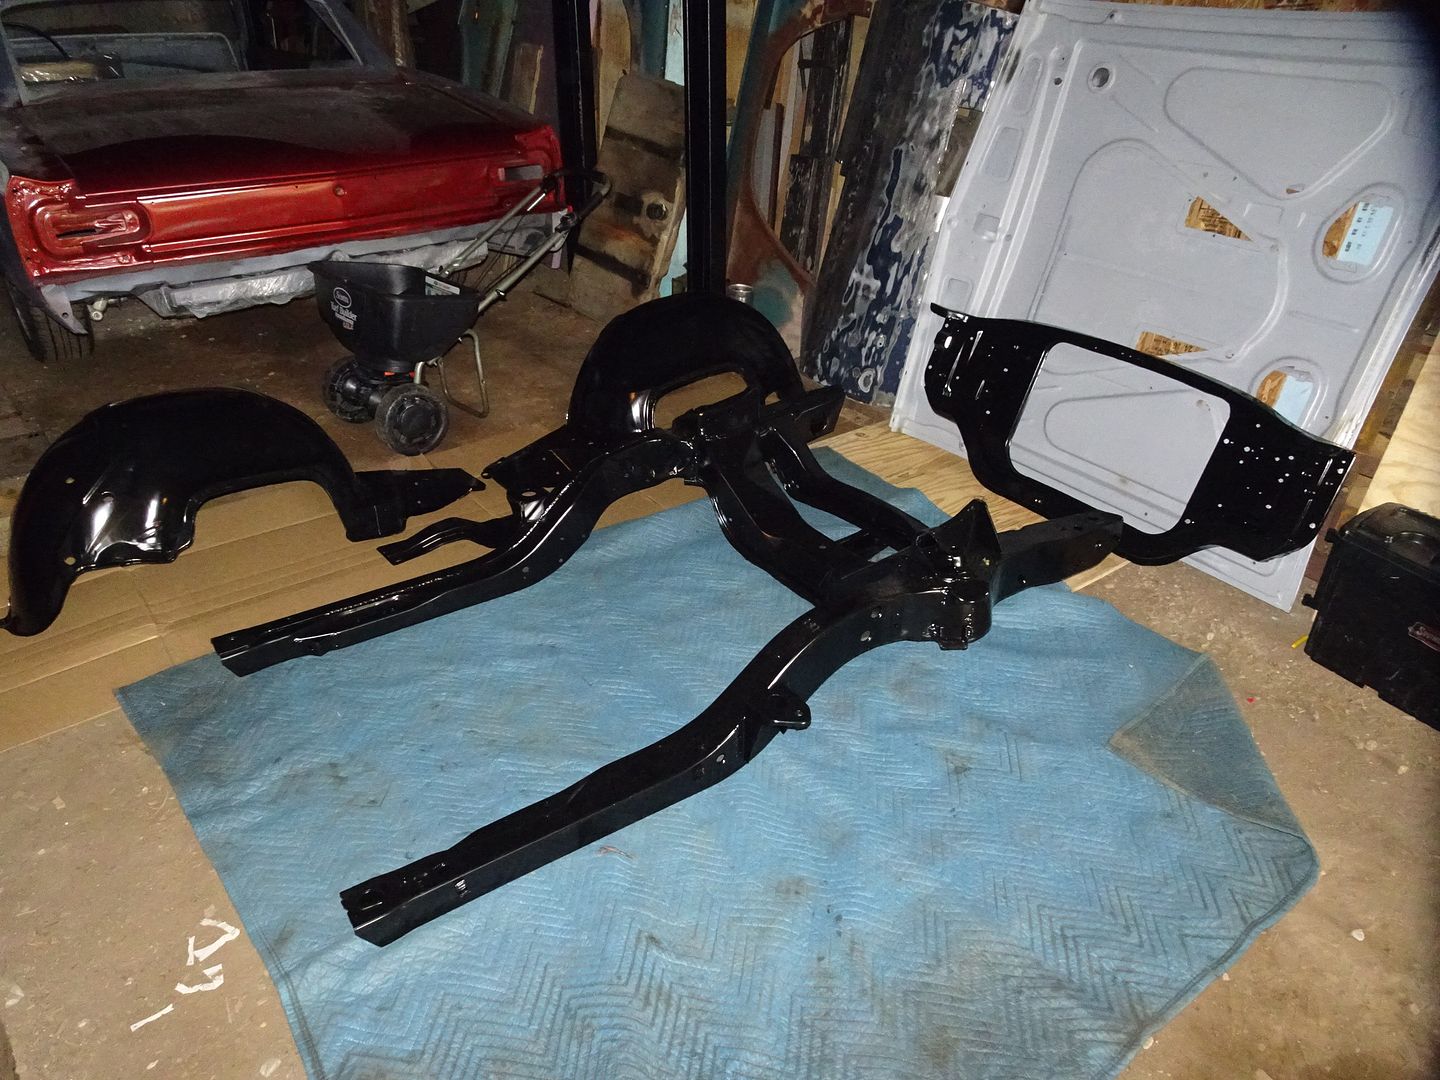
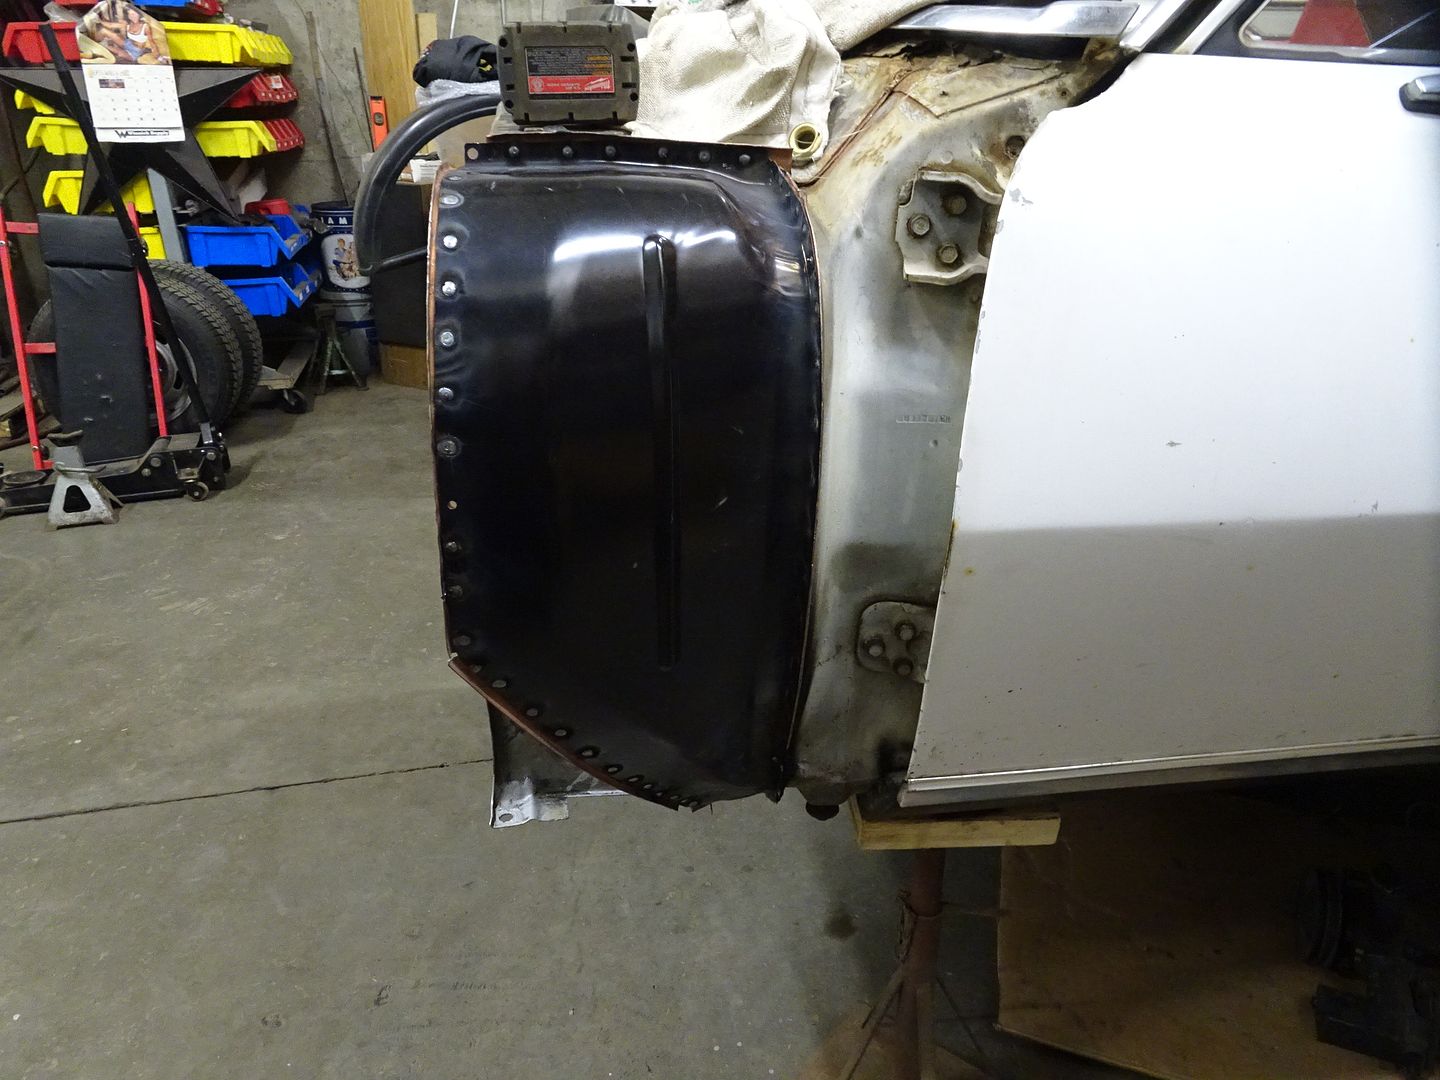
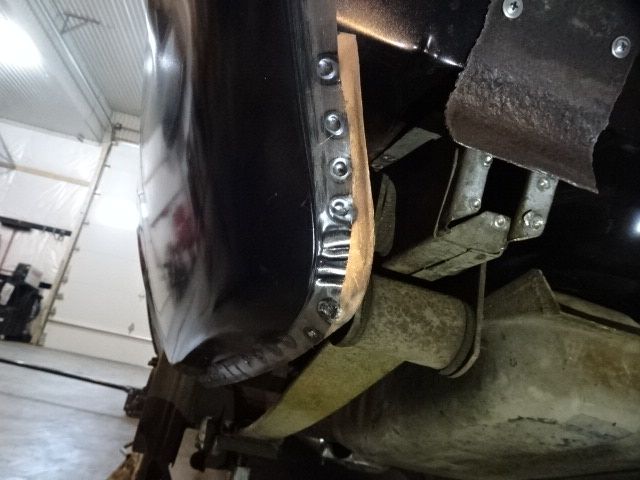
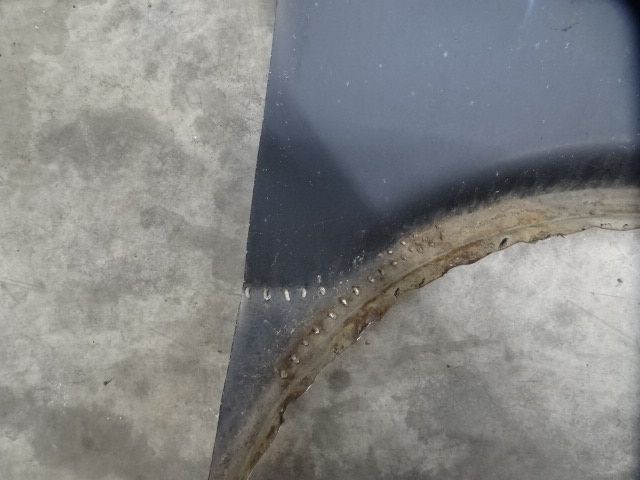
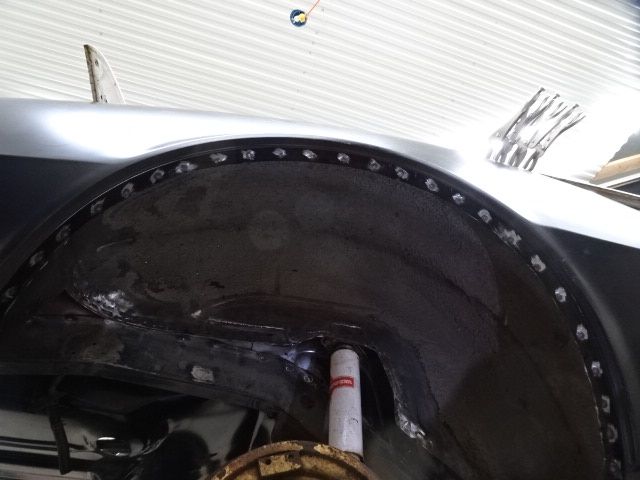
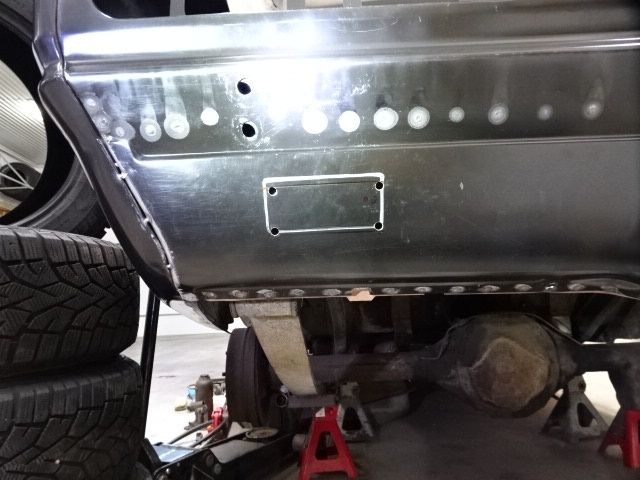
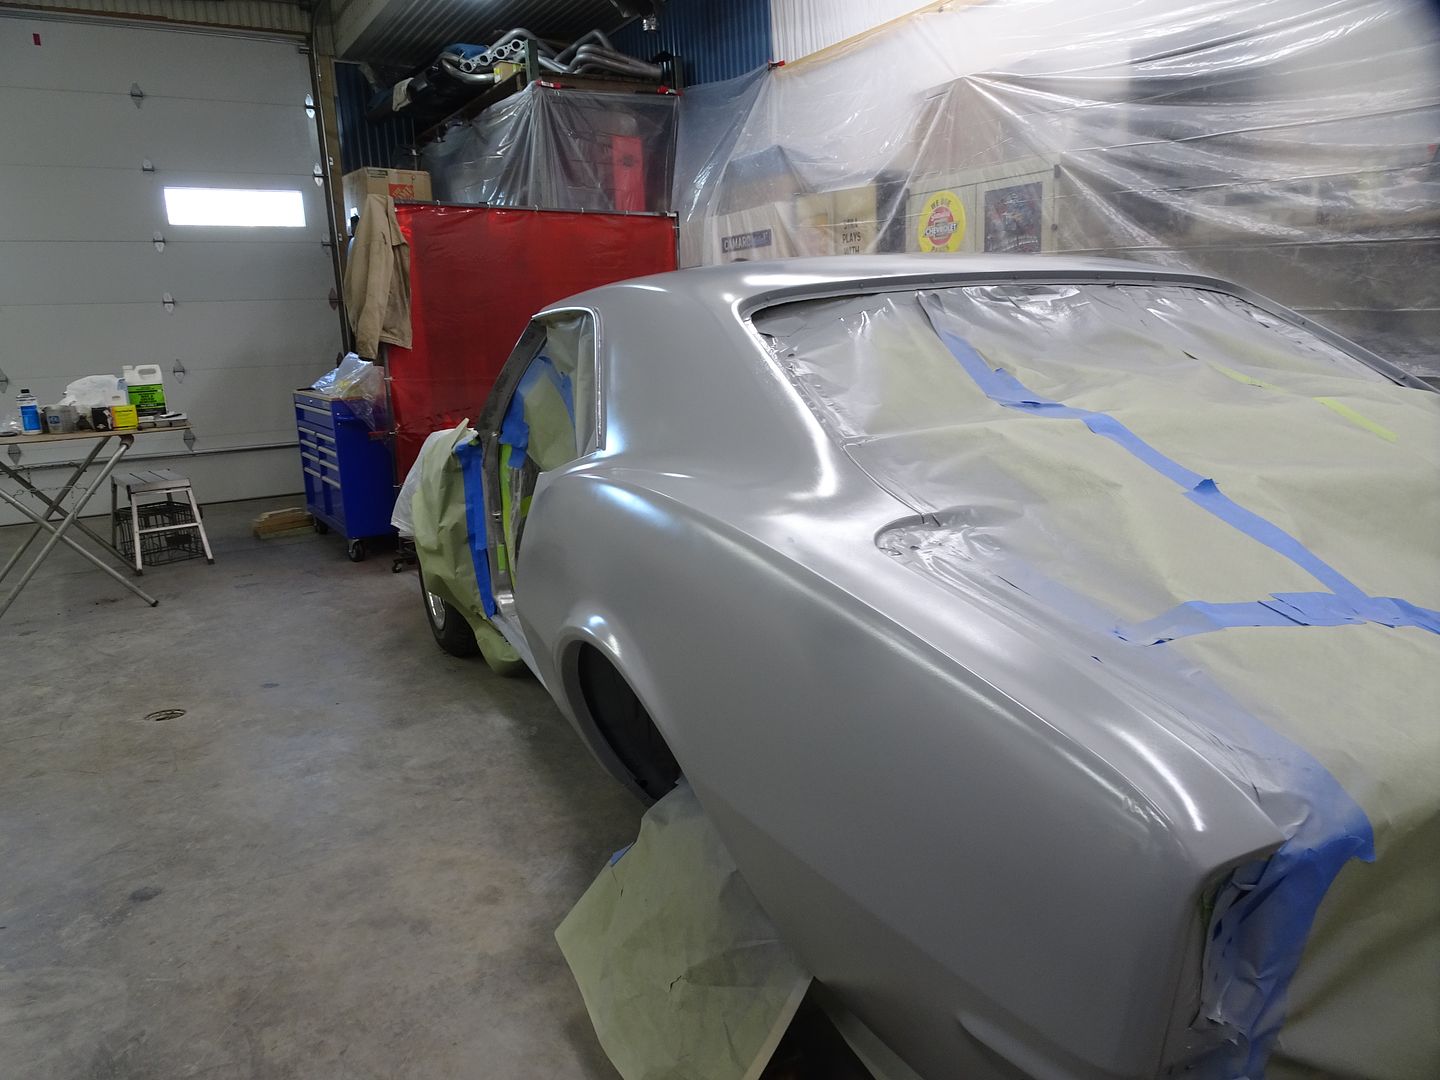
Prepped and pre-drilled to weld to the frame rails and drops.

DSC04186_zpsr7kqksep.jpg


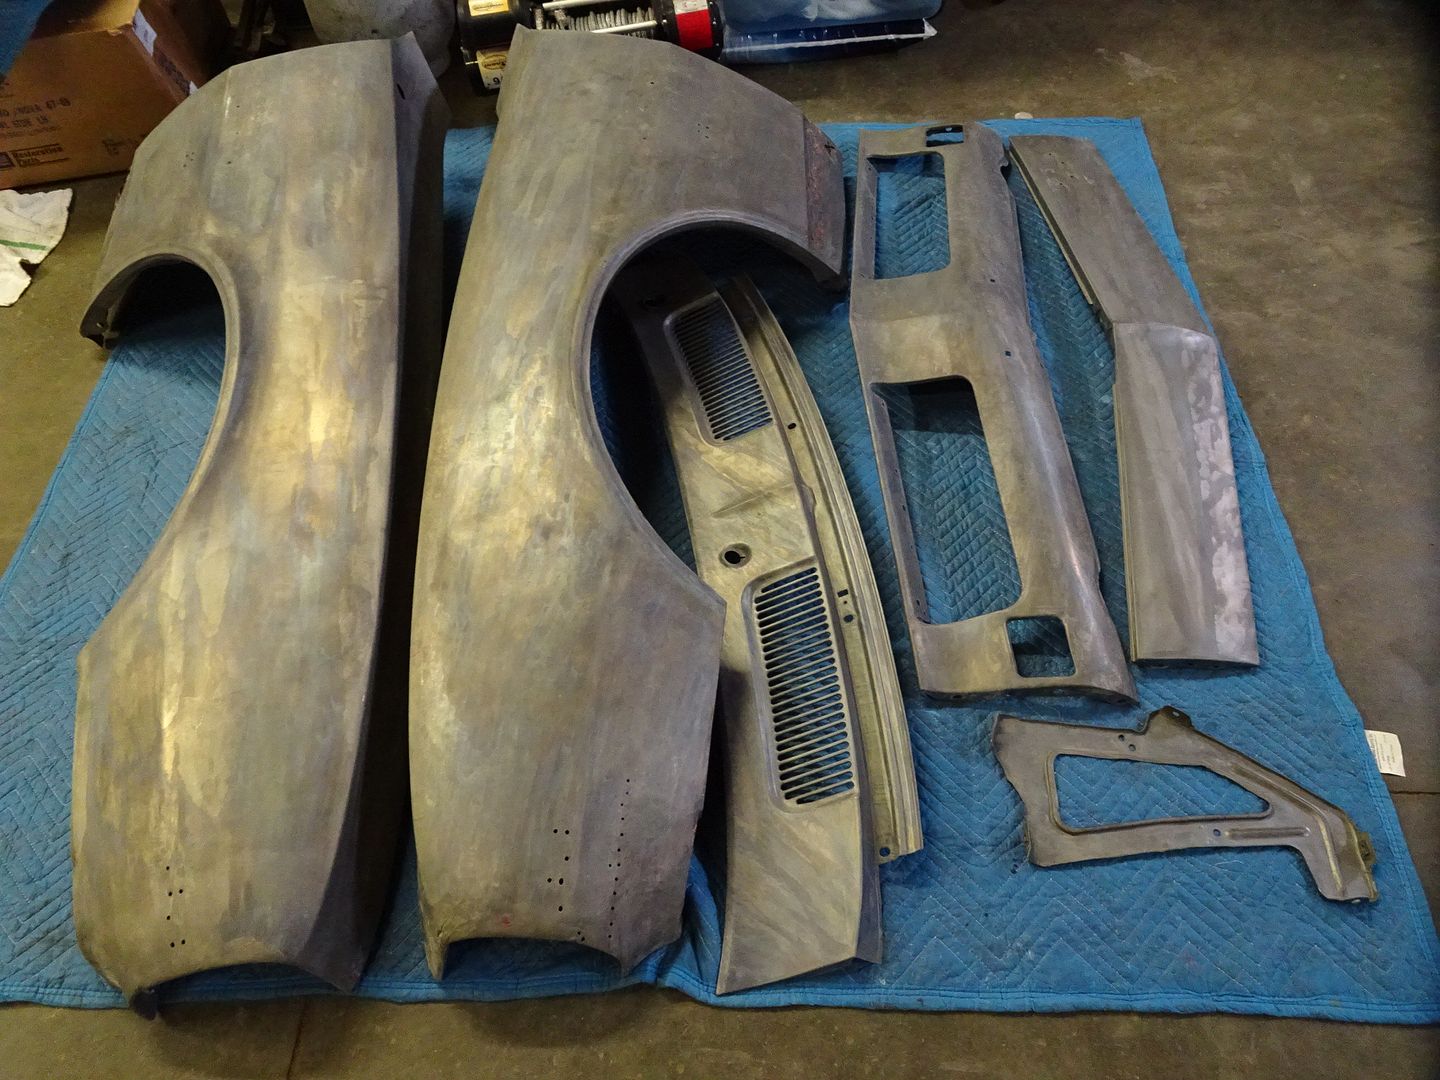
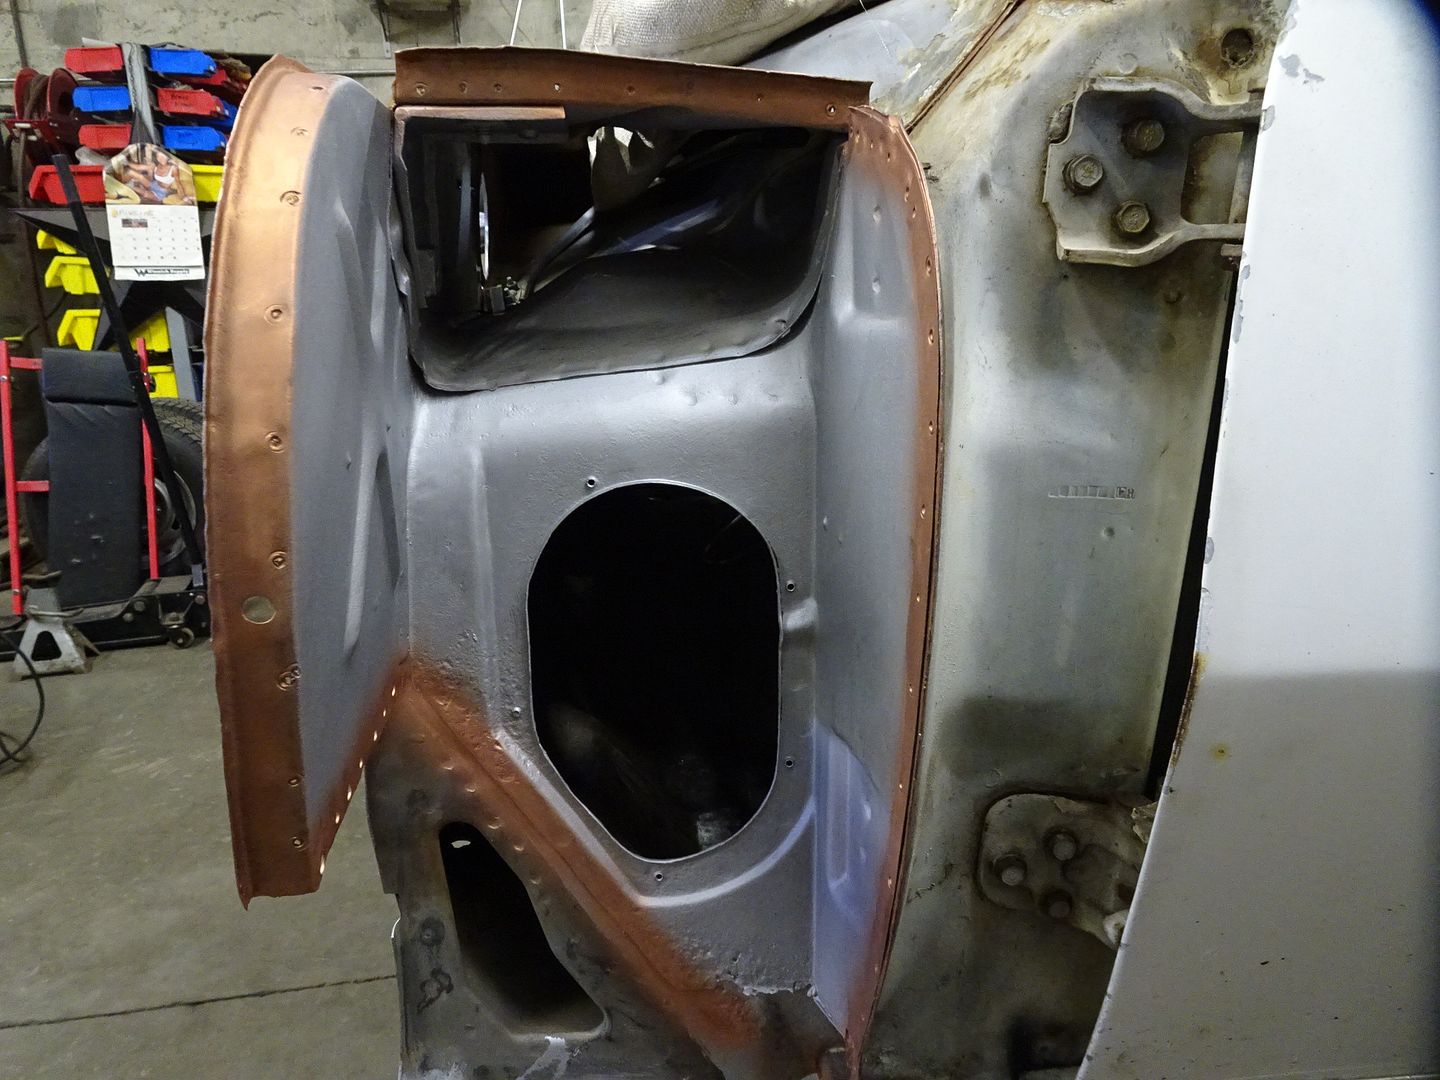
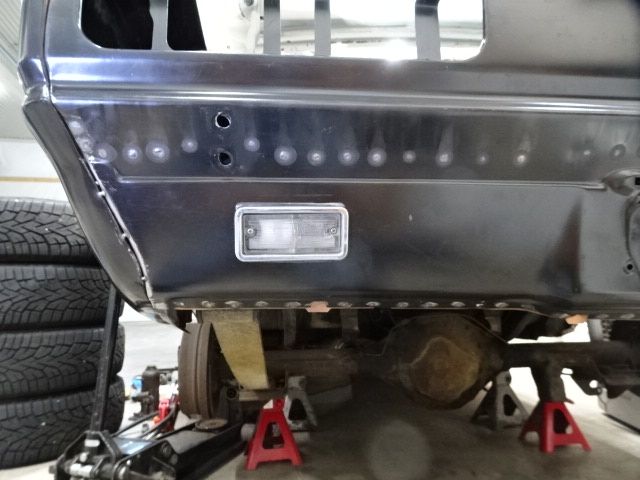
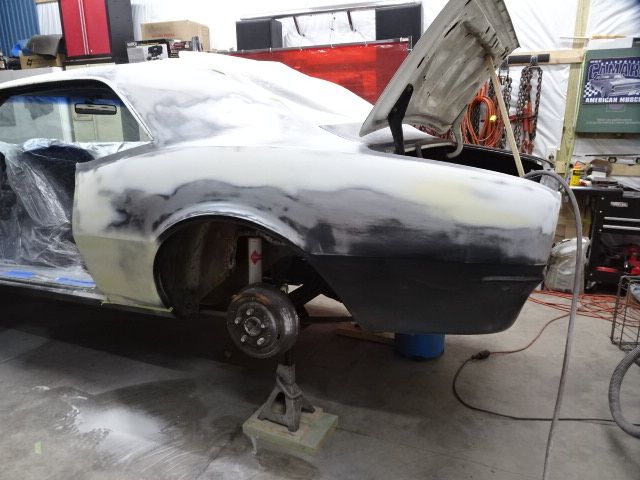
Fitting the wheel house.

DSC04196_zpsvnpy5oub.jpg

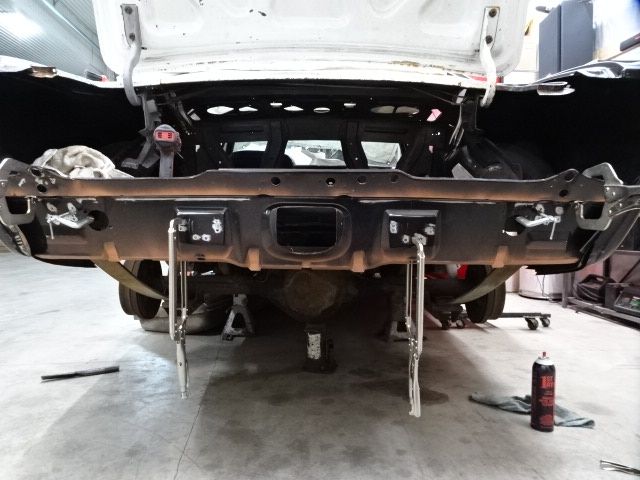
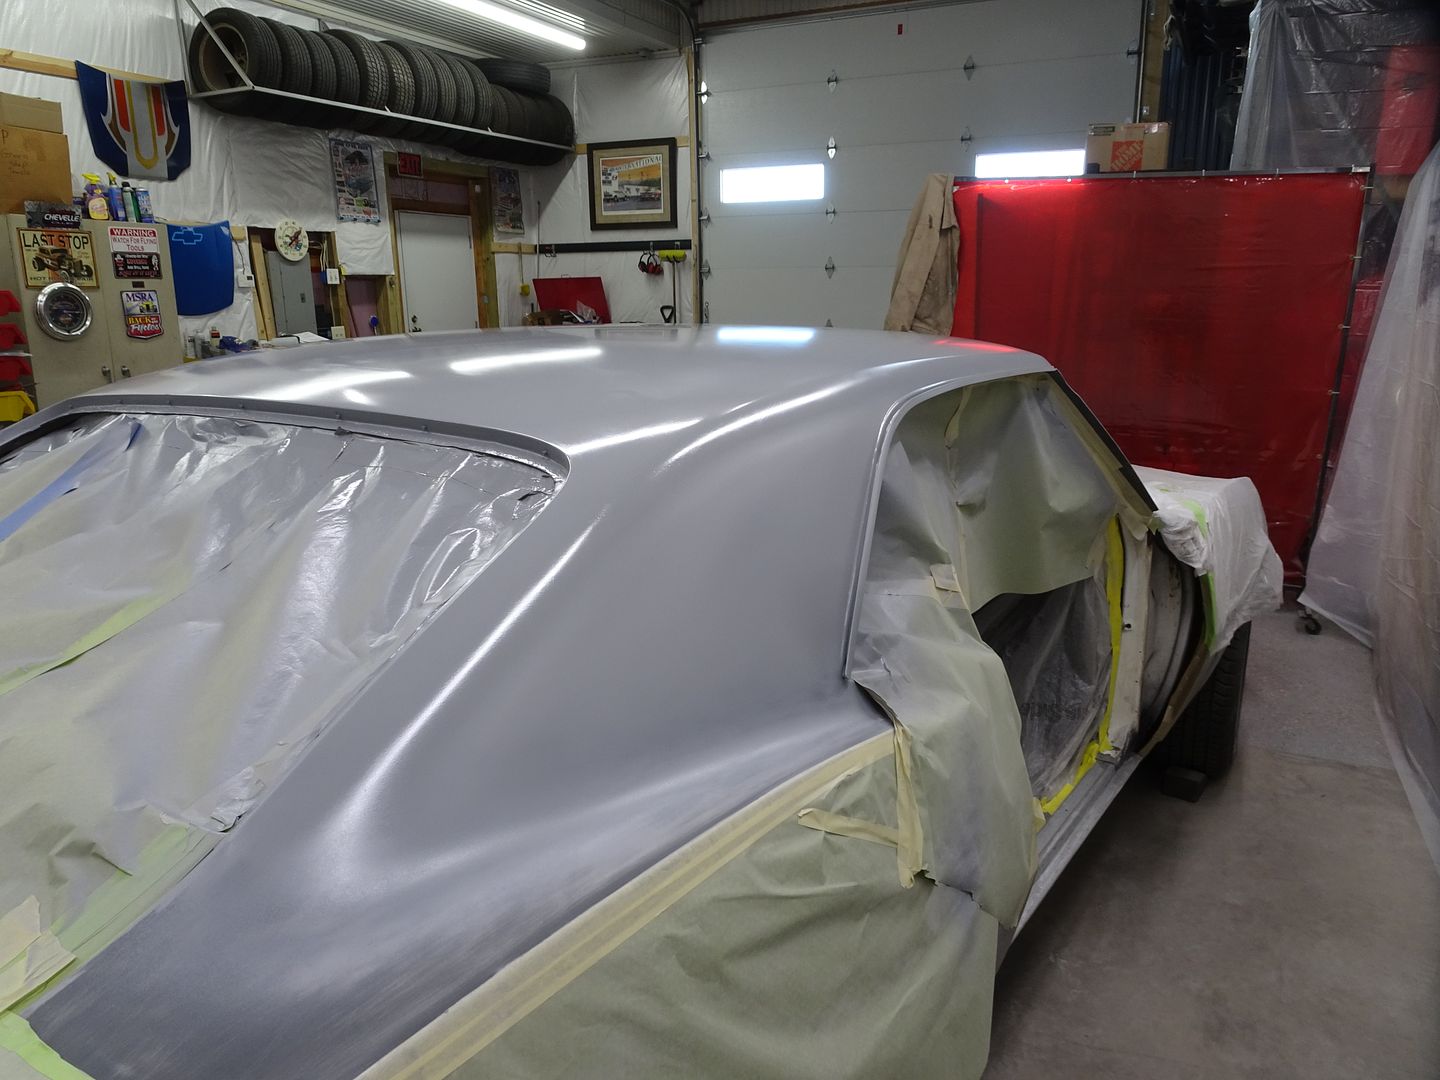
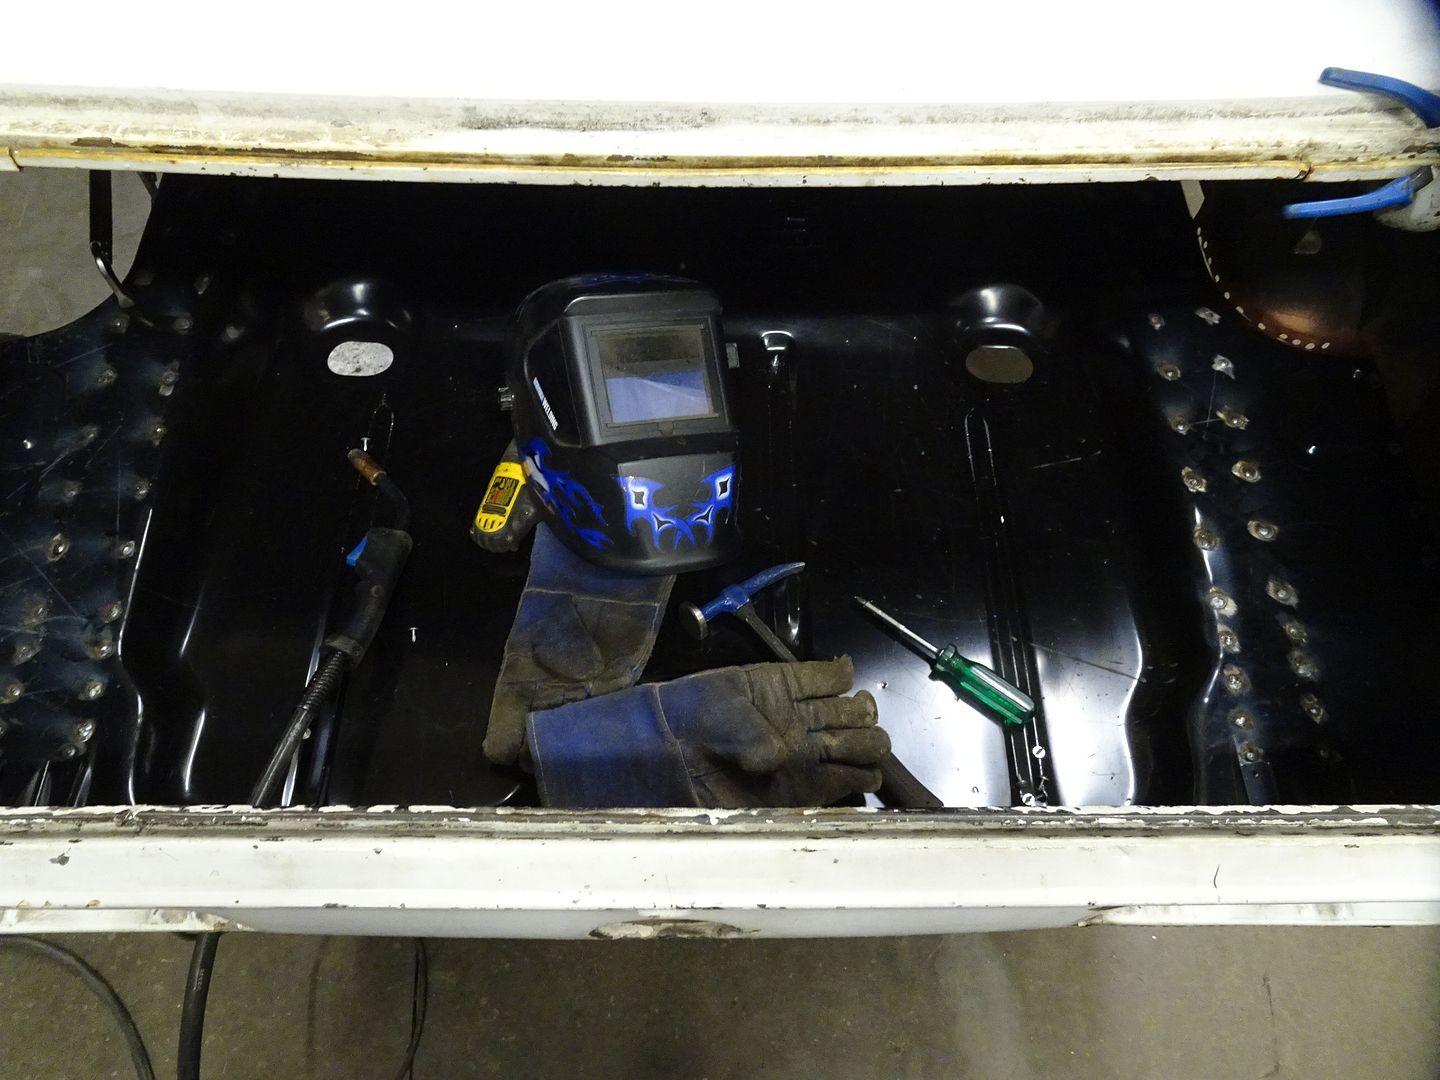
All measured, aligned, clamped and ready to weld

DSC04198_zpsw7vmsknb.jpg


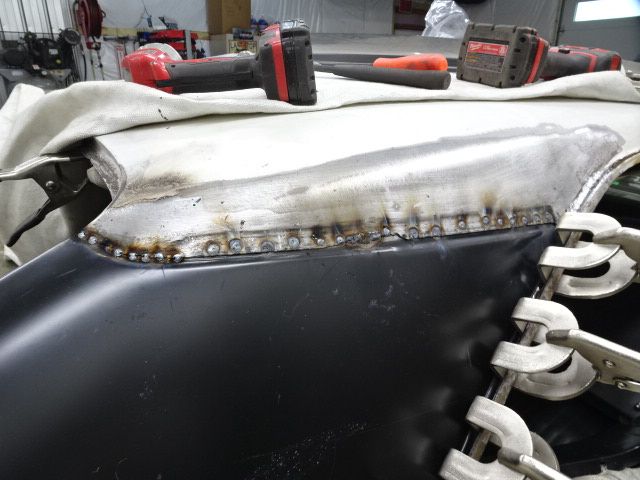
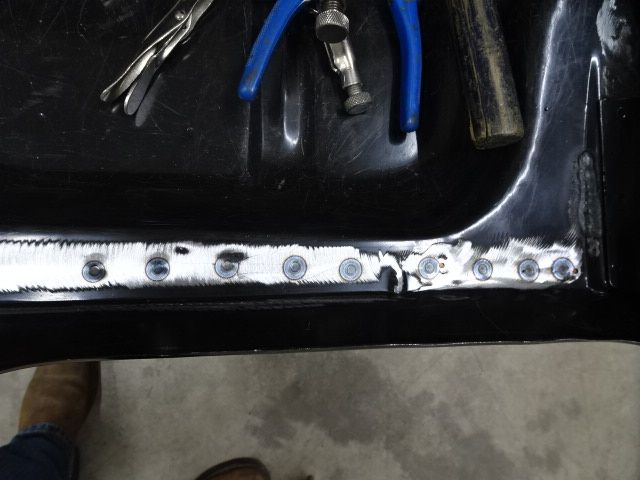
And the welding fun begins.

DSC04200_zpsnmz9s16s.jpg


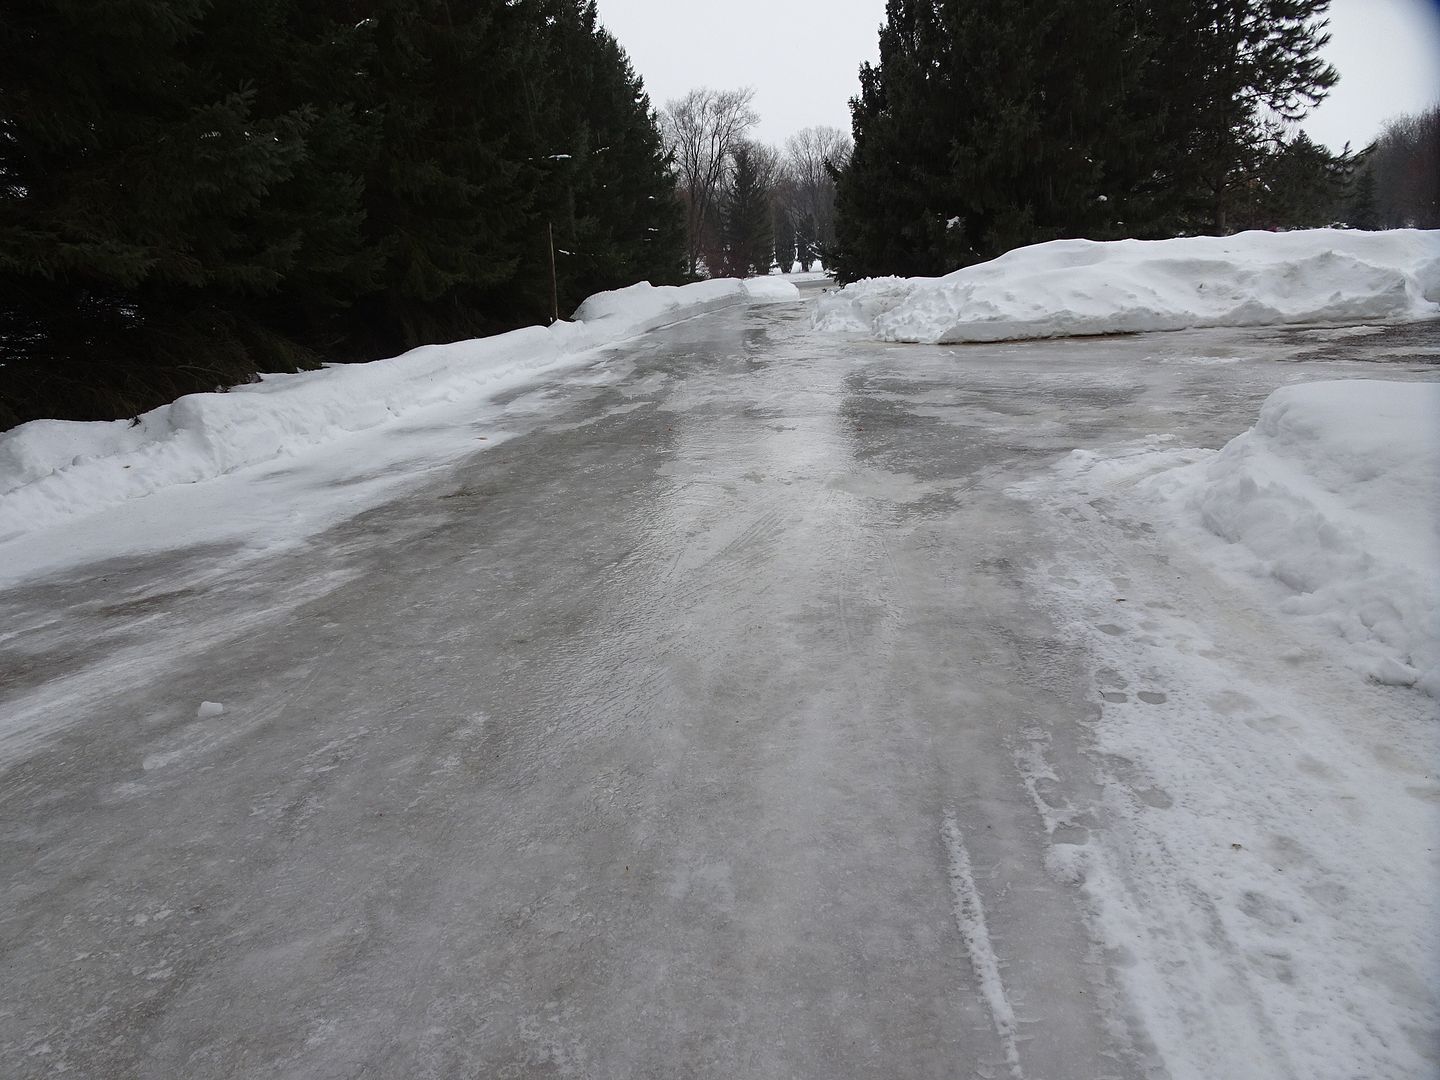
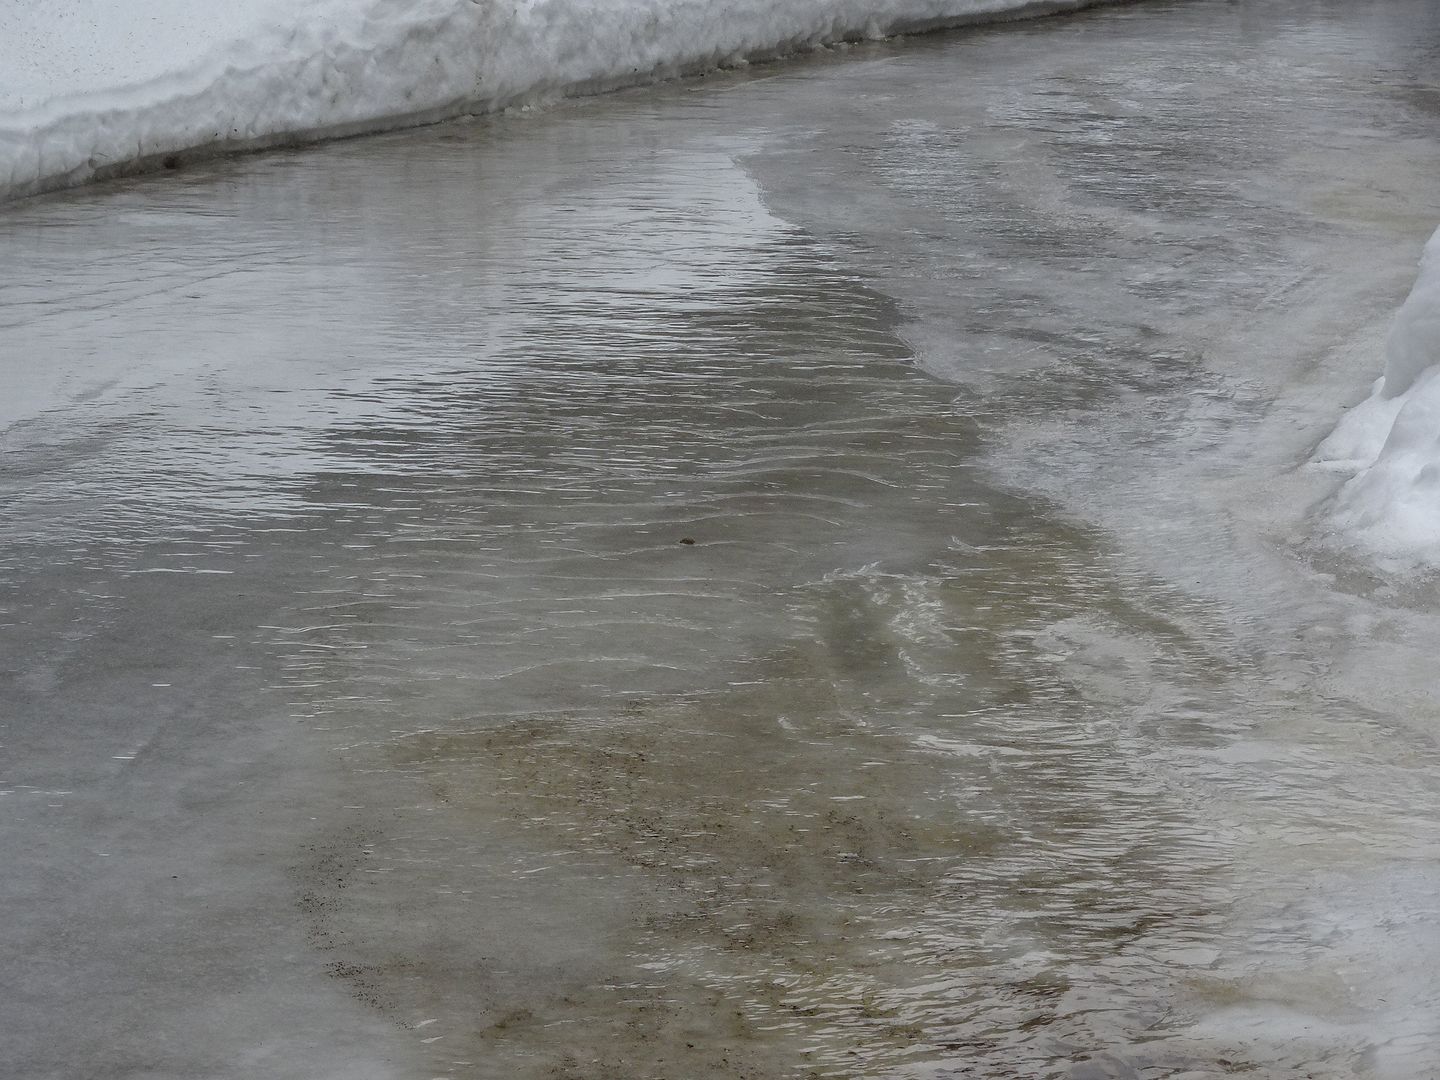
My shop driveway March 9 2019. We got 2" of rain and that is 300 ft of ice slide to the road. The culvert was frozen and the ditch flooded and overran the driveway, washing out the gravel. What a fun 2 days that was cleaning up that mess... anyway, back to the program.

DSC04206_zpsbqu9hozd.jpg


DSC04208_zpskdoanfke.jpg
 
Good stuff Mitch.
I'll be following along..............
I wasn't aware you were on this forum too, hope things are well with you. I haven't kept up with the Chrysler build. Are you going to be driving it this year ?
 
I wasn't aware you were on this forum too, hope things are well with you. I haven't kept up with the Chrysler build. Are you going to be driving it this year ?
ha, funny stuff right there.

Maybe in a few years and it will be far from finished.
 
About the time I got the floor and wheels houses all in, my local Chevelle Club was looking for something to do for a club meeting/tech session, so in May. I had a set of Global West tubular control arms and a disc brake conversion sitting on a shelf for about 5 years, so we decided we could do those swaps as a project. I spun the car around in the shop for better access to the front and removed the wheels a week ahead of the day. The frame rails were oily, dirty and generally nasty looking so decided to clean them up and paint before the swap. Well one thing led to another and by the time the club was done with it the next Saturday, I had a "LITTLE" more of a project to deal with.

DSC04243_zps6099tctm.jpg


DSC04242_zpsxyvayrrm.jpg


DSC04251_zpss87qsg7e.jpg


DSC04256_zpszzyuhdkv.jpg


This wasn't project creep, this was a full blown avalanche. The sub frame, inner wheel houses and core support went out for powder coating and all the sheet metal went to a dip and strip place to remove the paint and filler. It wasn't just the back of the car that had been beat up. I think this was used in a demo derby at some point in it's life.

DSC04281_zpsyws9vge4.jpg


DSC04307_zpsror4hc9e.jpg


DSC04425_zps3vqtrdml.jpg


DSC04426_zpsjbj3ikah.jpg


The left fender was really bad. The entire nose had been formed out of filler over shoddy metal work. I attempted to iron this out, but my skills weren't any match for this and I started looking for a better fender.

DSC04720.JPG


So, onto the firewall, which was stripped and prepped for paint.

DSC04379_zps526zjt7j.jpg


Rust in the lower cowls was removed and replaced.

DSC04463_zps0izkh2dc.jpg


DSC04466_zpsgf9ylfmd.jpg


All the bracketry under the hood was media blasted and painted with SPI black epoxy, which matches the powder coated nearly exactly.

DSC04438_zps373h4ydm.jpg


Blower housing, column support, park brake, anything I had removed was blasted clean, primed with SPI epoxy and then painted black.

DSC04503_zps5awxzpjr.jpg


DSC04502_zpsogadtcpi.jpg


DSC04519_zps0kcn3lzq.jpg


Along with the firewall and cowl sides.

DSC04533_zpsjrjzkjjl.jpg


I then started assembling the front subframe. A friend in the Chevelle club had built a mild performance 350 for another member, who then changed his mind and wanted something different, so he sold it to me for his cost. I, also, had a Muncie 4 speed with a broken main case that I had been planning to rebuild and put in this car, so now was the time.

DSC04547_zps3mbthidz.jpg


DSC04586_zps3xw9eumq.jpg
 
Once the firewall was ready, I slipped the sub frame in and started adding the pieces. I cleaned and painted every part as I came to it before install. sure is nice working with all clean parts.

DSC04707_zpsfsa6fxtg.jpg


DSC04658_zps2i5nc3qb.jpg


DSC04691_zps36qeu13r.jpg


DSC04695_zpsewe4b7gi.jpg


By now, it's the middle of July. We had been house shopping for 18 months, as we were close to a local airport that planned on expanding in the next few years. On July 28th, we signed a purchase agreement on a different place that, after a couple weeks of wrangling over price and things needing repair, it was finalized and a closing date of Sept. 5th was agreed upon. Oh crap, now I need to get this together enough to move it. The house we bought was vacant, as the owner had already moved into a condo, so we had the luxury of moving a little at a time until we sold our house. We put the current house on the market on October 5th and it sold that week with a November 6th closing. NOW the crunch was on. By Oct, I had primed and jammed all the metal, but had paint left over, so used it up on most of the front end.
I, also, had found an NOS rs left fender for the car, but it was in Buffalo NY and I don't have rare parts shipped in case of damage. loss or theft, so, I jumped in my HHR and drove from Stillwater, MN to Buffalo and back in 42 hours with my new fender.

DSC04968_zpsx7sc4m4y.jpg


DSC04970_zps2hffxyyi.jpg


DSC04852_zpsa4hmt7nv.jpg


Over the next week, I threw all the front end together and moved it to the new place about Oct. 15th.
Then I had to empty a 2,000 sq ft building that was packed to the 16' high rafters with "stuff", as seen in all these pics. But wait, this is only 1 half of the building....

DSC04883_zps3nk5mymu.jpg

Unfortunately, the new place had an unheated 1,200 sq ft pole building, so much of the "stuff" from my old place went into a storage locker and the Camaro sat in the unheated building that first winter. We spent the entire summer of 2020 insulating the walls, putting in a ceiling, rebuilding and adding trusses to form a cove at the front to install a 12' overhead door in a building with 12' sidewalls.

DSC05057_zps0lluqyki.jpg


DSC06621.JPG


DSC06743.JPG


DSC06744.JPG


We then put in radiant heat, which I had in the previous place, and plumbed it in and got it running by fall. That's my little helper looking at the camera. We do have a 20 something son who did help a little, but 98.5% of this project was done myself and her. She is a very accomplished forklift driver and drove me around on the pallet for about 100 hours over the summer. And that isn't an easy lift to drive. It's a manual with very stiff steering and clutch...

DSC06771.JPG


DSC07206.JPG
 
Once we had a signed purchase agreement, I had pole building contractors out to the property to give me estimates for a new 1,400 sq ft building. I had a signed agreement with Wick before we even closed on the house for one to be build in late Sept. Of course it started raining the week before that and didn't quit until the middle of Oct... We then got a cold snap that put enough frost in the ground to get the equipment into the back yard to put up the shed in late November. 2 guys showed up on a Wednesday with the truck hauling the building material and in THREE days built this !!

Day 1 8 am the truck arrives

DSC05141_zpsobxvrofg.jpg


This is sunset, when they quit for the day

DSC05147_zpsc8pq4zkj.jpg


Day 2

DSC05156_zpsfww1cp53.jpg


Day 3, unbelievable to me...

DSC05171_zps0pvaxoib.jpg


They don't install the overhead doors. Another contractor came out a week later and installed that. This one has 13' sidewalls for the 12X12 door.

DSC05173_zpsf5lgfocy.jpg
 
This is over a 2 year period, so yes, I do sleep, some, but I've been accused of being an over achiever, but I don't believe that. My wife tells me I should rest more, especially at my "age", but I tell her I'll have plenty of time to rest when I'm dead. I've got WAY too much to get done until then.
Back to the Camaro, fall of 2020,

Time to address all the filler from rust and collision damage in the left quarter. Most of this panel is still very good, but I've done the patch panels around the wheel opening in the past on other cars and it never turns out as nice as I would like it. So I bought an AMD skin and cut that in. I layed it on to see how well it fit.....there, I fixed it. Wish it was that easy... :D

DSC07006.JPG


I don't like the overlap install, especially at the door pillar, so elected to save the pillar, trim the new panel and tuck it behind. Part of that decision was also influenced by the pillar stamping being a 1 year only design and I'm trying to keep as much of the original car as I can. As time progresses here, that will become a real challenge.

DSC06990.JPG


Removed rusted and damaged sections of the outer house. I had to buy an entire replacement house to cut the sections out of, but replacing that entire house is a pain in the butt.

DSC07014.JPG


The skin was too long at the rocker panel to get the body lines to align. I had to keep rolling it under with a hammer and dolly to get it this good. Thankfully, the 2 style lines were the correct distance apart and both fell in place nicely.

DSC07052.JPG


DSC07051.JPG


There isn't much left of the tail panel to align with, as I had to cut that off to get the trunk pan in, but it looks good.

DSC07049.JPG


DSC07131.JPG


Welded the seam and knocked down the extra.

DSC07135.JPG


Set up the spot welder to do the trunk drop and wheel opening. Soooo nice not to have to plug weld and grind all these.

DSC07166.JPG


DSC07170.JPG


DSC07172.JPG


DSC07227.JPG
 
Moved on to the right side, which is getting a full quarter panel. This had a repair panel brazed over crash damage early in the cars life and VERY poorly done. It was an overlap and a fair amount of the original panel was still under the replacement. Copious amounts of filler were used to blend it.

DSC07241.JPG


DSC07240.JPG


The gap/alignment at the door was horrible too and I couldn't get that to close up. The problem was the panel was installed incorrectly....big surprise.

DSC07243.JPG


Backside of the panel. I'm certain it was an OEM part that they butchered in this process too.

DSC07446.JPG


DSC07444.JPG


Couple of other, interesting discoveries once this was off. I was wondering if there had been an additional hit here that was repaired, but after more looking, I believe they drilled the holes and hammered the body in to move the style line down at the bottom, since they had the replacement elevated to lay on top of the old quarter. Yeah, I know, the old timers will say this was how stuff was done back then because at only a few years old, it was just a $1,500 car.

DSC07445.JPG


This is what I found under the replacement in the wheel opening, and the new one was never welded in here....

DSC07448.JPG


I was still hoping I could salvage the original pillar part of the quarter, as it has the "telephone" stamping but it had been cut into and welded on by the replacement process and wasn't all there anyway, so out it came.

DSC07476.JPG


Another long story, made short. I had an AMD full quarter, but wasn't happy with the gaps/fit or alignment of the style lines. I worked on it for a couple weeks, but it just didn't seem to fit well. I managed to locate an NOS quarter in Clevenger, TN. Hopped in the Silverado and was there in 15 hours, home again in another 15 with my prize...:)

DSC07641.JPG


The door had always had too much gap at the rocker, but it matched the height of the old panel. Now, with the NOS, the gap was good, it aligned with the door side and the door can be set down to match the quarter and close the big gap at the bottom. Everyone is happy.

DSC09195.JPG


MANY hours were still invested in fitting, tweaking, welding the inner door structure in and general building the confidence to actually weld this on. I'll keep it simple. After I got over the self doubt and made the move, it went well. I did panel bond the gutter, as that lip is so narrow to begin with, neither my spot welder tips or mig fit close enough to feel confidant I would get a good, clean weld. I did use the spot welder on the b pillar flange so that eliminated more welding and grinding to clean up.

DSC09192.JPG


DSC09200.JPG


Spot welds in the wheel house

DSC09206.JPG


Part of the time spend fitting and tweaking involved the new tail panel and the quarter had an issue there that I worked on to get a better fit. Seems the quarter had been dropped and the opening at the tail panel was quite bent out of shape.

DSC07872.JPG


This is an AMD panel, with the cut outs for the rs reverse lights. The body line where the bumper would go wasn't aligning and I thought it was the tail panel, soooo, I once again went shopping and located an NOS tail panel in Tulsa OK. Another 24 hour trip in the CR-V and I was back and discovered it didn't fit any better than the AMD !!! The quarter still needed a bunch more "relocating" to get the fit I was happy with. Now, the question was, do I use the AMD and flip the NOS, or use the NOS and sell the AMD at a loss. One big factor is, the NOS panels did not come with the cut outs for the reverse lights and this set me back a good week, trying to decide what I wanted to do. In the end, I kept and installed the NOS. It would be another week of measuring, marking and re-measuring and then measuring again before I dared drill the corner holes of the panel for the danged lights...

DSC09634.JPG
 
Once I was happy with the fit of the tail to quarter panel, I had to weld in the reinforcement panel that goes behind the tail panel to join the ends of frame rails and trunk pan to the tail panel. Again, much fussing was involved with the fit, along with hanging the tail panel to check fit every time I moved the support panel. All this fitting was done with the car sitting on stands under the rear axle with the stands shimmed so the body was level and under load to be as if it were on the wheels.

DSC09108.JPG


A new right side trunk drop was fitted along with the tail and quarter and welded in with the quarter. I had saved the left side and welded that in with the skin. Now, they were both welded to the support bracket.

DSC09121.JPG


I was able to use the spot welder for much of this installation and along the bottom of the tail panel.

DSC09156.JPG


DSC09155.JPG


I put the bumper brackets on to pull the 2 panels tight together, along with multiple clamps along the bottom and sides and made it permanent.

DSC09657.JPG


I did manage to weld the tabs of the tail and quarter in the rear corner, but there was no way I was going to get the welder in the trunk to weld the sides of the new extension panel. After that was fitted, which took a fair amount of slicing and dicing to get it to lay flat, and prepped, it was panel bonded to the quarters and the trunk gutter.

DSC09272.JPG


The only welding was at the glass channel.

DSC09306.JPG


And with all the panels now on, it was time for the week of consternation over the cutting of the tail panel for the reverse lights.
Ha, I see this would have been about May of 2021 now, as I had removed the snow tires from the CR-V.

DSC09726.JPG


I cut the opening a little small to allow hand filling it to fit the light fixture properly and once that was done, I was relieved that the light dropped right in the pre-punched access holes in the support panel behind the tail. That only happened on the left side, I had to "adjust" the holes in both the tail and support panel on the right to get them to line up, but none of that is visible with the fixture in place.

DSC09728.JPG


DSC09731.JPG


DSC09729.JPG


Theoretically, the reverse lights are centered under the tail lights and I had to throw them on to see and was pleased with the result. So, naturally, I got all carried away and assembled all the parts on the back to get a look at my "new" car... I had even procured an NOS fuel filler cap along the way to put the final period on this phase...:cool:

DSC09735.JPG


Even the trunk lid was replaced after the rear collision as it is a second design and the build date of the car would have had the first design. Sooo, after hoping to keep as much of the original car as possible, by this point nearly everything from the doors and back seat structure rearward has been replaced...:rolleyes:

DSC09738.JPG
 
Thanks, pugs, that was about 7 months of on and off time spent getting all that done. I have a good friend in the Chevelle club that owned and operated a collision repair shop that employed 30 techs for 40 years come over and get the bodywork started on the skin. He retired 2 years ago and his wife was in hospice for dementia and he was kinda lost with what to do with his days, so I benefited from that. First course of long strand fiberglass on the under-lap seam.

DSC09825.JPG


Next course is lightweight filler.

DSC09856.JPG


Then a swipe of polyester to seal the porosity of the lightweight filler. I sound like I know what I'm talking about, but this was all new to me. There is a light dusting of tan guide coat as he brings the poly down to the finish level.

DSC09858.JPG


Same procedure for the deep valley at the quarter to roof seam. We found a couple dents in the roof, right at the window opening so worked them in at the same time. Turns out the roof had dents all over the place that he spent a LOT of time getting level.

DSC00040.JPG


He shot all that with SPI epoxy and then we blocked that out and went over the roof and found more dents...

DSC00042.JPG


DSC00043.JPG


DSC00039.JPG


After he/we were happy with the results of the blocking, I shot the whole shell to seal it up and get started on the doors and trunk
lid.

DSC00139.JPG


DSC00140.JPG


DSC00141.JPG


For some reason, we are dealing with pin holes in the paint that can be seen in this pic on the roof. He ended up sanding nearly all the filler off in those areas and starting over and it's a lot better after another spray out, but still isn't perfect. We had that roof down to bare metal with 80 grit to start with and, we thought, very clean but there must have been something on the metal that is causing this to happen.
 
For some reason, we are dealing with pin holes in the paint that can be seen in this pic on the roof. He ended up sanding nearly all the filler off in those areas and starting over and it's a lot better after another spray out, but still isn't perfect. We had that roof down to bare metal with 80 grit to start with and, we thought, very clean but there must have been something on the metal that is causing this to happen.

Here is pin hole response from SPI member 68 Coronet R/T that I had saved for future reference.

Sounds like solvent pop to me as well. Probably due to not enough flash time between coats.

SOLVENT POPPING
(Boiling, Blowing)
Small bubbles, pinholes or crater-like openings in or on the paint film.
____________________________________________________________________________
CAUSE
(A) Liquid solvent (thinners/reducers) becomes "trapped" in the paint film when the surface layer skins over too quickly, preventing their evaporation into the atmosphere. Solvents that vaporize within the paint film leave bubbles, pinholes or craters as they push through and "pop" the surface.
Solvents can be trapped due to:
(1) Thinner/reducer evaporating too fast for spraying conditions;
(2) Inadequate flash time between coats;
(3) Excessive film thickness or "piling on" of heavy/wet coats;
(4) Too much air movement causing surface to "skin over" before solvents evaporate;
(5) Excessive purge/flash time before force drying.

REPAIR
(1) Allow finish to thoroughly dry/cure, sand smooth and refinish. Inspect surface
carefully to ensure all craters have been removed.
(2) Severe popping will require removal of the affected film. Prime, seal and recoat,
as necessary.
 
After this application was applied, we waited 2 weeks and sanded it all down and sprayed again and it was better, but still happened in the same area and nowhere else. In the overhead pic above, there is a tan-ish streak in this area that was a 1 step glaze in a tube and this popping was happening in that area. We then sanded ALL that off and started over with polyester top coat and sprayed again. It's OK now but still shows minute divots. The last spray was 8 months ago and flash time was 1 hour before second coat. I had intended to block that area and remove them, but summer came and the car sits during that time. I just got back on this a couple months ago and found another issue that took my attention away from the roof...:(
 
Yes, it was a U-Pol Fantastic 1k in a tube. It has since been discarded and I can't find an example on the web....maybe it was discontinued. They have a different label on a 1k now, but we are done with them. It was an attempt to save time mixing such a small amount.
 
Back
Top