1969 Plymouth Barracuda Restoration Thread

Knowing if the epoxy will fill enough comes with experience. At the end of the day if you can see it then I would have doubts it is enough with just epoxy. It has to be almost perfect to make it perfect with a few mills.

True words right there ^^^.....I guess I'll know with my next round of epoxy and blocking. At least I obtained a little experience with mixing, spreading and sanding filler. That was pretty easy actually.
 
Epoxy is the only primer I know of that gets stronger with thickness. The same can't be said for 2K or polyester. If you are not in a hurry, epoxy is a superior primer, even for fill, IMO.

Good information there. I know I probably over sanded the first two coats of epoxy primer I laid down so, I'm not to worried about having excess or ridiculous millage build up. Thanks for your replies, Tex
 
If you want build out of the epoxy, let it induce overnight in a covered cup, and don't be afraid to put on 3 wet coats with 30 minutes or more between coats.

I'm liking that idea, a lot. I will use that for the next trunk lid spray. Will be spraying this Saturday. Today I stripped the guts out of the drivers door, window, regulator, vent window and frame.
 
That last tip is the one I really like a lot, too.
Lots of good information on here, and it looks like you’re off to a good start!
 
  • Like
Reactions: MJM
Nothing major to report. Have the interior side of the trunk lid prepped. Was able to try out the Sure Shot sprayer Barry recommended. Still scheduled to lay down more epoxy this Saturday. Thankful the weather looks really good all next week so, it's time to kick it into high gear. The drivers door is ready to be pulled. Already pulled the guts out, and tomorrow I'll pull the front bumper, headlight surrounds and grill so the front fenders can come off.

20210512_171319.jpg
 
Another small update. Weather out here is just cooperating at all. It's really pissing me off but, I'm not going to get in a rush and mess this up. Trunk lid was sprayed with two more coats of epoxy, re-installed to make room for the front fender on my painters rack. Trunk lid will need one more blocking to check for any low spots.

Disassembled the front clip of the car and gutted the drivers door. Started prepping the front fender before removing the door. Removed all the undercoating on the inside of the fender which reveal some embedded rust. After throughly removing all the undercoating, and throughly cleaning any residue with both spi 700 & 710, I media blasted with medium glass media. All pitted rust removed, looks good.

Front clip removed and trunk lid reinstalled.
20210601_163950.jpg


Set up media blasting tent in my garage due to the weather.
20210528_181149.jpg

20210528_181601.jpg


Stripped the paint off the front side of the fender by razor blade. Had a lot of filler on this fender. Some spots as thick as 3/16". It took me a day with my stud welder, hammer/dolly and slapping spoon to get the bad areas within 1/16" or less. Thank goodness for Jim's thread about the flexible metal ruler he posted about. I had bought one and it sure was a huge help getting the fender in a much better condition.

Working the fender
20210531_103751.jpg


A few spots left to work and it'll be ready for epoxy primer Friday or Saturday.
20210531_150944.jpg


20210531_150820.jpg
 
Last edited:
Also got lucky last weekend and picked up this commercial 36" Chore Time exhaust fan at a garage sale for $50 dollars. This fan puts out 10,500 cfm. It does not have an explosion proof motor but, it is total enclosed. I think it will make a good semi down draft, or cross draft temporary paint booth exhaust fan.. From my readings I would need 9,600 cfm for a 12' wide by 8' high cross draft booth.

20210523_153250.jpg


20210525_132452.jpg


20210523_154703.jpg
 
Last edited:
Not patting myself on my back, well I guess I am. All I have at the moment is a flux core mig welder, so welding on body panels is rather risky. I wanted to smooth out the fender lip and had trim holes to weld up. I researched how to weld thin gauge sheet metal with a flux core welder. Did some practice on some metal I had, then, went for it.

I don't know if it was luck or skill, maybe a bit of both but, no burn throughs. So I'm thankful for that.

20210520_160934.jpg
 

Attachments

  • 20210520_160928.jpg
    20210520_160928.jpg
    99.6 KB · Views: 117
Last edited:
Making progress slowly but surely. This drivers side fender was pretty beat up after I stripped it to bare metal. Some areas had filler 3/16 thick. With a dolly, hammer and slapping spoon I got the panel a lot straighter to with in 1/16th inch + or -.

I want to make sure I'm doing the correct procedure. So please chime in and let me know.
1. Stripped panel to bare metal
2. Da with 80 grit 3/16" random orbital
3. SPI 700 then two coats epoxy primer
4. Sanded with 180 grit revealing low spots
5. Applied body filler, sanded with 80 and 180 grit.
6. Sprayed two coats epoxy primer
7. Sanded with 180 grit revealing some low spots.
8. Body Filler and 180 grit.
Sprayed two coats of epoxy primer.

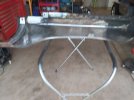
Fender after it was stripped, then da with 80 grit and two coats of epoxy. Hopefully you can see the damage the fender has.
20210603_195158.jpg


Sanded epoxy and first round of filler
20210605_161752.jpg


Two coats of epoxy
20210607_185439.jpg


Sanded epoxy with 180 and another round of filler
20210611_150644.jpg


Sprayed two coats of epoxy today. Fender looks good with some minor waves and one area around the wheel arch needs attention.
20210611_183623.jpg

20210611_183636.jpg


Am I doing this correctly?........ As of today Fender looks good with some minor waves. Is this the time to use filler glaze, then one more coat of reduced epoxy before spraying high build?
20210611_183617.jpg
 
Last edited:
Question:

Getting ready to pull the drivers door for epoxy prep. Before removing the door I set door gaps at the striker / quarter panel and rocker. Rocker has a 1/4" reveal and the striker to quarter panel varies from 3/16" at the top, 5/16" in the middle, and 3/16" at the bottom.

My question is, what is the better panel to do tack welds on, the door edge or the quarter panel so I can make a consistant 3/16" reveal?

New door gaps as of now
20210613_192403.jpg


New door gap at bottom
20210613_192418.jpg


Old door gap at bottom
20210510_121742.jpg


5/16" gap middle of door......top and bottom gap is 3/16"
20210613_192729.jpg
 
Last edited:
Just to be safe since you pointed it out (thanks for speaking up).....I went over it with some water and didn't see anything. I believe what is seen in the picture is my shadow, taking the picture.
Yea if you look at an earlier photo it looks fine.
 
Been working on the drivers door. When I painted the interior 25 years ago, I just did a scuff and spray. To my surprise there was some serious dents on the interior side, upper arm rest area after I stripped the paint off of the interior side. I've been racking my head trying to figure out how those two large dents got there. It looks like the panel was kicked. This car originally had a bench seat. Looks like someone was making whoopee in the car, lol

20210625_120529.jpg


20210625_122047.jpg


20210625_155558.jpg


20210625_221557.jpg
 
Last edited:
Back
Top