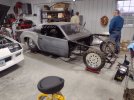
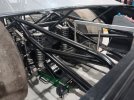
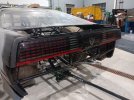
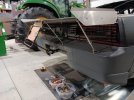
As if I needed another project, I picked up this drag car project today. Mild steel cage, 4 link rear with fabricated 9", strut front. I don't expect to make much progress on this, have too much going on at this point. Just throwing this up there
You are using an out of date browser. It may not display this or other websites correctly.
You should upgrade or use an alternative browser.
You should upgrade or use an alternative browser.
1989 Trans Am
- Thread starter UAmember
- Start date
I certainly don't have too many toys, just too many projects! I bought this from my Dad's best friend. Without going into the story there's a lot of history between them and this car. He has talked about wanting to get rid of this car for some time and he finally talked himself into it after he bought a "complete" car last week.
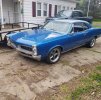
It has been a strange week, I had two different people approach me about buying a car this week. One of my friends approached me about his '67 Pontiac Lemans Sunday, this came about Tuesday. Poor timing, but opportunity always seems to be. With that in mind, if anyone is interested in a 1967 Pontiac Lemans project let me know. He pulled and sold the 350 Pontiac, that was my deal breaker. I am no purist, but I was only interested in the car as a cruiser. There ya go, that's the short and long of it
It has been a strange week, I had two different people approach me about buying a car this week. One of my friends approached me about his '67 Pontiac Lemans Sunday, this came about Tuesday. Poor timing, but opportunity always seems to be. With that in mind, if anyone is interested in a 1967 Pontiac Lemans project let me know. He pulled and sold the 350 Pontiac, that was my deal breaker. I am no purist, but I was only interested in the car as a cruiser. There ya go, that's the short and long of it
Last edited:
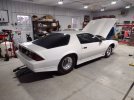
Here's the car he bought, it is absolutely beautiful. Build quality and attention to detail is amazing. He brought it home in the rain, so it might not be photogenic. I will try to get a photo of my friends LeMans up here if anyone is interested.
Attachments
Brought the car to my Dad's Saturday. We spent the last few days talking about the chassis work and some of the other hurdles.
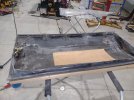
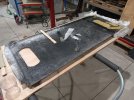
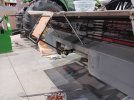
We spent a bit of time tonight playing with the ground effects and seeing where body lines are. The doors and front clip are pretty well out of whack. There's a fair amount of fiberglass work to be done.
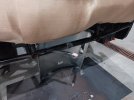
As far as chassis work, wheelie bars need to be redone, chute mount and attachment need finished.
Lots of small fab work to be done for engine plates, trans mount, radiator, etc.
We spent a bit of time tonight playing with the ground effects and seeing where body lines are. The doors and front clip are pretty well out of whack. There's a fair amount of fiberglass work to be done.
As far as chassis work, wheelie bars need to be redone, chute mount and attachment need finished.
Lots of small fab work to be done for engine plates, trans mount, radiator, etc.
Attachments
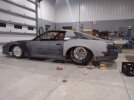
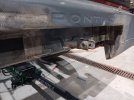
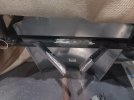
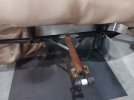
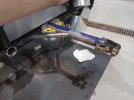
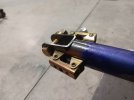
Here's my progress from after work this week. I shortened the bridal mount, and fish-mouthed the tubing. I reinstall the bumper with clecos and put the deck lid and wing back on. Then I started playing with the pack mount and strut location.
Attachments
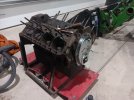
Dad pulled this oldie out of the garage and I started cleaning it up. We are going to be using it as a mock up block but who knows, it was in much better shape than we anticipated. A few of the lifters were stuck, #4 cylinder has some rust. I got the lifters all free and cleaned up. I might try some evapo-rust to see if a hone job will clean up the cylinder or not.
Attachments
'68 Coronet R/T
Oldtimer
It's really coming together. Can't wait to see the finished product.