painting a vette?

dukess396;11064 said:
I'm curious, tell us more! What do these seems look like, how are they treated? Are procedures pretty standard, regardless of year? My boss just had his '66 Vette done by a local shop. It was a budget/favor deal. About a month after getting it back, little bubbles started appearing on the left fender. I remember there was some spotting there from brake fluid before it was sent to the shop. There looks like sags on the deck lid, all kinds of little junk.
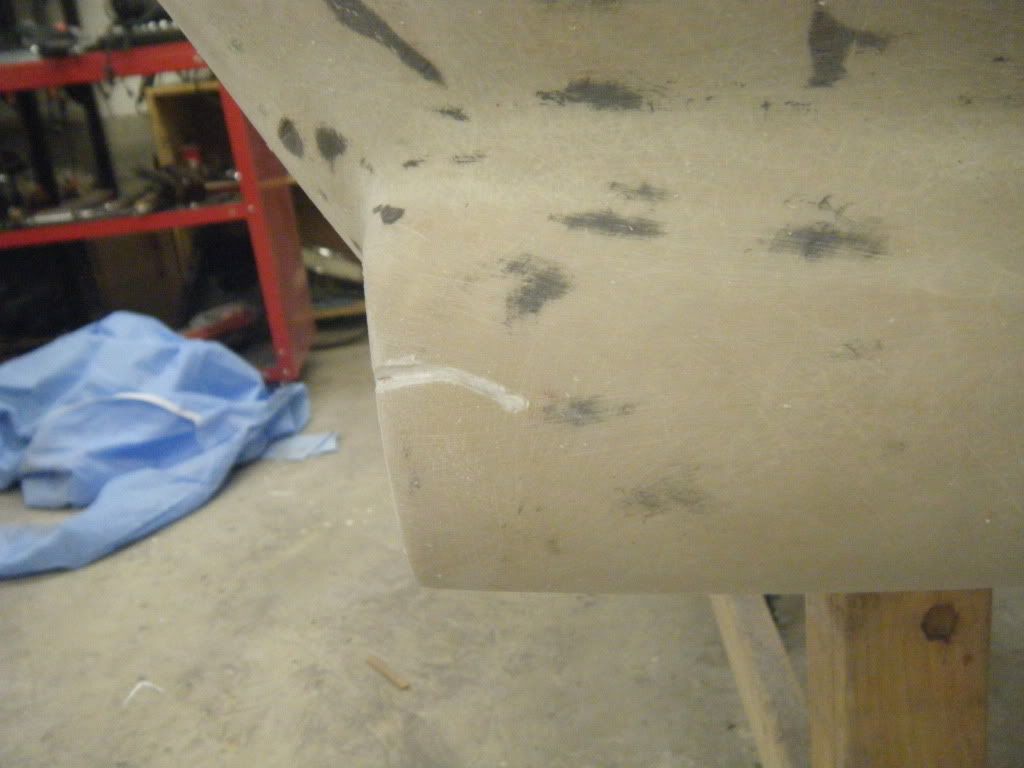
Older Corvettes bodies were made from many panels that were glued together. The factory used bonding strips behind each one of the panel joints. The glue was also the filler for these panel joints. The glue expanded and contracted at a slightly different rate than the surrounding fiberglass (the double thickness of panel and bonding strip didn't help). The paint on the glue would telegraph the difference and you would see stripes at all the joints. The stripe is typically about an inch wide and the only way to avoid the stripes is to grind out the glue at the joint, feather the edges to about three inches and use fiberglass and resin to fill in the depression. Some experts use polyester resin and others use epoxy resin. Once the repair is sanded down, the whole area is given several coats of SPI epoxy primer. Shine recommends epoxy resin, epoxy filler and epoxy primer (only) to eliminate the problem. It isn't the only way but based on the Corvettes he has completed, it works.

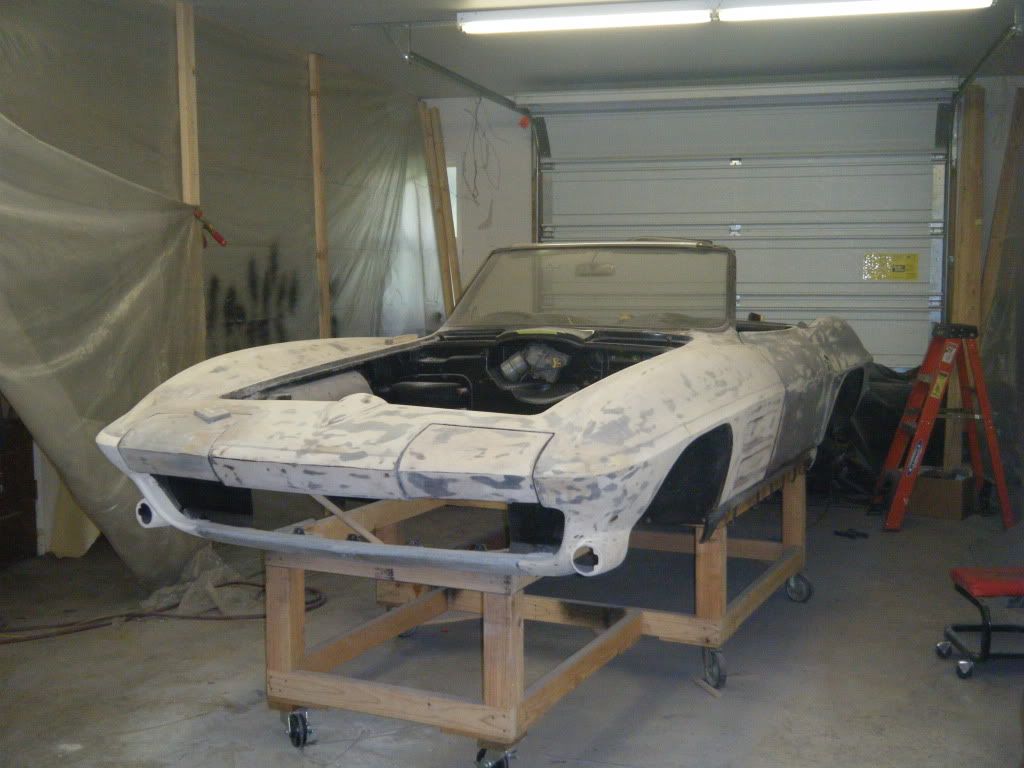
Here's what the back half of a 1972 body looks like before it gets glued together.
BodyPanelss.jpg
 
Older Corvettes have no fender liners so tire dressing can wreak havoc when you try to repaint the car. When the original paint is damaged by brake fluid, wiping it off is no cure. It soaks into the fiberglass and paint doesn't like to stick. The fiberglass dries out over the years and becomes porous so anything the tires pick up gets flung on the inside of the bodywork. Air conditioning compressors are another source of paint problems. When they leak, the A/C belt flings oil in a nice stripe across the passenger side of the hood. Like the brake fluid, you see quite a few otherwise perfect looking Corvettes with bubbles in the paint on the hood. For those of us who like the idea of a body that doesn't rust, the older Corvettes have some special nightmares. The body sits on a metal frame and while the body might not have any rot, the frame often does. The passenger compartment is a birdcage inside the fiberglass and it likes to rust as well. Neither of these is visible until the car is stripped for paint or something actually collapses. The final insult comes from the metal reinforcements at various locations. When they rust, the fiberglass actually deforms and is often seen as a row of large bubbles across the valance in front of the hood.
 
Man, this post couldn't come at a better time. I just saw a 74 Stingray for sale locally for $2500 (no motor) but had no idea of its value or how to evaluate its condition. The guy pulled the motor and is selling the car, hmmm?
 
[QUOTE='68 Coronet R/T;11091]Man, this post couldn't come at a better time. I just saw a 74 Stingray for sale locally for $2500 (no motor) but had no idea of its value or how to evaluate its condition. The guy pulled the motor and is selling the car, hmmm?[/QUOTE]
Not a bad price and if it turns out to need a ton of work, it's worth way more than that parted out.

If you already have an engine and all the stuff to put it on the road, it's a good deal but if you have to put $3K or $4K into the car just to get it on the road, you might be better off getting a driver. These are 30+ year old cars so they are selling for very little if they need work but you can figure a couple of grand even on a pristine driver, just to freshen up the brakes, suspension, and interior pieces -- not to mention the paint.

Cars with numbers-matching running gear fetch higher prices and big block cars are also bringing a premium. Most C3 Corvettes sell through specialty car lots and asking prices are ridiculous.

The chrome bumper third gen Corvettes (1968-1973) are selling for a bit more than the urethane-bumper cars (1974-1982) but prices have dropped on all of them. Mecum Auctions have had some really nice cars for pretty reasonable prices. This one sold for $6,800 last December in Kansas City, MO.
KC1210-100500_1.jpg


This 1979 went for $6,700 at the July 2011 auction in Des Moines, IA.
IA0711-112480_1.jpg
 
the bond seams on early vettes need to be cleaned out and reglassed with epoxy resin. a 3 in angle grinder words good. feather the edge out 2 in both sides. DO NOT use a coke can wrapped in sandpaper. this leaves a sharp line which is what showed in the first place. DO NOT use any lacquer thinner period . best way i know of to get an acid contamination in the glass. do not use any duraglass products on it . use evercoat vette panel bond/filler for finish work. i use only epoxy to surface with , no poly primer or polyester . each coat of epoxy needs to be a wet double coat. let cure overnight then block the next day. first block 100 grit then 120 ,180 , 320 . once it is straight let cure for a week. the more sun the better . day before color sand with 600 . when ready to shoot seal with a reduced coat of epoxy wait 30 min then get after it. this is my opinion of doing vettes and is worth just what you paid for it.
 
Yeah, that coke can thing is like some kind of urban myth. I guess a guy could START with a coke can (slow and lots of elbow grease), but you better taper what's left REALLY GOOD with a regular block or a DA, or those lines will show just like shine says.
 
Shine, I've got a few spider cracks to deal with (picture shows one by turn signal lamp). I was going to use a roto-grinder to eat out the crack and then fill with Evercoats "Glass-Lite #639". You mentioned Duraglas, is there a problem with all short strand filler?
vette012.jpg
 
Flynams, I'm in the process of stripping. I have no expierence with chemical strippers, so thought I'd play it safe and strip by hand sanding with 80 grit and a long board. I've blocked down thru all the old red primer. When you strip do you take it down far enough to get rid of all the old filler?
vette010.jpg
 
jaf;11215 said:
Shine, I've got a few spider cracks to deal with (picture shows one by turn signal lamp). I was going to use a roto-grinder to eat out the crack and then fill with Evercoats "Glass-Lite #639". You mentioned Duraglas, is there a problem with all short strand filler?

Make sure you taper that crack area much more than it shows in the photo. You can epoxy before the repair is made.
 
I've had good luck with evercoats kitty hair or tiger hair although I would use the evercoat vett adhesive filler over the short/long strand fiber-filler. Just a better product.

Jaf, you might want to consider using a da with a soft interface pad with 100 grit to get down to the clean bare glass. Just keep an eye on your edges and try to keep the da as flat as possible to the panel. Let the da do the work and eat the rest of the paint/primer/filler off.

You are making some good progress!!
 
if you are going to use a da to sand tape off all ridges and edges !!!!!!!!!!!!!!!!!!!!!!!!!!!!!!!!!!!
 
Right now the panels are pretty flat, do I want to sand off all the bond adhesive filler? If I do it seems like the glass panels will get pretty thin?
 
wet sand it with 180 to get rid of all the gray lacquer primer. the line you see is the bond seam. this is where you grind a 3-4 in trough to repair. fill it with matt and epoxy resin. if there is any fill work to do use the panel bond filler.

any lacquer primer left can and will come back to haunt you.
 
Shine, the spots that are on there aren't grey (it looks that way cause of all the sanding dust). The stuff is kinda black, looks and sands just like the stuff in the bonding seams. Is there a way to tell if it's primer or body adhesive/filler? If it's body adhesive/filler don't I want to keep it on there?
 
Back
Top