Chris Martin
Promoted Users
Hello SPI Friends,
My project is going well but going slowly because of the high temperatures. But getting there.
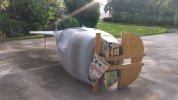
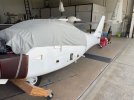
I have a question: As you can see in the picture attached, I need to paint a fuselage that is one continuous curved surface all around. The fuselage sits very low to the ground and it would be hard for me to paint the whole thing one shot. Painters that I know do the bottom first then the sides and top after the bottom cures. This is easier to do in aluminum airplanes because there are plenty of skin seams to separate the jobs. But in a composite airplane there are no seams.
Any techniques the group can share that would allow me to do the flip the fuselage upside down, do the bottom, wait till cure, then flip and finish top. The two ways that occur to me is to create a line by masking then sand and buff. The other to try to blend the seams. I am using white SS.
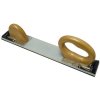
The second question is what would be the best way to block such a compound curved surface? What blocks you think would work best? Should the block be held aligned longitudinally or circumferentially when doing the cylindrical aft part of the fuselage? When I did the initial blocking to prime 2 years ago I used shorted durablocks but not sure if that is the best technique.
Thanks for the advice,
Chris
My project is going well but going slowly because of the high temperatures. But getting there.
I have a question: As you can see in the picture attached, I need to paint a fuselage that is one continuous curved surface all around. The fuselage sits very low to the ground and it would be hard for me to paint the whole thing one shot. Painters that I know do the bottom first then the sides and top after the bottom cures. This is easier to do in aluminum airplanes because there are plenty of skin seams to separate the jobs. But in a composite airplane there are no seams.
Any techniques the group can share that would allow me to do the flip the fuselage upside down, do the bottom, wait till cure, then flip and finish top. The two ways that occur to me is to create a line by masking then sand and buff. The other to try to blend the seams. I am using white SS.
The second question is what would be the best way to block such a compound curved surface? What blocks you think would work best? Should the block be held aligned longitudinally or circumferentially when doing the cylindrical aft part of the fuselage? When I did the initial blocking to prime 2 years ago I used shorted durablocks but not sure if that is the best technique.
Thanks for the advice,
Chris
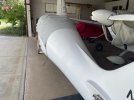
") But as I said, the bottom is truly not something you can easily see, just trying to do the best I can within reason.
But as I said, the bottom is truly not something you can easily see, just trying to do the best I can within reason.