Spraying epoxy help needed.

rustover

Member
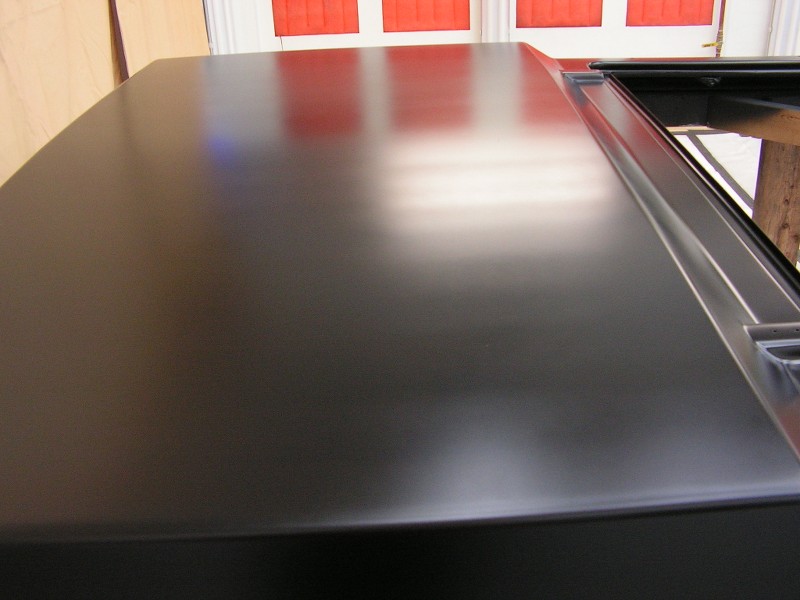
Sometime when I spray it, it turns out nice and other times, not so good. The other night I sprayed the lid and cover that I'm working on with 2 coats of epoxy.

The lid was shot with full strength epoxy that had been induced for about 3 hours and sprayed with a 1.8 tip for build to block with 320 grit. Overall the lid turned out nice. Not as smooth, some slight peel, but I used a 1.8 tip.

The cover shot with epoxy reduced 20% induced for three hours. Temp of the garage and surface temps was 74 degrees. My lph400 silver cap settings were 23psi, fan maxed out and just turned back in slightly and fluid was 2.25 turns out. I was about 4-5 inches from the panel and speed seems slow to me. Just fast enough to keep up with the wet edge. The last few times I have shot it, I striped it really good. I have been video my spraying and when I watch it back I would like to jump and there and grab the gun out of my hand.

There are times when I don't have the air cap parallel to the surface. Instead of being at 6 o'clock I'm more at 6:35. If that makes sense. I believe this is where a lot of my problem is, but there has been times in other vids that I sprayed it like this and it did fine. The middle of the cover is a reach and something I need to work on is locking my wrist when I get fully extended. Not only do I stripe it in the middle I also striped it where there is no reach near the edges so this leads me to believe it may be something else.

The other thing I noticed is I was a little too wet, especially on the first coat. I know the cover was cleaned well. I used both 700/710, about an hour apart and let the cover sit until the next evening prior to spraying. There was a few places that when the epoxy hit the surface it acted a little funny, kinda gave a swiss cheese look. Those areas didn't look to bad after it flashed. I believe I should have turned the fluid in .25 turns or more.

The one thing that has me puzzled and may be contributing to the striping is my overlap. I have been using about a 70 percent overlap. There are times when I spraying doing this overlap and watching the edge and it looks like I missed an area that I just passed. I don't understand how that can happen with the fan on the lph400. I measured my test fan and it was 9 inches. So when I moved up say 3 inches and make a pass there is an area left behind that looks like I missed. (It could be that the paint just hasn't melted in yet) I don't know.

I know I need to work on my technique. I'm really close, but that still doesn't make it look good. What do you guys think, especially on the overlap. I was frustrated the other night. Thanks for the help. Russ


I often shoot it as a sealer mixed 1:1:1 and make two thin passes back to back, what temp reducer were you using?
 
Bob Hollinshead;n77718 said:
I often shoot it as a sealer mixed 1:1:1 and make two thin passes back to back, what temp reducer were you using?

Bob, thanks I forgot to mention that. As of now I only have the 885 slow reducer. I was hoping to have finish this thing back in the summer when it was hot. I may need to get some 870. I will do the 1:1:1 on my next spray session just before base. Just added a little reducer to get it to lay flatter for a final sand with 600.

[QUOTE='68 Coronet R/T;n77720]Are you checking your spray pattern on paper first?[/QUOTE]

I did do a couple test patterns sprays and it seemed to be nice and even. At the bottom of the paper I made 2 passes and it looked ok.
 
dont feel bad. its not entirely you. ive been spraying the epoxy for 15 years and its not the easiest thing to spray and have look good. its a very odd material. i dont know if its the solvents used in it or what. for something that is visible and needs to look good i always put a touch of flattener in it. 5-10% maybe. it changes the whole product. it looks alot nicer, sprays 100 time easier. honestly i wish it came from spi like that. it behaves more like the matte black ss. everyone i was selling it to over the years all went back to their old epoxy because of the spi is too glossy and too difficult to spray and have look good. in most cases it doesnt matter because its just getting primered over anyway and as an epoxy undercoat its a great product but as a final finish on a frame or something like that, i havent found anyone that likes it. i try to tell people about the flattener trick but no one wants to bother. spi should add it to give the stuff a little more control
 
I have never had the stripping issue. It lays nice and I love the satin finish. Its like the first guide coat comes already "built in".
 
Jim C;n77726 said:
dont feel bad. its not entirely you. ive been spraying the epoxy for 15 years and its not the easiest thing to spray and have look good. its a very odd material. i dont know if its the solvents used in it or what. for something that is visible and needs to look good i always put a touch of flattener in it. 5-10% maybe. it changes the whole product. it looks alot nicer, sprays 100 time easier. honestly i wish it came from spi like that. it behaves more like the matte black ss. everyone i was selling it to over the years all went back to their old epoxy because of the spi is too glossy and too difficult to spray and have look good. in most cases it doesnt matter because its just getting primered over anyway and as an epoxy undercoat its a great product but as a final finish on a frame or something like that, i havent found anyone that likes it. i try to tell people about the flattener trick but no one wants to bother. spi should add it to give the stuff a little more control

Thanks Jim. That's good info about the flattener. You're right most cases it doesn't matter and that's the case here I was just hoping to improve my spraying technique. I love the rust protection it provides and how it sands. I'll see how I do when I spray it as a sealer 1:1:1. I just hope I do better when I spray the bc/cc. I've got a trunk lid that I'm planning on spraying some crossfire base and universal clear, so this will be a good learning experience for me before I actually spray this bed cover. The cover will be Prospray base and universal clear.

Outlaw;n77732 said:
I have never had the stripping issue. It lays nice and I love the satin finish. Its like the first guide coat comes already "built in".

Thanks Outlaw, Oh yes, the built in guide coat is awesome and has really helped me on this project. I have only used epoxy and slick sand. I think the black epoxy blocks great. I've had the stripping issue before but usually on the first coat and by the second they are gone. it may be a combination of my overlap and not having the air cap perfectly parrell.
 
I wouldn't want anyone to use flattener in their epoxy on bare metal, get a couple straight unmodified coats on the metal for protection before possibly weakening the coating! Anyway, I have had a bit of an issue here and there trying to get a presentable topcoat look out of the epoxy. Not so much on a frame or suspension, but honestly for things like hood undersides and engine bays, I would just rather use the SPI #2201 Flat Black single stage, I can say that it is the most bulletproof, idiot-proof flattened product I have ever used.
 
It has been my experience from my work that I comment on the following: Well first, regarding most folk's opinion as to the "so called correct percentage" of sheen, flatness, gloss or whatever degree you want to call it for a finish on the frame and fender skirts. If your car is older than 1964 the frame and skirts never came from the factory flat like you see everyone with a spray can finger or an affinity for a lazy premix frame paint can will attest to. Oh, It was not glossy shiny either like at the car shows. The frames ware slightly more gloss than the fender skirts. Given to that, they were a degreed predominately semi gloss finish and in comparison just a tad bit shinier than a cured wet coat of properly applied SPI Epoxy. No frames need not Look like their childhood HO steam train engines.

Another opinion and observation we have and one that we should just leave well alone, is in the use and spraying of SPI Epoxy. If you are a lone hack working in your home shop and insist on using a HVLP gun to apply it, and if for no other reason then that so many experts tell you to do so, just remember that the HVLP by it's designed nature loves to deliver the paint to the surface in dumped fire bucket sized loads thus the name HVLP. This is how it addresses over spray. It operates on the same principle as your backyard garden hose with just a tad little more adaptions …. So you get the picture. This from the beginning sets one up for the orange peel dance party. Also HVLP guns with epoxy do not tolerate your tender non linear or non strict 90 degree right angle applications, twisting of the gun or wrists or waving of the wrist or any mis-aalignment or allowing the fan nozzle to turn obliquely to the surface or orange peel, cratering and even waving will occur as well. To this, remember the nature of this epoxy is it just hates to be pounded and dumped on in the first place or it will wave, crater or orange peel to the tune of your heart breaking so take heed to this while applying epoxy with your garden hose HVLP spray gun. To this end, if using an HVLP gun, we suggest to those among us concerned about getting initiated is to force & restrain ones self to applying only misty light coats for the first couple of passes allowing at least 15 minutes at 72 degrees ( or adjusted accordingly to application temps ) to pass before applying the next coat, which would be a true medium wet third coat, then let it set 45 minutes then apply the final wet coat. What your really doing is applying a tac coat then two real coats. Also, Epoxies secretly love you the best if you give them a lot of reasonable time to set before having some more layers dumped on them - Really. So stretch out your coating times to the max for maximum desirable effect. Of course a much easier, calmer and safer alternative to all this drama and heart ache is to simply use a syphon conventional true atomizing spray gun instead on an HVLP until you get the epoxy tango foot steps down, thus ignoring the experts for a little while anyways. The conventional gun by it's nature and design truly atomizes the paint and does not fire bucket it onto the surface nor is wrist / nozzle angles and application distances of such dire concern when applying the epoxy.

Now we realize this is shear downright heresy and the belief that conventional guns should only be used with the enamels and lacquers that were used back in the day and what with the cost of paint these days and blah, blah, blah, but it still remains a very good alternative option for the beginner painter of epoxy. The result will be little to no orange peal, zebra stripping and runs for the ardent beginner and for even the blind folded first string spray masters among us. Sanding orange peel requires removing a lot of paint to correct which relates to time and money for more materials spent to correct so give this some thought. To aid in this you will find a slightly reduced epoxy by 5 % with slow reducer will allow for good uptake into the gun. Your air pressures will of course be higher and you will use about 20% more paint. But then once again, what is the cost of some 20 % more paint compared to the cost of grief, time and pain delivered through the end of an HVLP gun applying epoxy and the time spent writing about your crappy experiences and results on various forums lost in a cloud of mystery and confusion ? If spraying on a borderline cooler day, try pre mixing the epoxy up in a glass sealed bottle and setting on the shelf inside away from the cold for a couple of days. We have let it set for up to 7 days and on the 7th day there was no more rest and we added about 5 % reducer to it and spayed. It took off very well and was ripe. If you are spot painting in sanding woes, preheat the surfaces areas, as the substrate temperature is very important as is the metal temp of the gun itself. Always keep in mind that this epoxy just loves warm and cozy.

The stripping effect shown on the hood in our humble and kneeled opinion, is the gun fan is too wide for the psi delivered to the gun and the amount of fluid delivered at that particular gun adjustment of both fluid and pattern control. The poster is getting dry at the edges even if not evident immediately but shows itself after the paint flows out. This stripping would of been evident immediately upon the second pass once you know what to look for. Decreasing the application speed and increasing the fluid needle output would also of corrected this on the fly. If unsure of your ability to adjust on the fly, you can always keep a white plastic 2' by 2' sheet of plastic 1/8 " nearby that you turn to and adjust your spray out put. When you change the pattern you have to change the fluid amount delivered. We find that, one only gets to turn out the pattern knob about 50 % at any given increment of a rotation before the fluid knob also needs to be turned albeit by a lesser degree as well or the fan pattern will widen but the application amount will be drier. This mean you can only turn and expand your fan pattern out to a given degree before absolutely needing to increase the fluid output. The opposite is applies as well. This is easier than the other option of having to tweak your air input psi.

Well my hoildaze mix drink is beginning to wear down as I am sure yours is as well after reading this my chapter of rant and confusion.
 
I don't think using an old siphon gun is particularly good advice, because simply turning in the fluid and raising the pressure beyond spec on a gravity gun can give very good results, somewhat simulating the way an older gun lays out the paint but still with better transfer efficiency.
 
crashtech said:
I don't think using an old siphon gun is particularly good advice, because simply turning in the fluid and raising the pressure beyond spec on a gravity gun can give very good results, somewhat simulating the way an older gun lays out the paint but still with better transfer efficiency.
I agree.....
 
Thanks guys. I have done some blocking on the lid and have had the opportunity to spray a couple more times. I'm definitely still learning. I have learned that for my gun setup (LPH400) fan wide open, ft - 1.3mm 2.25 turns out, psi-23, that I was traveling a bit too fast, although I thought I was going slow. Some passes was fine, some were not. I like the idea of doing the 3 coats starting out with a light coat, then medium, then a medium/wet coat. I probably should have opened the fluid another 1/2 turn and it would have helped.

The lph400 had a massive fan on it and for my next attempt I'm thinking about loading the 1.4 in the gun, closing the fan from wide open in 1-2 turns and 2.5 turns out on the fluid. @23psi and see how it does.

On this project its all getting blocked and sanded anyway, just trying to find the sweet spot as I develop my technique. When I get to certain parts of the Camaro I want to spray 3 coats of epoxy as a finish coat on certain parts of the car so I need to learn how to do it.

Thanks for all the help. I have this cover/lid blocked in 400 and will soon be blocking it in 600. I also have an old trunk lid that I have also been practicing with. Soon I hope to spray the trunk lid with sealer and bc/cc so I'm sure I will have more questions.
 
If the fan is massive, you might be too far away. That gun likes to get in close and personal, 4-6".
 
crashtech;n78692 said:
If the fan is massive, you might be too far away. That gun likes to get in close and personal, 4-6".

Crash, that's about where I was. I think the fan was about 8 or 9 inches. Oh and I'm getting the reply emails from the site now which is awesome!
 
Yeah we hear you. "Better Transfer Efficiency" Did your read the part about fire bucket delivery ? That's the problem. A lot of paint goes on the car like a water hose. Guess some are hell bent on using an HVLP gun and then complaining about why it all looks like shit. Well I guess after a hefty and solid number of written paragraphs explaining why beginners paint jobs may possibly look like they do and why a HVLP gun is not possibly the right 1st choice for your once in every 5 year garage paint job, what can we say. But don't get us wrong here, we use HVLP guns as well too, but believe the points brought up were pertinent and factual and should be taken into serious consideration when analyzing and executing your paint primer job and paint job. Just our 2 cents.
 
rustover;n78691 said:
I also have an old trunk lid that I have also been practicing with. Soon I hope to spray the trunk lid with sealer and bc/cc so I'm sure I will have more questions.
Sounds to me like you might want to get some practice parts with some shape in them, that is where it is more difficult to maintain proper spraying distance. And parts that are hard to get good coverage on, after you master flat panels.
 
chevman;n78699 said:
Sounds to me like you might want to get some practice parts with some shape in them, that is where it is more difficult to maintain proper spraying distance. And parts that are hard to get good coverage on, after you master flat panels.

Thanks chevman. I do plan to do that.
 
Overspray;n78695 said:
Yeah we hear you. "Better Transfer Efficiency" Did your read the part about fire bucket delivery ? That's the problem. A lot of paint goes on the car like a water hose. Guess some are hell bent on using an HVLP gun and then complaining about why it all looks like shit. Well I guess after a hefty and solid number of written paragraphs explaining why beginners paint jobs may possibly look like they do and why a HVLP gun is not possibly the right 1st choice for your once in every 5 year garage paint job, what can we say. But don't get us wrong here, we use HVLP guns as well too, but believe the points brought up were pertinent and factual and should be taken into serious consideration when analyzing and executing your paint primer job and paint job. Just our 2 cents.

I enjoyed reading your other post, and completely understand the philosophy-anyone using an old siphon feed gun is going to crank up the pressure and naturally end up with decent atomization. But.... the same atomization can be realized with proper adjustment on a gravity feed hvlp at a lower air pressure.
 
Overspray;n78695 said:
Yeah we hear you. "Better Transfer Efficiency" Did your read the part about fire bucket delivery ? That's the problem. A lot of paint goes on the car like a water hose. Guess some are hell bent on using an HVLP gun and then complaining about why it all looks like shit. Well I guess after a hefty and solid number of written paragraphs explaining why beginners paint jobs may possibly look like they do and why a HVLP gun is not possibly the right 1st choice for your once in every 5 year garage paint job, what can we say. But don't get us wrong here, we use HVLP guns as well too, but believe the points brought up were pertinent and factual and should be taken into serious consideration when analyzing and executing your paint primer job and paint job. Just our 2 cents.

Thanks Overspray. I read your post and your comments on the striping about the gun setup, I have found them to be true with my practicing, such as increasing the fluid and slowing down. I purchased the Iwata because a lot of guys here use it with great success. I am a beginner there's no denying that. I thought about buying one of those old guns, but then I decided not too because I knew the industry had changed and many were switching to hvlp. I did purchase a good gun, reason being: if I cant learn to paint, it wont be the guns fault. I know for a fact here in my home town that there are painters that painted for years that never was able to make the switch from an binks to an newer hvlp gun and the ones that did when I asked them about learning to paint, they simply told me not to do it. That I wouldn't be able to learn and it would just be a big old mess or in your words "look like shit". I guess they came out of their mothers womb holding a Sata 5000. I'm not sure. These are also the same guys that are hell bent on using etch primers and wash primers and think epoxy is not a good product and still putting body filler on bare metal with 36 grit scratches..

That's what makes this forum so great. There are a lot of guys on here that are pro's and have years of experience that readily share information and help several guys like me working in a 2 car garage out. That's also what makes SPI so great.
 
Back
Top