I'm contemplating a hack and have been too afraid to even ask

Lizer

Mad Scientist
So I've been working on full restoration of grandpa's 1970 F250 for my uncle. He's paying materials, I'm providing a labor of love. But I'm getting pretty tired of it. It's been a complete frame off.

So I replaced a combine-inflicted injury in the lower fourth of the door skin with a lower skin patch, it's about 8" high or so, maybe 16" long, curls around the back edge and bottom edge and butt welds where it mates up to the existing skin on two sides.

There is no structural reinforcement in the door shell for the skin whatsoever, it's just the crown of the skin that holds it in place. Owing to that, it warped horribly when I tried to weld it. I completely cut the weld back open. Stitched it again, spacing the welds out, giving them literally minutes to cool, it still warped badly. Now the metal of the door skin above the seam is badly oil canned but it's just a huge ripple in the middle of the weld. So I ground the proud weld down both inside and outside and get it as thin as I could and then tried to stretch with hammer on dolly to relax the surrounding metal. But that's not doing much.

The only way I'm going to get this relaxed again is to cut the seam back open. I am not sure why I didn't just use panel adhesive and flange the mating edges of the panels.

So here's the hack: can I cut the weld back open in the middle of the door, and adhere some sheet metal to the backside of the open seam (inside the door) like a backing plate with panel adhesive to bond the two, fill the open seam on the outside of the skin with panel adhesive, and then continue on as normal?
 
Pictures might help.
It would be great if metal responded like calculating alkalinity in water, but there are too many variables once you involve thermal expansion, structural constraint, etc.
Sorry for the lack of clarity or help
 
It will ghost in the sun. Don't know if that is or isn't acceptable to you.

If you decide to try and weld another patch, I'll try to describe one method. I'm assuming you are using a MIG.

Fit the patch up fairly tight. Leave approximately one thickness of metal gap. Then tack it with the MIG in one spot. Move to another spot (away from the first) tack. Do this until you have tack welds fairly evenly spaced out across the seam. Then grind the welds down with a die grinder and weld grinding wheel. Don't worry about getting them perfectly flat just close will do for the time being. Then start another series of tack/spot welds in between each existing tack/spot. Don't do them side by side skip around. Then grind again. Continue spot/tacking skipping around then grinding till you have connected all the tacks into one continuous weld seam. If you do it this way, shrinkage is minimal and can be easily filled. Adjust your welder so that when you tack it's hot enough to get full penetration. Don't ever weld more than a spot/tack. If you are running stitches even if they are short stitches, that will warp something like you are working on
 
CJ Pony Parts and LMC sells a 22" tall door skin if you wanted to cut it higher up and try again.
If I was tired of working on it I'd buy a new door and be done with it, but I don't see them offered anywhere that I've looked so far.
 
It will ghost in the sun. Don't know if that is or isn't acceptable to you.

If you decide to try and weld another patch, I'll try to describe one method. I'm assuming you are using a MIG.

Fit the patch up fairly tight. Leave approximately one thickness of metal gap. Then tack it with the MIG in one spot. Move to another spot (away from the first) tack. Do this until you have tack welds fairly evenly spaced out across the seam. Then grind the welds down with a die grinder and weld grinding wheel. Don't worry about getting them perfectly flat just close will do for the time being. Then start another series of tack/spot welds in between each existing tack/spot. Don't do them side by side skip around. Then grind again. Continue spot/tacking skipping around then grinding till you have connected all the tacks into one continuous weld seam. If you do it this way, shrinkage is minimal and can be easily filled. Adjust your welder so that when you tack it's hot enough to get full penetration. Don't ever weld more than a spot/tack. If you are running stitches even if they are short stitches, that will warp something like you are working on
This is exactly how I buttweld. Sometimes I will even do some planishing on the welds before doing the next one to give just a little stretch.

Are you saying I will get ghosting along the seam even after my filler work?
 
CJ Pony Parts and LMC sells a 22" tall door skin if you wanted to cut it higher up and try again.
If I was tired of working on it I'd buy a new door and be done with it, but I don't see them offered anywhere that I've looked so far.
I actually did go to a junkyard last week to try to find a door, but all the doors out there are shot. This door is mint except for where it got gashed open which is why this is a shame.

Getting a taller skin might be the ticket too if my hack is too hack. But I just don’t see how I can be a good hack if I don’t do good hacks.
 
it is oil canning because it shrunk. there are many YouTube videos on this. tacking is not the answer. working the metal is.
metalman can explain it better.
 
Planishing is a lot easier if welded with a torch, or TIG, because the metal remains softer. But on a big flat area it’s tough anyway. If working close to a body line, it can help stabilize the repair area. Shine is right, you have too much shrinkage.
 
a mig welder is not your friend. i learned to weld with gas and coat hangers. mama grounded me for a week. metal works so much easier than brittle mig.
 
I bought myself a Dagger Tools torch setup to give fusion welding panels a try. I also bought some filler rod. One of my customers is a welding instructor. He’s coming by next week to see if he can school me. Stay tuned to the classifieds to see if I offer it up… :D

TIG welding is a no go for a guy also known as Mr Magoo… :D

Don
 
i have a henrod torch. too lazy to use it now days.
i watched the guy welding beer cans with it. never got that good with it but it will do some amazing stuff.
 
Last edited:
This is exactly how I buttweld. Sometimes I will even do some planishing on the welds before doing the next one to give just a little stretch.

Are you saying I will get ghosting along the seam even after my filler work?
Yes.
it is oil canning because it shrunk. there are many YouTube videos on this. tacking is not the answer. working the metal is.
metalman can explain it better.
If you are having to weld with a MIG then the tack method usually works. Of course if you could work/stretch the metal that is what you want to do, but it aint happening with a MIG. Or at least not very much. Or it cracks.
 
So I've been working on full restoration of grandpa's 1970 F250 for my uncle. He's paying materials, I'm providing a labor of love. But I'm getting pretty tired of it. It's been a complete frame off.

So I replaced a combine-inflicted injury in the lower fourth of the door skin with a lower skin patch, it's about 8" high or so, maybe 16" long, curls around the back edge and bottom edge and butt welds where it mates up to the existing skin on two sides.

There is no structural reinforcement in the door shell for the skin whatsoever, it's just the crown of the skin that holds it in place. Owing to that, it warped horribly when I tried to weld it. I completely cut the weld back open. Stitched it again, spacing the welds out, giving them literally minutes to cool, it still warped badly. Now the metal of the door skin above the seam is badly oil canned but it's just a huge ripple in the middle of the weld. So I ground the proud weld down both inside and outside and get it as thin as I could and then tried to stretch with hammer on dolly to relax the surrounding metal. But that's not doing much.

The only way I'm going to get this relaxed again is to cut the seam back open. I am not sure why I didn't just use panel adhesive and flange the mating edges of the panels.

So here's the hack: can I cut the weld back open in the middle of the door, and adhere some sheet metal to the backside of the open seam (inside the door) like a backing plate with panel adhesive to bond the two, fill the open seam on the outside of the skin with panel adhesive, and then continue on as normal?

Welcome to the world of problems associated with welding lighter gauge carbon steel sheet. My similar experience was about 44 years ago. And I made an ugly mess out of a decklid and not one but two hoods on for an old Ford Falcon. Then, I did a lower skin replacement and ruined a 64 Chevy PU door. Even managed to twist the whole door slightly so it was a problem to seal with the weatherstripping after I reassembled it to the truck--even with all the adjustments.

Yep--ruining a panel or two or three with welding and unbalanced expansion/contraction/heat dissipation on it is a good experience. It just comes with the territory. Too many people believe close you eyes rote doing equates to skilled success and it is connect the dots and post it on some kind of video. The real skill and learning comes only from failing until you don't and then you figuring it out for yourself how it works and what you can get away with and what you cannot. But the sorry part is for many people--they never get there. I wish when I was starting out I would have got an old hood or door or decklid no one care about and used that to figure things out instead of my good pieces. Too many people think welding is a couple of 6" pieces of sheet steel on fire bricks to set their machine settings and making an unrestrained sample joint. I should have taken a saber saw and cut out a 12" circle or worse a square and rewelded it back in the middle on a junk hood or door and learned to take out the panel's structural parts out too to gain access and solve my problems. Now I know how to do a lot of this and what is apt to lead me in the right direction rather than away from it. Learning which way the metal crystals are oriented in your panel can help. The part should be the same orientation. Any ridge lines or forming are transverse to the rolling direction of the steel sheet customarily. That's why you see a hood fold up in a head -on collision the way that it does--the steels' crystals act as beams in the sheet running side to side. The forming lines stamped in are front to aft usually. Carbon steel's mechanical properties differ often 9% or so with crystal direction and more in the thickness direction. Sometimes--you can exploit that to your benefit.

In short--you have warping, "oil canning" panel twisting etc. not because of weld shrinkage but because of an imbalance of residual stresses remaining from uneven heating, cooling and shrinkage with the weld joint. You ended up with unbalanced residual tension and compression forces left in the panel and hence movement from flat in an attempt to relieve itself. When you cut it--it will. One piece might even try to overlap the other. When people talk about planishing welds or stretching them--they are also creating tension somewhere in the panel if the panel is not free to move such as in the case of a door skin resistance welded to the door itself along the skin's folded edge perimeter. You need to create a balance of forces left over after everything is done. Since more heat was put in on the side welding was done from--you would really like the same weld deposit on the backside for balance. Sometimes you have to use your oxy-acetylene torch and heat spots on the patch or existing door skin to do this. How big and how much is the skill. Or put a button MIG deposit and grind off later after it cools. I tend to do this now. May need to a balanced series of them to achieve this goal and on the other side of the panel......................and in areas you might not think of first.

Think about leaving your patch free where it attaches to the door and removing some spot welds attaching the existing skin to the door slightly beyond your new work addition patch . "Work from fixed to free" in sequencing weld deposits or overlapping spots and "balance welding with the symmetry of the part" when you can. When one weld deposit is cooling and thus contracting--try to balance that with the next weld deposit's cycle of expanding than then contracting to balance things and repeat this pattern.

The term "admixture" refers to the percentage of the molten weld puddle contributed by the base metal and that of the filler metal. Generally you want to avoid melting more of the base metal than more of the filler metal and with the least amount of heat into the joint. Short-arc MIG is the ideal process for such carbon steel sheet metal with 0.023--0.035" wire. Gapping about the diameter of the wire to avoid over melting of the excess parent metal. Oxy-fuel, TIG are less desirable in the heat input end of things with joules of energy expended into the weld/heat affected zone/base metal-- but no problem for many skilled and seasoned users. You just have to plan a bit different for it. I never tack such sheet metal work today in the weld joint--I use bridge bars across the pieces with just one tack on the bridge bar to the pieces on one side and everything free around the perimeter as much as possible . Then you can crack it off after weaking it with a grinding wheel.
 
just thinking out loud here, and i know it could lead to rust issues later, but could you add a piece on the back side to help stiffen things up?
seems like any thing, a body crease even seems to help. i know most door skins are thinner than the rest of the body, i have not tried a door skin patch yet.
also i have some wheel arch patches here, after market. they are no where near as thick as the original bed side........i bet they will be a pain.
 
Welcome to the world of problems associated with welding lighter gauge carbon steel sheet. My similar experience was about 44 years ago. And I made an ugly mess out of a decklid and not one but two hoods on for an old Ford Falcon. Then, I did a lower skin replacement and ruined a 64 Chevy PU door. Even managed to twist the whole door slightly so it was a problem to seal with the weatherstripping after I reassembled it to the truck--even with all the adjustments.

Yep--ruining a panel or two or three with welding and unbalanced expansion/contraction/heat dissipation on it is a good experience. It just comes with the territory. Too many people believe close you eyes rote doing equates to skilled success and it is connect the dots and post it on some kind of video. The real skill and learning comes only from failing until you don't and then you figuring it out for yourself how it works and what you can get away with and what you cannot. But the sorry part is for many people--they never get there. I wish when I was starting out I would have got an old hood or door or decklid no one care about and used that to figure things out instead of my good pieces. Too many people think welding is a couple of 6" pieces of sheet steel on fire bricks to set their machine settings and making an unrestrained sample joint. I should have taken a saber saw and cut out a 12" circle or worse a square and rewelded it back in the middle on a junk hood or door and learned to take out the panel's structural parts out too to gain access and solve my problems. Now I know how to do a lot of this and what is apt to lead me in the right direction rather than away from it. Learning which way the metal crystals are oriented in your panel can help. The part should be the same orientation. Any ridge lines or forming are transverse to the rolling direction of the steel sheet customarily. That's why you see a hood fold up in a head -on collision the way that it does--the steels' crystals act as beams in the sheet running side to side. The forming lines stamped in are front to aft usually. Carbon steel's mechanical properties differ often 9% or so with crystal direction and more in the thickness direction. Sometimes--you can exploit that to your benefit.

In short--you have warping, "oil canning" panel twisting etc. not because of weld shrinkage but because of an imbalance of residual stresses remaining from uneven heating, cooling and shrinkage with the weld joint. You ended up with unbalanced residual tension and compression forces left in the panel and hence movement from flat in an attempt to relieve itself. When you cut it--it will. One piece might even try to overlap the other. When people talk about planishing welds or stretching them--they are also creating tension somewhere in the panel if the panel is not free to move such as in the case of a door skin resistance welded to the door itself along the skin's folded edge perimeter. You need to create a balance of forces left over after everything is done. Since more heat was put in on the side welding was done from--you would really like the same weld deposit on the backside for balance. Sometimes you have to use your oxy-acetylene torch and heat spots on the patch or existing door skin to do this. How big and how much is the skill. Or put a button MIG deposit and grind off later after it cools. I tend to do this now. May need to a balanced series of them to achieve this goal and on the other side of the panel......................and in areas you might not think of first.

Think about leaving your patch free where it attaches to the door and removing some spot welds attaching the existing skin to the door slightly beyond your new work addition patch . "Work from fixed to free" in sequencing weld deposits or overlapping spots and "balance welding with the symmetry of the part" when you can. When one weld deposit is cooling and thus contracting--try to balance that with the next weld deposit's cycle of expanding than then contracting to balance things and repeat this pattern.

The term "admixture" refers to the percentage of the molten weld puddle contributed by the base metal and that of the filler metal. Generally you want to avoid melting more of the base metal than more of the filler metal and with the least amount of heat into the joint. Short-arc MIG is the ideal process for such carbon steel sheet metal with 0.023--0.035" wire. Gapping about the diameter of the wire to avoid over melting of the excess parent metal. Oxy-fuel, TIG are less desirable in the heat input end of things with joules of energy expended into the weld/heat affected zone/base metal-- but no problem for many skilled and seasoned users. You just have to plan a bit different for it. I never tack such sheet metal work today in the weld joint--I use bridge bars across the pieces with just one tack on the bridge bar to the pieces on one side and everything free around the perimeter as much as possible . Then you can crack it off after weaking it with a grinding wheel.
This isn’t my first rodeo with this which is why I’m surprised it blew up so badly. And is also why I typically try to avoid putting a weld right through a wide open panel like this.
 
I bought myself a Dagger Tools torch setup to give fusion welding panels a try. I also bought some filler rod. One of my customers is a welding instructor. He’s coming by next week to see if he can school me. Stay tuned to the classifieds to see if I offer it up… :D

TIG welding is a no go for a guy also known as Mr Magoo… :D

Don
When you are ready to start welding, call Craig at Dagger and ask him about adjusting your torch.
 
DAT points out… the best chance at success comes from several attempts. I know from experience that some refer to as failure.
It comes down to procedure and experience.
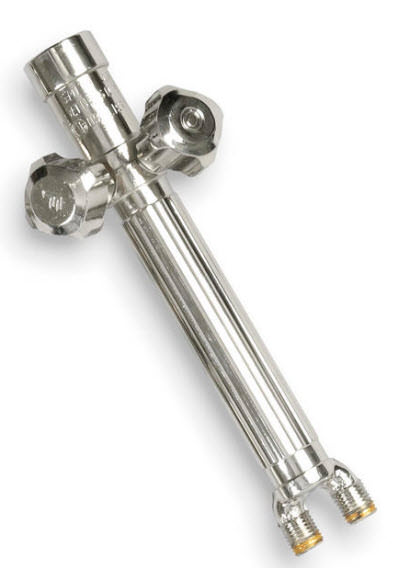
I would like to see the pic just for reference.
 
This is my favorite torch, well this and the Smiths AW1A. Both are really light and feel good in your hand. The Meco with the ultralight hose feels no heavier than a feather. Maybe not a feather but it is light.:) Meco has enough tips and handles that you can weld 1/4" or thicker steel or aluminum. As does the Smiths. Years ago I bought a DHC-2000 (Henrob) pistol grip torch as I heard a lot of talk about how good it was. While the torch comes complete with tips and cutting accesories I find it awkward and heavy. It does cut nice though. It is very expensive and if I had to do it again I would not have bought it.

Meco

Smith(s) AW1A (airline) torch


Personally I prefer a TIG for steel as you have more control over the heat and the welds planish just as nice as with O/A. With AL sheet, using the torch gives really awesome results once you master the learning curve. Kent White (TM Technologies) has 3 great videos on how to weld AL sheet with gas.

MIG welds are hard because of the carbon content of the shielding gas. The weld gets carburized to some extent when using a MIG.

@Lizer I'm surprised that you had excessive warping seeing you were using the method I described above. I will say that every panel is different and some steel and panels seem to walk more than others. My guess is that where the joint is is the absolute worst place to actually weld on that panel. IDK. Doing it the way I described you should be able to weld it with a minimum of warpage/shrinkage but IDK. Did a 70 Chevy once where it went crazy when I was trying to patch a spot. Same spot same model truck (different truck() a couple of years later it welded near perfect.

Can you get a large patch and weld it in a higher crown area? When you are trying to get the job done it's probably not practical fro you to try and learn a whole new skill set. If you could get in a higher crown area or near a body line that would help when trying to do it with the MIG. My other thought is that if you can fasten a copper backing plate with either the comercial ones available or something you make, then you could do the tack method and it would pull enough heat out that it should not warp much at all.

You aren't blowing compressed air on the welds after you do a spot are you? That will make it shrink even more.
 
Back
Top