You are using an out of date browser. It may not display this or other websites correctly.
You should upgrade or use an alternative browser.
You should upgrade or use an alternative browser.
I'm contemplating a hack and have been too afraid to even ask
- Thread starter Lizer
- Start date
MJM
Promoted Users
Ya that is why I haven’t bought one. But it’s an interesting tool for sure!
I tried looking for a price to no avail. What's it worth to me......maybe $200 dollars.
dhutton01
Backyard Hack
$700 on ebay. Gotta pay to play!I tried looking for a price to no avail. What's it worth to me......maybe $200 dollars.
dhutton01
Backyard Hack
I use a profile gauge. A real time saver. You can get Chinesium ones on eBay.I tried to find Lizer a video on how to make a Profile Template. To my surprise there was none to be found. Just guessing maybe it's simple enough task to do a video oh how to make one is not high on peoples list to make. I do like Roberts method of using aluminum flat stock over construction paper or poster board. In my mind the aluminum would give it the truest reading.
MJM
Promoted Users
$700 on ebay. Gotta pay to play!
I'll just ask to borrow yours. Hurry up and buy one
")
MJM
Promoted Users
I use a profile gauge. A real time saver. You can get Chinesium ones on eBay.
Yes, very handy. I have a few of those. I'm assuming MP&C would like lizer to have a profile template that extends from the upper door body line to the bottom of the door. That way he can see just how much or how far the patch panel and existing door skin needs work, and where to start working it from.
dhutton01
Backyard Hack
I have one that is 20 inches. I’ve never needed anything longer for the backyard hacking I do. That and a flexible steel yard stick.Yes, very handy. I have a few of those. I'm assuming MP&C would like lizer to have a profile template that extends from the upper door body line to the bottom of the door. That way he can see just how much or how far the patch panel and existing door skin needs work, and where to start working it from.
MJM
Promoted Users
beer carton templates when all else fails.
I bet you have plenty of those beer carton templates too, lol
MJM
Promoted Users
I have one that is 20 inches. I’ve never needed anything longer for the backyard hacking I do. That and a flexible steel yard stick.
Hhhmmm I'll have to look on ebay. I didn't know I could get a 20" one.
MP&C
Member
I just got back from a metalshaping workshop a couple weeks ago, they had one of the Ox planishing hammers for us to use/try out. One of the fellas had a project he was working on with similar weld distortion results that Lizer is showing with his. As most of us left to go to dinner one evening, he decided to use the ox on his project and took what needed only minor touch ups to a nice warped up mess. They are like any other metalshaping tool, used correctly they will perform beautifully and save you lots of time. For someone yet to experience a learning curve, it made short work of making the problems worse. It’s part of the reason I like teaching people to weld, planish, and grind in that order. Any deviation is easily seen using profile templates, you can planish the individual weld tacks until the panels shape is restored, and then work on the next. Everything is nice and slow so you can see what’s happening and react to the little happenings instead of a great big one at the end. He did get his project straightened out with the help of one of the more experienced coach builders that was attending. But just like any piece of metalshaping equipment, they can make the job easier and faster or make scraps faster. Understanding what the metal is doing prior to jumping in feet first with the faster methods is highly recommended!!
Last edited:
dhutton01
Backyard Hack
I wouldn’t use it to build a nuclear reactor but for rough work it’s adequate.Hhhmmm I'll have to look on ebay. I didn't know I could get a 20" one.

5/10/15/20 Inch Profile Gauge duplicate Ruler Contour Duplicator for Measurement | eBay
1x Irregular Shape Duplicator Gauge. Trying to duplicate profiles and contours on your woodworking or auto body projects?. Work with less hassle with the Master Outline Gauge! Material: Made from tough and durable ABS plastic, lightweight, sturdy and well built.
www.ebay.com
I also have some smaller steel ones including a vintage steel one that is pretty cool.
Last edited:
For templates--1/16" thick non-corrugated cardboard or a left over piece of picture framing matting. Two flat carpenter's pencils stacked on top of one another --one with a nice line edge cut with my utility knife on top--the other just a convenient spacer to slide over the work. That's enough to get some lines to cut with the utility knife. When you are happy--spray contact cement on and glue to 1/4" hardboard or 0.032" aluminum and bandsaw to shape for something you might want to save.
Lizer
Mad Scientist
@MP&C when I was planishing I was using a fairly flat hammer face and doing it from the top.
There is plenty of access to inside the door shell but not a lot of swing room as you might guess.
The skin patch I use does go all the way across. So I still have the remaining part I never used. Before trying an entire new skin, maybe I should just try replacing the skin all the way along the bottom? It would remove that corner, and then there wouldn’t be a mismatch of the skin profile and the original door profile along the very bottom of the skin.
MP&C
Member
@MP&C when I was planishing I was using a fairly flat hammer face and doing it from the top.
The added benefit of planishing before grinding, you are stretching the weld and nothing else, so a more effective stretch. With grinding first and then planishing you have a fairly flat panel, a flat hammer and a flat-ish dolly? So the stretch is less effective. For what you presently have in front of you, I would attempt some planishing using a crowned body hammer, such as the face on the one I shortened. The more crowned face will help to push things outward for a more effective stretch.
There is plenty of access to inside the door shell but not a lot of swing room as you might guess.
A shortened crowned hammer would do wonders. Even with limited swing potential, most hammer work is better accomplished using accuracy instead of heft. For the troubling low spots (inward wave) I would use my crowned short hammer to stretch and bump outward.
The skin patch I use does go all the way across. So I still have the remaining part I never used. Before trying an entire new skin, maybe I should just try replacing the skin all the way along the bottom? It would remove that corner, and then there wouldn’t be a mismatch of the skin profile and the original door profile along the very bottom of the skin.
At this point using the other half of the patch will add another vertical weld and another corner adjacent to the last one with a pucker for likely more of the same. I would attempt planishing what you have with a crowned body hammer if you have one, and see how the weld area responds.
Chris_Hamilton
Trying to be the best me, I can be
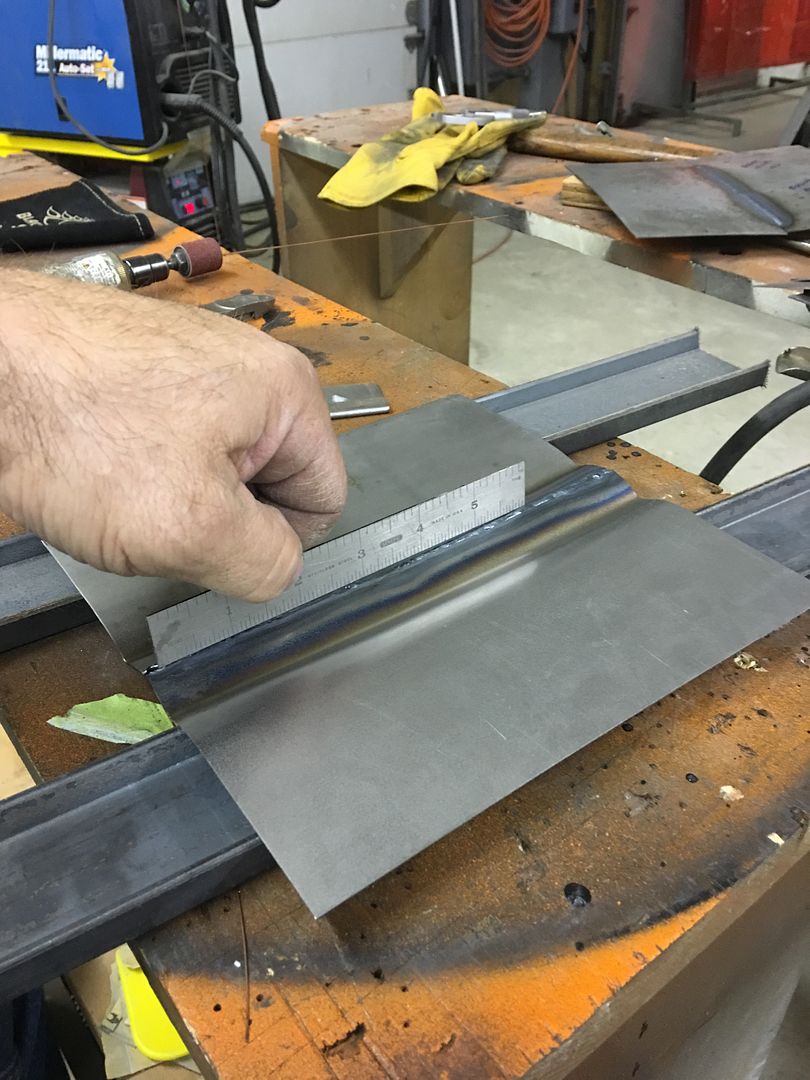
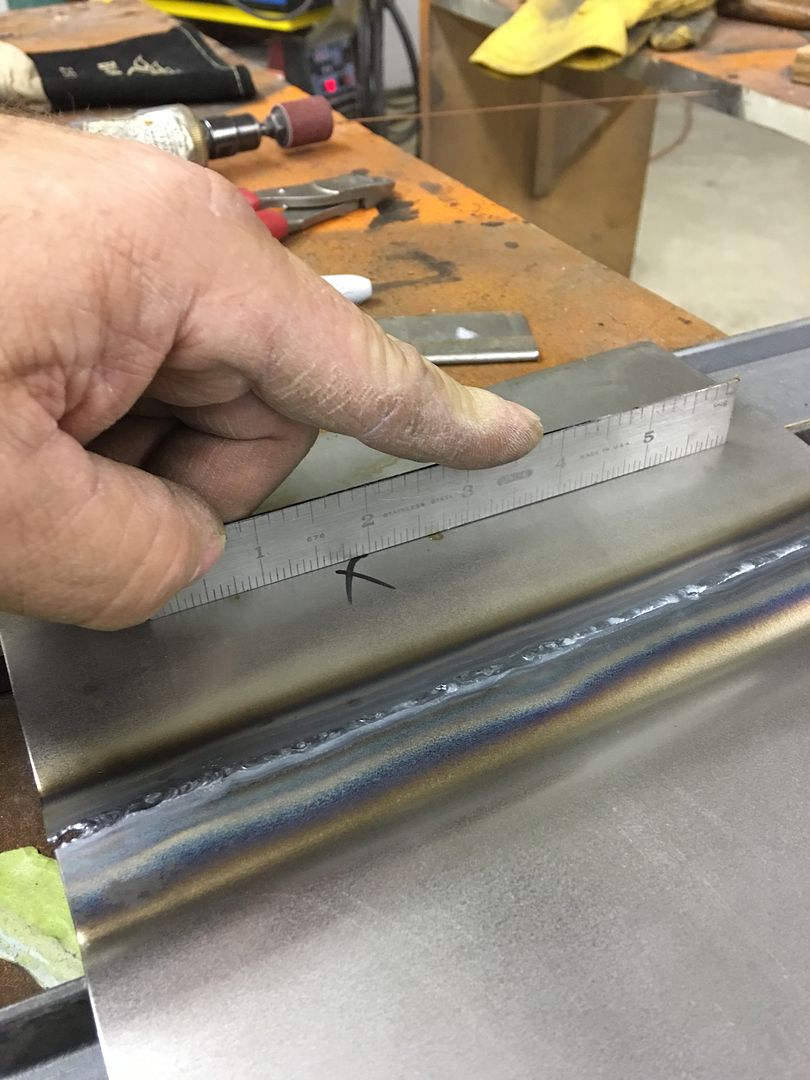
Dang Robert. You sacrificed a BF618? Those are terrific hammers. And they are out of production. Nothing else available at the time?Your local box store should sell some aluminum strips 1/8 x 1". They will make a good straightedge, and if the panel has a slight amount of crown, a shrinker or stretcher set would modify it to match exactly. Absent a shrinker/stretcher set, some strategic hammering on a steel table will provide any stretch needed to add crown to the template.
If the opposite door is still unscathed by farm implements, that would be the ideal place to match the template to. Hindsight and all that, this would have helped tremendously in reading the panel when planishing the individual weld tacks while they are easier to "manipulate".
The damage in the corner is expected, the compounding shrinking effects in the corner make this a guaranteed result. The larger radius in the corner helps to eliminate/minimize this effect. The other option would be a straight weld across the entire door (entire new bottom) to eliminate corners in your patches.
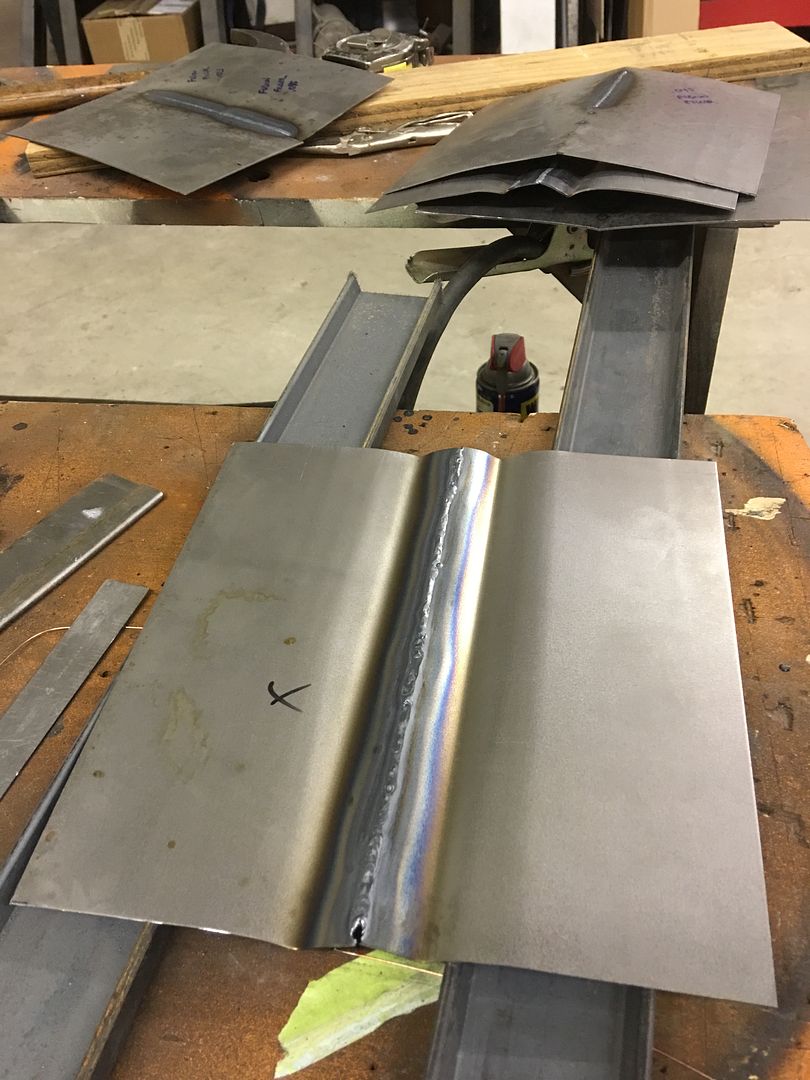
The patch has the benefit of the body crease in the vicinity, so it is less prone to the ugly effects of shrinking. These show a sample done with the weld seam between two creases to show how they control the distortion. Also pay close attention to the sample in the top left of the first picture. The straight, flat panel warps all over with nothing to hold things in check. Same as the middle of a door.
Practice is a hell of a tool. Perhaps a new skin is your final option, but you still have planishing that can correct that. What kind of access does the back side have? Were you using flat hammer on outside, dolly on inside? Sometimes the panel doesn't go the way we want it to and it helps to strike it with the hammer from the low side (inward bend of the wave) to better persuade it outward. Since most panels have an outward crown, this means that a hammer used inside the door would need to be crowned as well, to eliminate any coining, and would also need to be short as you can get, for more swing room. Sometimes necessity dictates making your own tools when they don't exist.. This Snap on hammer was modified twice to get it as short as possible, and notice the final version has a slight angle to allow more finger room.
View attachment 27184
View attachment 27185
View attachment 27186
This hammer has come in handy on many occasions.....
MJM
Promoted Users
Dang Robert. You sacrificed a BF618? Those are terrific hammers. And they are out of production. Nothing else available at the time?
Have you seen Roberts body hammer collection? He has more hammers than all the dents combined in the world.