You are using an out of date browser. It may not display this or other websites correctly.
You should upgrade or use an alternative browser.
You should upgrade or use an alternative browser.
1941 chrysler coupe build
- Thread starter 123pugsy
- Start date
Chris_Hamilton
Trying to be the best me, I can be
Pugs, you are doing great work on this car. Thanks for sharing the build.
123pugsy
Member
Another round of filler and blocking topped off with some more epoxy.
Couldn't take anymore and since my Christmas holiday was upon me, I just left her at that. Can do some more skimming at the final body work stage. I'm still on metal. Only did this Bondo to see if the metal was gonna be OK.

The roof sticks out further than the window frame panel below, so I had no choice but to do a little sculpting.


Couldn't take anymore and since my Christmas holiday was upon me, I just left her at that. Can do some more skimming at the final body work stage. I'm still on metal. Only did this Bondo to see if the metal was gonna be OK.
The roof sticks out further than the window frame panel below, so I had no choice but to do a little sculpting.
123pugsy
Member
On to the doors. Relaxing time using the furniture stripper to remove the paint. Don't know why I love doing this. Maybe just the anticipation of what lies beneath is exciting.
Both doors, a few dings and both have the swelling at bottom edge fold over flaps.


They look pretty good, no?


Both doors, a few dings and both have the swelling at bottom edge fold over flaps.
They look pretty good, no?
123pugsy
Member
Got the zip wheel out to take a look.

I keep some brake formed angles under my bench. Hot dang if the two pieces together weren't the exact height I needed. Never happened before in the history of Pugsy's Garage.
A little shrinking and stretching here and there.......


Of course the celebration didn't last long after the welding which changed the shape drastically.

Copious amounts of heat applied at the exact precise spots for the exact precise amount of time were applied. OK, most of that was BS, I just heated here and there til they came back to shape.


I keep some brake formed angles under my bench. Hot dang if the two pieces together weren't the exact height I needed. Never happened before in the history of Pugsy's Garage.
A little shrinking and stretching here and there.......
Of course the celebration didn't last long after the welding which changed the shape drastically.
Copious amounts of heat applied at the exact precise spots for the exact precise amount of time were applied. OK, most of that was BS, I just heated here and there til they came back to shape.
123pugsy
Member
I put the bottom channels to the side as I need to repair the skin before installing them. But while it's on the bench upside down, why not check out the power window motor installation. Seemed more interesting after being bored for so long on that roof project.
Window requires deleting the expletive vent. I was gonna get a bent glass but the radius would be too large. For the bottom, I will make a tall glass channel from 1/8" stainless that will be strong enough to hold the two pieces required to form the one piece window from flopping around and breaking the silicone joint. The seam will also have 1/2" x 1/2" mirror polished stainless trims over it which will be UV bonded to the glass. One inside and one outside. I'm hoping that will stick everything together with no issues down the road.
Simulated glass from 1/8" steel in place.

Worm's eye view:

Lots of metal cut away for the motor install. Angles tacked around the opening to stiffen it up.


Window requires deleting the expletive vent. I was gonna get a bent glass but the radius would be too large. For the bottom, I will make a tall glass channel from 1/8" stainless that will be strong enough to hold the two pieces required to form the one piece window from flopping around and breaking the silicone joint. The seam will also have 1/2" x 1/2" mirror polished stainless trims over it which will be UV bonded to the glass. One inside and one outside. I'm hoping that will stick everything together with no issues down the road.
Simulated glass from 1/8" steel in place.
Worm's eye view:
Lots of metal cut away for the motor install. Angles tacked around the opening to stiffen it up.
Could you please provide the details on the furniture stripper you use and the procedure that follows. i.e. how'd you get the paint odd and to the bare steel? DA or the like?On to the doors. Relaxing time using the furniture stripper to remove the paint. Don't know why I love doing this. Maybe just the anticipation of what lies beneath is exciting.
Both doors, a few dings and both have the swelling at bottom edge fold over flaps.
View attachment 19016
View attachment 19017
View attachment 19018
View attachment 19019
View attachment 19020
They look pretty good, no?
View attachment 19021
View attachment 19022
View attachment 19023
Thanks for the reply!
123pugsy
Member
Could you please provide the details on the furniture stripper you use and the procedure that follows. i.e. how'd you get the paint odd and to the bare steel? DA or the like?
Thanks for the reply!
I use any furniture stripper, they all work the same. Rubber gloves required. Grab an old brush and the key is to lay it on thick. A thin coat does nothing. Wait until it bubbles and then scrape off with a putty knife. May have to repeat the applications couple/few times. Do not allow stripper to dry as the paint then just re-dries again. If you hit some paint that doesn't bubble/wrinkle up, all bets are off. Grind or 3M paint stripper wheel.
After scraping most, wipe access off and DA sand with grit of your choice. Coarse is faster.
Here's my back window frame with the bubbled up paint.
Look carefully at the second pic. On the cart I'm working on, you can see some thick spillage and some brush marks thru some spillage. When you apply it, you want it laying on the paint just like the thick puddles on my cart, not like the places with the brush strokes thru it.
metalman
Oldtimer
I agree with your comments about the stripper, put it on thick and don't fuss with it. I used to use "Zip-Strip" but it's not the same anymore.
I found a stripper (furniture grade) at the local hardware that worked a little better called "Dad's Easy Spray".
What helped big time is that the gallon stripper comes with a small pump spray bottle. Using the pump bottle you can put on a thick even coat without thin spots that brushing is prone to. Sometimes I cover it with the thin plastic sheet left over from car covering. Wads of it go in the trash anyway. The plastic sheet isn't affected by the stripper and it keeps the solvents from drying too fast.
123pugsy
Member
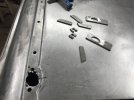
Chrysler door handles are non existent in the aftermarket so I had to pick something similar. I found 48 - 52 Ford pickup handles to be OK for the replacements. However, I didn't stop to think about if the body line was wide enough for the handles....D'OH!....of course not.


Attachments
123pugsy
Member
Tacked the striker bolt plate in place so I could size the door edges. Back edge lined up perfectly and all the way up and over. The front edge was so close that I ground right thru the folded flap.
A good way to clean up in there is a bonus from this. Then I thought that a guy could planish if able to pick the skin up. Rather than edge welding, where planishing is impossible, I made an angle piece to fit the front edge to go along with the whole bottom edge and about a foot of the back lower edge.


A good way to clean up in there is a bonus from this. Then I thought that a guy could planish if able to pick the skin up. Rather than edge welding, where planishing is impossible, I made an angle piece to fit the front edge to go along with the whole bottom edge and about a foot of the back lower edge.