A100 Twins

Jim did you replace the hinge mounts? im gonna have to repair the door hinge mount on a cab for my next project. if i ever get to it.
im thinking i may be able to drive it back down, tack and put a reinforcement patch on the back side. maybe.
 
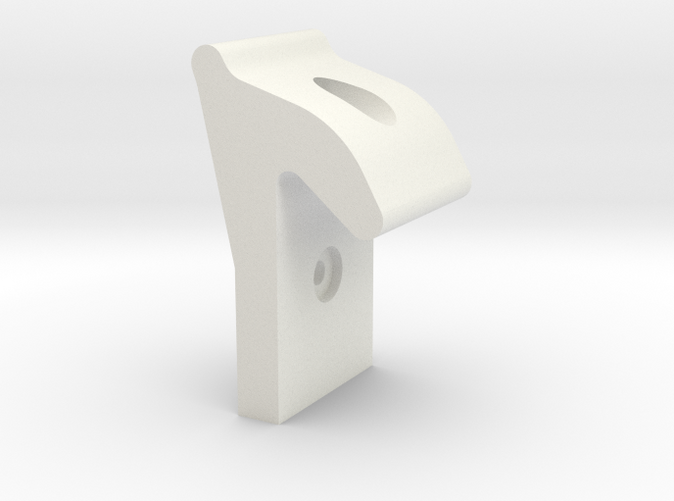
My headlight adjusters came in from Shapeways. Yep they are the same as a 1966 A-Body and fit perfectly. Make sure you run the tap in and out a dozen times and the screw in and out a dozen times to make sure the plastic is fully cut and the screws won’t bind but other than that took longer to pick up the tools and do the job. You can get these on my ShapeWay store. I don’t mark them up at all. The cost is what the unit cost is.


IMG_6734.jpeg
IMG_6735.jpeg
IMG_6736.jpeg
IMG_6737.jpeg
IMG_6738.jpeg
IMG_6739.jpeg
IMG_6740.jpeg
IMG_6741.jpeg
IMG_6742.jpeg
IMG_6743.jpeg
 
My headlight adjusters came in from Shapeways. Yep they are the same as a 1966 A-Body and fit perfectly. Make sure you run the tap in and out a dozen times and the screw in and out a dozen times to make sure the plastic is fully cut and the screws won’t bind but other than that took longer to pick up the tools and do the job. You can get these on my ShapeWay store. I don’t mark them up at all. The cost is what the unit cost is.

Great idea running a tap through them Jim.
Another idea would be to put a hose clamp on each one for support from the outside such as the one below, then again running a tap through.
 
Jim, any idea on the later square adjuster? all the non oem i ever tried were junk plastic. i have been using the square license plate inserts, they arent ideal but they work. i wont even get started on the crappy jobber store wiper linkage bushings.
 
Since I can’t actually make any progress on anything else, and I have parts strung all over the place, waiting for a multitude of things to put them back together why not take something else apart! And of course it’s a search to find parts for these too. Called the@ normal Mopar steering gear places and nobody deals with truck boxes. I looked up part numbers for seals and I can’t find any new old stock so I have some from Grainger coming that are based on measurements. Fingers crossed. Everything else is cleaned up painted and restored. Just need the seals. Also need to either get a U-bolt clamp for an automatic or cut, the one off that has the three speed bracket. Anybody have the correct U-bolt clamp they part with? Interesting these boxes appear to be painted oxide red from the factory.


IMG_6754.jpeg
IMG_6755.jpeg
IMG_6756.jpeg
IMG_6757.jpeg
IMG_6758.jpeg
IMG_6759.jpeg
IMG_6760.jpeg
IMG_6761.jpeg
IMG_6762.jpeg
IMG_6763.jpeg
 
Question for you guys, what is the property of the EFI that make you want to put that investment into the vehicle. The last 3 have been carbs that I tuned with an AFR meter and I personally find them to be no better or worse than the EFI other than heat soaking like I mentioned.
good question. I went with my LT swap because i wanted to test my skill set. ive always been a carb guy. this is my first EFI swap. the wiring was very intimidating at first. but after doing it, its actually pretty simple. you still need gas air and spark. but now theres just a bunch of sensors that tell the computer what to do. the knock sensors are literally like having a midget under the hood adjusting the distributor as you are driving. id probably never buy another crate 350 carb setup. but if i bought a car that was running fine with a carb, i wouldnt yank it out for no reason. i guess im halfway transitioned lol
 
It’s never a good day to blast and paint but as good as any today. Pretty much everything is in epoxy primer so it’ll never rust again! Maybe a few extra little parts here and there but 99% of the parts are done and ready for assembly.


IMG_6766.jpeg
IMG_6767.jpeg
IMG_6768.jpeg
IMG_6769.jpeg
IMG_6770.jpeg
IMG_6771.jpeg
IMG_6772.jpeg
IMG_6773.jpeg
 
PC-7 is the only stuff that I’ve seen work and last for fixing steering wheels. Open up all the cracks you can find with a disk and go in angles to try to undercut so you can get sort of a dovetail lock of the epoxy once you spread it in the groove. That epoxy is like tar so once you get it sort of done, you can wet a rubber glove with acetone and smooth it out as the final step. There’s a ton of working time, so no reason to hurry with this stuff.


IMG_6774.jpeg
IMG_6775.jpeg
IMG_6776.jpeg
IMG_6777.jpeg
IMG_6778.jpeg
IMG_6779.jpeg
IMG_6780.jpeg
 
In drag racing, a carburetor will produce a tad more hp than EFI, however......what you can't do with a carburetor is fine tune fuel and timing thru out the rpms. This is what makes EFI the safer choice for drag racing. The only way to know if your leaning out a carburated engine is by reading spark plugs but, it still doesn't tell you at what rpms it's happening, EFI will.

I'm still old-school and run a carb on my mopars. Some guys tune with a computer, others tune by reading spark plugs and a box of jets :)
 
PC-7 is the only stuff that I’ve seen work and last for fixing steering wheels. Open up all the cracks you can find with a disk and go in angles to try to undercut so you can get sort of a dovetail lock of the epoxy once you spread it in the groove. That epoxy is like tar so once you get it sort of done, you can wet a rubber glove with acetone and smooth it out as the final step. There’s a ton of working time, so no reason to hurry with this stuff.


View attachment 30252View attachment 30253View attachment 30254View attachment 30255View attachment 30256View attachment 30257View attachment 30258
iv done that on old semi steering wheels Jim. it does work well. i couldnt match the color on one so used a nice leather wrap after.
 
I'm looking forward to seeing this steering wheel restoration. The Dart steering wheel was a work of art.
 
My Granger seals fit like a glove. The shims for preload seem to be black = 0.010, red = 0.005” and white = 0.0025. I experimented with removing the red and it bound up too much and with the white gone it had just a bit more resistance to turn than with the bolts loose. I assumed that wear likely had loosened it up some and I could take 0.0025” out of seems to have played out that way. Used grey sealer instead of the gasket on the side cover. I made sure that there was plenty of play with the sector gear adjustment screw to compensate the 0.030” gasket and there was. All adjusted. If you get the preloads too tight it will be hard to keep it in the road as the gear will “stick” then “pop” to the next location which likely will be more than you need and it will be a constant left to right with the wheel trying to find the perfect spot (which you can’t achieve with the steps as it pops to a new position). Those who adjusted motorcycle heads will likely know exactly how this all should feel. Just need to cut the clamp half off the 3 speed selector mechanism (not needed for the 727), wait for the grey sealer to cure overnight and fill it with 90 weight.


IMG_6794.jpeg
IMG_6795.jpeg
IMG_6796.jpeg
IMG_6799.jpeg
IMG_6798.jpeg
IMG_6797.jpeg
IMG_6802.jpeg
IMG_6801.jpeg
IMG_6800.jpeg
 
And tomorrow’s project all laid out. I have already inspected the thermal nichrome wire in the gauges and they look really good on this. You can tell when they’re not looking so good and the ceramic coating on the wire is crumbling and falling off these look great. I will be taking the gas gauge apart to clip out the bi metallic regulators so I can install, the RTE microcontroller regulator with current limit to protect things just in case one of those thermal wires does short out in the future.


IMG_6803.jpeg
IMG_6804.jpeg
IMG_6805.jpeg
 
This is the perfect opportunity to have the first A100 150mph speedometer :)
 
Last edited:
PC-7 is the only stuff that I’ve seen work and last for fixing steering wheels. Open up all the cracks you can find with a disk and go in angles to try to undercut so you can get sort of a dovetail lock of the epoxy once you spread it in the groove. That epoxy is like tar so once you get it sort of done, you can wet a rubber glove with acetone and smooth it out as the final step. There’s a ton of working time, so no reason to hurry with this stuff.


View attachment 30252View attachment 30253View attachment 30254View attachment 30255View attachment 30256View attachment 30257View attachment 30258
I've used jb weld 2 part epoxy to repair steering wheels with good results. It's a putty you knead together, seems the same process you did
 
Back
Top