You are using an out of date browser. It may not display this or other websites correctly.
You should upgrade or use an alternative browser.
You should upgrade or use an alternative browser.
1960 IMPALA CONVERTIBLE BIG PROJECT
- Thread starter RosharonRooster
- Start date
RosharonRooster
Promoted Users
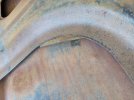
Have just been blocking away on this thing. It's been filler and epoxy only so far. Yesterday me and the boy got the doors down to bare metal. One was original paint, the other had one very old repaint. No patch needed finally. I'm excited
Attachments
RosharonRooster
Promoted Users
RosharonRooster
Promoted Users
'68 Coronet R/T
Oldtimer
Yes, it is the finer details of restoring a car that really chew up the time.
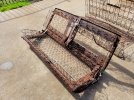
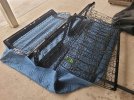
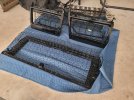
I too am glad my car came with seats, the price of replacements if you can find them is staggering to say the least.
I too am glad my car came with seats, the price of replacements if you can find them is staggering to say the least.
RosharonRooster
Promoted Users
Yessir. If people don't know what they are buying and the good parts have been picked off the car. The cost can double quickly. 58 impala front seats, 59/60 convertible back seats. 58 convertible trunks...stuff that isn't available in catalog.Yes, it is the finer details of restoring a car that really chew up the time.
I too am glad my car came with seats, the price of replacements if you can find them is staggering to say the least.
RosharonRooster
Promoted Users
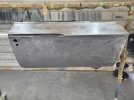
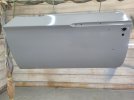
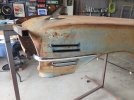
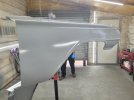
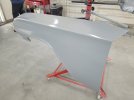
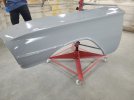
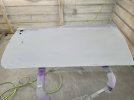
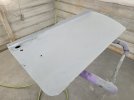
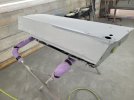
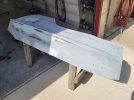
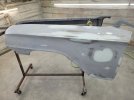
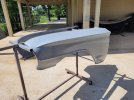
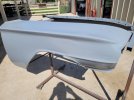
Been plugging away. Last weekend we got the doors stripped. This weekend we got the fenders. The driver side door is in exceptional shape. Passenger door going to need some body work. One fender is from a biscayne so I had to drill trim holes. Both fenders came from Arizona and were original paint. One of them had some pitting so I used some ospho. I'm always hesitant to use the ospho because of what I read on here. My process was. Strip the paint using the blue condition discs.....some 80 grit roloc discs. Then ospho and scrub it with a red pad....repeat that a couple times. Then rinse. Then soap and water......then 80 grit DA.... then cleaned them 3 times with water based wax and grease remover. Let them sit 45 mins in 85 degree. Then 3 coats of epoxy....here are the results
Attachments
-
 20230513_104412.jpg196.2 KB · Views: 87
 -
 20230513_104419.jpg174 KB · Views: 82
 -
 20230513_170639.jpg157.2 KB · Views: 69
 -
 20230513_170645.jpg144.1 KB · Views: 85
 -
 20230513_170655.jpg153 KB · Views: 78
 -
 20230513_190226.jpg126.1 KB · Views: 76
 -
 20230513_190238.jpg115.9 KB · Views: 80
 -
 20230513_190248.jpg117.5 KB · Views: 76
RosharonRooster
Promoted Users
When using the ospho I noticed it wants to turn the metal a orange tinge. Is that normal? It went away with 80 on the DA, it was also raining all day yesterday and extremely humid
1A Rock
Promoted Users
I believe the orange tinge may be from the iron in the rinse water.When using the ospho I noticed it wants to turn the metal a orange tinge. Is that normal? It went away with 80 on the DA, it was also raining all day yesterday and extremely humid
RosharonRooster
Promoted Users
Probably. We are on well water
RosharonRooster
Promoted Users
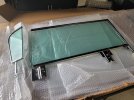
I also got my side glass in. I went with auto city classics. Everything looks great. My vent window assemblies will polish out nice, so I just got the vent glass, and weather strip kit, new door glass and quarter glass only. My quarter assemblies will polish out nice. The car came with a new windshield, so I ordered the rubber gasket for that. Still managed to spend 900 dollars on glass.....there isn't much left to buy for this car. I have 2 shelving units full of.boxes of parts.
Attachments
RosharonRooster
Promoted Users
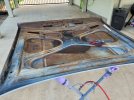
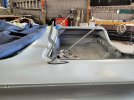
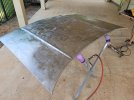
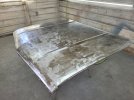
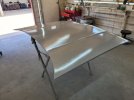
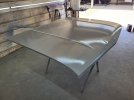
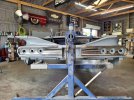
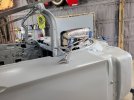
Hadn't updated in a while. Took 2 weekends off for other stuff in life. Looking to get the doors hung and trunk lid back on to see how the gaps look and proceed accordingly. Featherfill the whole thing at one time...before that I need to drill holes for moldings. I got the antennas drilled, and the long fin stainless mocked up. The long fin stainless is just really awkward to work with. It's atleast 8ft long and it's already restored "show quality"...I'll get the rest drilled tomorrow and plan to strip the hood Friday. It's the only piece of the puzzle that hasn't been stripped and body worked
Attachments
RosharonRooster
Promoted Users
RosharonRooster
Promoted Users
RosharonRooster
Promoted Users
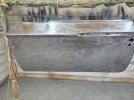
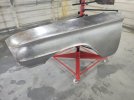
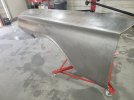
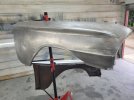
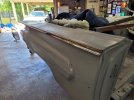
The fenders have been getting filler work. Driver side looking good. Passenger side needs a couple more hours. So far everything has been epoxy and filler only. Hadn't got to the highbuild yet. One man army on this paint job
Attachments
RosharonRooster
Promoted Users
I am keeping a spread sheet on time spent. And total man hours so far is 883. That's everything disassemble, floors and sheet metal, chassis, and now body work. I also include anytime spent making runs to hardware store or anything involving this car. Needless to say, I'm tired. I put in 2-4 hours a day after an 8 hr work day. Not running out of gas. But I'm ready for a vacation...really ready to see some color on this thing...not to mention it's only 100 degrees and 80% humidity lately..little warm
Last edited:
RosharonRooster
Promoted Users
RosharonRooster
Promoted Users
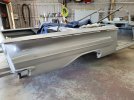
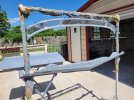
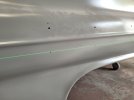
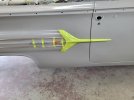
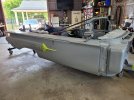
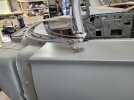
Yesterday was a big day for the 60. My wife helped me hang the doors...passenger side fought us . Driver side was pretty smooth. I wanted to see how the gaps and panel to panel looked. I'm going to do a little filler work down low but everything else I think looks good to me. I also put some stainless on and over the past week been drilling holes for moldings. Since the driver side quarter came off a belair there was no trim holes. Used a laser level to get everything done. Also drilled holes for my spotlights.....now that the doors are on....I can get the car in feather fill poly prime.
Attachments
RosharonRooster
Promoted Users

RosharonRooster
Promoted Users
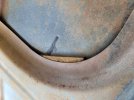
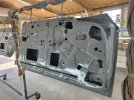
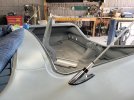
I thought this was note worthy..I've always jammed stir sticks in between panels to help with any oil canning...it's just the hackery I was taught and it costs nothing.....come to find out, looks like GM did the same thing in 1960. I dont feel as unprofessional now....